Best Workstation Computer for 3D Modeling and Rendering
The most interesting thing about looking for a Computer or Workstation for 3D Modeling and Rendering, is the fact that 3D Modeling and (CPU) Rendering are two very different use cases.
Both use the Hardware of a Computer in very different ways!
CPU Rendering
CPU Rendering in itself uses all cores of a CPU 100% of the time while rendering.
This means, when you go looking for a Workstation just for 3D Rendering Images and Videos, and also Video Editing for that matter, you would be looking for a Computer with a CPU that has as many cores as possible.
Even if these cores are somewhat clocked low.
Every Core will be assigned a so called “bucket” by the Render Engine and it will Render its Bucket until it is finished and gets a new bucket to render.
Perfect Multi-Core Usage.

3D Modeling
3D Modeling then again, is an active working process.
You (usually) sit in front of your computer and interact with your Computer and the 3D Software.
Actively using a Software makes the Software utilize the Hardware it is running on in entirely different ways.
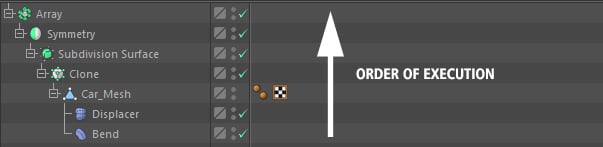
If I were to Model a Car for example, this Car would consist of Polygons that might have modifiers and Deformers applied to it, such as Mirroring, Cloning, Bending Objects and so on.
These kind of calculations though are mainly done by only a SINGLE CPU Core.
Why? Because a scene is built in a hierarchical Order, and a CPU has to step through this hierarchy one at a time.
It can’t skip or off-load hierarchy steps to other cores, because most of them are dependent on each other!
What does this mean?
It means quite frankly that having lots of CPU-Cores will do nothing towards speeding up your modeling, and does not usually make your Viewport faster.
Long explanation short:
For Modeling in itself and actively working in your 3D Scene, you would need to get a CPU that has the highest Clock possible, no matter if it only has a few Cores, as most of these Cores won’t be used for modeling.
Same is also valid for doing Animation on a Computer. A high-Clocking CPU will almost always outperform a high-Core-count CPU.
The more Cores and the higher the clock the better, right?
Now, the next logical train of thought would be to just get the fastest clocking CPU with lots of Cores.
Then we could work fast AND render fast, right?
Unfortunately, because of power consumption and heat limits, there usually is a proportional trade-off between CPU-cores and core-clock.
This means the more Cores the CPU has, the lower it will clock and vice versa.
The faster the Cores are clocked, the less cores there usually are on the CPU.
Many Cores need lots of Power and lots of Power produces lots of heat. CPUs have thermal regulations that need to be adhered to. The same applies to higher clocked cores that will be hotter than lower clocked cores.
This is quite a bummer, but it’s 2018 and the major CPU Manufacturers wouldn’t be all that major, if they hadn’t thought of improving this impracticability.
AMD and Intel, have thought of a nice way of compensating for some of these trade-offs.
Enter Turbo-Boost.
Turbo-Boost
Turbo-Boost is a feature that automatically overclocks Cores, when not all Cores are currently used.
So, say we are currently modeling and are only really using 1-2 Cores, the rest of the Cores are lying dormant.
What Turbo boost does now is overclock these 1-2 Cores as far as specified by the manufacturer and as long as the Power Consumption and Temperature stays withing the predefined limit.
As soon as these limits are reached, the Turbo-Boost clocks these two cores back down.
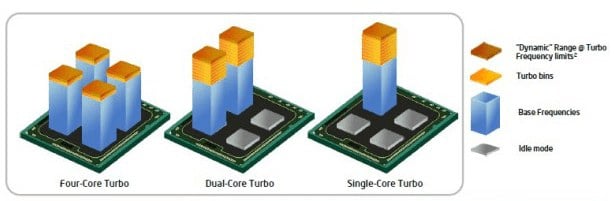
Image-Source: Intel
This way, to a certain degree, we can get CPUs with more Cores (and a low base-clock), that clock higher on limited cores, when needed and not all cores are being used.
CPU vs GPU Rendering
There are currently two popular methods of Rendering Images and Animations in 3D Software: CPU Rendering and GPU Rendering.
As you probably guessed, CPU Rendering utilizes the Processor for calculating the Image in all kinds of Render Engines, and GPU Rendering utilizes the Graphics Card.
There are some differences in GPU and CPU rendering that you might want to be aware of, before choosing a new Computer or Workstation for 3D Rendering and Modeling:
Almost every major 3D Software comes with an inbuilt CPU Render Engine nowadays.
Only recently have GPU Render Engines such as Octane, Redshift, V-RAY RT or FurryBall become mature enough to slowly but surely overtake CPU Render Engines in popularity.
In popularity, because GPU Render Engines are much faster in many cases and allow for extremely interactive preview Renderers.
This can improve and accelerate a 3D-Artists Workflow tenfold as you are able to iterate more often before finishing a project.
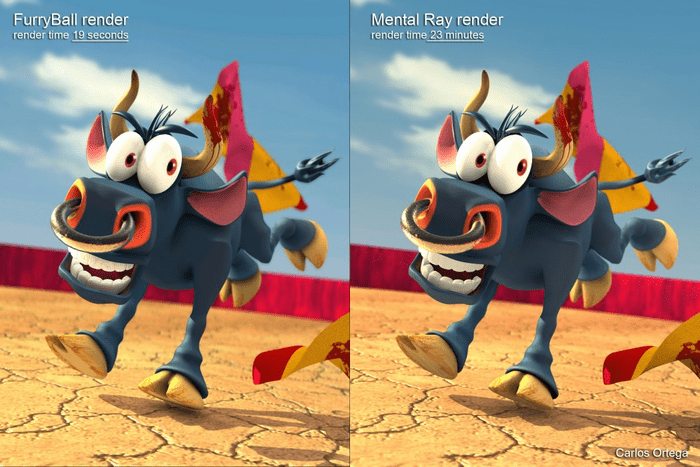
Image-Source: furryball.aaa-studio.eu
Usually, beginners are told to start with 3D Rendering on the CPU and later switch to (often) costly 3rd Party GPU Render Engines when they have learned enough to properly utilize them.
I think this is about to change.
Especially with Blenders in-built Cycles GPU Render Engine and Cinema 4Ds new ProRender GPU Render Engine, that are built into the Software packages itself and don’t rely on third party plugin installation.
But enough talk, lets take a look at what hardware you will need for the Best Computer or workstation for 3D Modeling and Rendering:
Best Computer Hardware for 3D Modeling and Rendering
Best Processor (CPU) for 3D Modeling and Rendering
For Active Work: Intel i7 8700K / 8086K
As mentioned above, you will have to make some decisions here depending on what you will want to use the Computer for the most.
Do you use it mainly to Model, Sculpt, Texture, Light, Animate and you spend much more time actively on it than rendering on it?
You will want to get a CPU that is clocked as high as possible!
Good choices here are:
- Intel i7 8700K, 6-Cores, Clocked at 3,7 GHz Base, 4,7 GHz TurboBoost
- Intel i7 8086K, 6-Cores, Clocked at 4 GHz Base, 5 GHz TurboBoost
- AMD Ryzen 2700X, 8-Cores, Clocked at 3,7 GHz Base, 4,3 GHz TurboBoost (Turbo Core)
Image-Source: AMD/Intel
A great benchmark for finding CPUs that are the snappiest is the Cinebench Single Core Test.
Take a look at this page with Cinebench Benchmarks and sort the Table by “Cinebench Single” to find the snappiest CPU that will let you actively work as fast as possible.
Intel has recently released a new Generation of i7 and i9 9xxx CPUs that have a slightly higher Cinebench Single Core Score than the 8700K, but I do not recommend them yet, as they are still too expensive for the extra performance they offer.
If money does not play a role for you though, the Intel i9 9900K might be an interesting pick.
If you are less a 3D Artist and consider yourself more in the realms of Graphic Design for doing lots of Texturing and Design work for your or others’ 3D Models, having a high-Core clock is one of the most important factors to keep an eye out for too.
For Render Work? AMD Threadripper!
Do you use this Workstation less to actively work on and more to Render out your Projects and spend more time on Rendering than on actually sitting in front of it?
You should consider going into a high core-count direction which are the best CPUs for Rendering (Or if you want a second Computer just for Rendering on).
Good choices here are:
- AMD Threadripper 1900X, 1920X, 1950X, 2950X, 2990WX – 8-32 Cores – Highly Recommended!
- Intel i9 7900X, 7920X, 7960X, 7980X – 10-18 Cores
If you are looking at using VRAY, as it is one of the most popular Render Engines out there, head on over to get an overview of the VRAY CPU Benchmarks Results here.
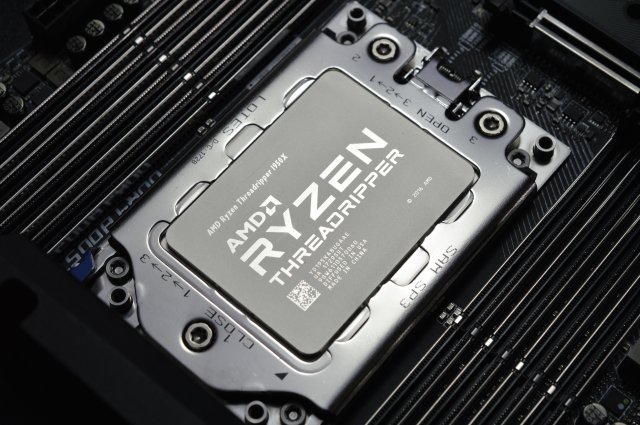
Image-Source: overclock.net
Best Graphics Card (GPU) for 3D Modeling and Rendering
Best GPU for GPU Rendering: GPU Rendering is getting more and more popular as we speak and will surely overtake CPU Rendering in the near Future.
Investing into a good GPU that lets you render on, or if you are already planning on extensively using GPU Rendering, is definitely a wise thing to do.
The most popular modern GPU Render Engines are Octane, Redshift, VRAY-RT and Cycles. The first two only support NVIDIA GPUs the latter additionally also support AMD (OpenCL) GPUs.
As I want to recommend GPUs that will work with any of the above Render Engines (CUDA Support) I will name some NVIDIA GPUs in order of Performance that will give you excellent GPU Rendering Speed:
- NVIDIA RTX 2080Ti
- NVIDIA RTX 2080
- NVIDIA GTX 1080Ti
- NVIDIA GTX 1080
- NVIDIA GTX 1070Ti
- NVIDIA GTX 1070
- NVIDIA GTX 1060
The list could go on, but you get the gist.
The higher the number, the faster and the more expensive they get.
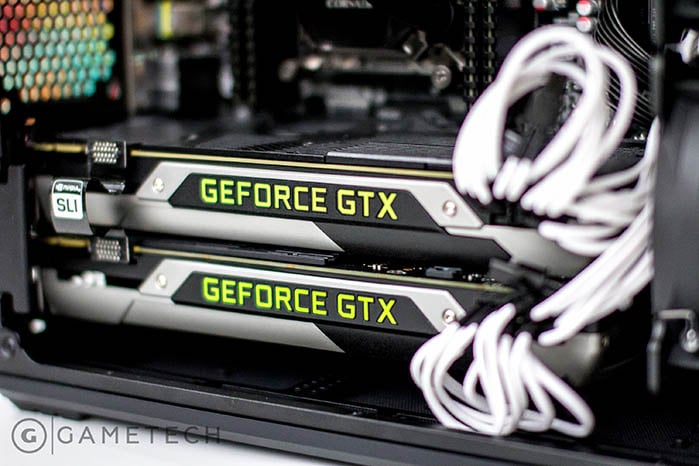
Image-Source: gamespot.com
Great GPU Benchmarks to also take a look at are VRAY-RT, Octane, and Redshift.
Best GPU for Viewport snappiness: As the Processor is usually the bottleneck in having a snappy Viewport, Graphics Cards don’t usually make that much of difference, if you buy good enough.
All of the above listed GPUs will usually perform roughly the same in Viewport snappiness.
This is because there are rarely features that the GPU is slower in computing than the CPU takes to update Meshes, Deformers and the like.
In other words: The GPU usually has to wait for the CPU to finish its tasks to continue working.
Of course, if you rely heavily on In-Viewport SSAO, Reflections, AO, Anti-Aliasing and the like, you might want to lean towards the top of the above GPU list if you value a snappy Viewport.
But for most, a high clocked-CPU will make a much larger difference.
A quick heads-up:
If you use only a few extremely high-poly RAW meshes, such as a CAD-Converted Car that turns out to have 40 Million Polygons, and you don’t have any modifiers on this mesh, then again, the GPU will probably be the bottleneck as your workstation only has to update the viewing angle of the Car and not the meshes underlying structure.
How much and what Type of RAM (Memory) do you need for 3D Modeling and Rendering?
As so often, this depends a bit on your use case.
If you work on models with extremely high polygon counts, you will want more RAM than if you usually only do lightweight 3D work with simpler scenes.
I recommend 32GB of RAM for most 3D Artists.
If you sculpt or work on high-poly meshes, use lots of large textures or have complex scenes with thousands of objects in them, you might want to go with 64GB of RAM.
16 GB of RAM can be enough for many starting out with 3D, but usually you outgrow 16GB quite fast.
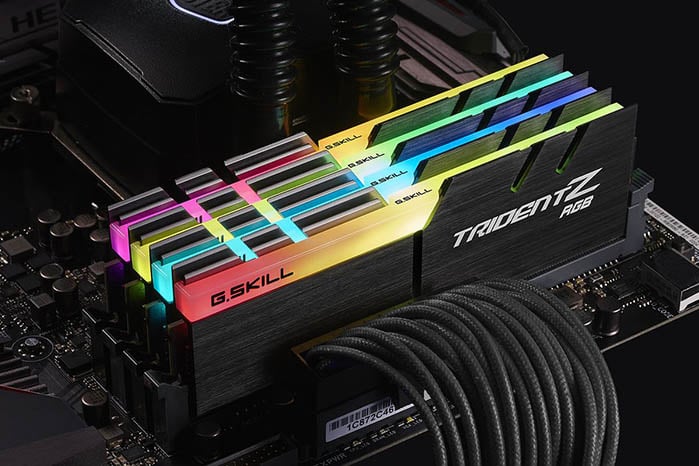
Image-Source: gskill
RAM speeds & timing can normally be ignored, as these don’t make much of a difference performance-wise.
Getting DDR4-4166 RAM won’t be noticeably faster than DDR4-2133 RAM.
If you do like to optimize your hardware as much as possible, the rule is usually: The lower the CL and higher the Clock Speed, the better. So a DDR4-3000 CL15 would be slightly faster than a DDR4-2800 CL16 for example.
A note on RAM Kits: It is usually advised to get the final amount of RAM in a single RAM Kit. RAM Kits (The RAM Modules that are packaged together) are pre-tested in the Factory, so you know they will work well together.
Although it is often said, that you can get some RAM and a year later add some more of the same kind, in rare cases these RAM Modules won’t work nicely together.
So if you are getting entirely new RAM for you PC, be sure to get, say 4x8GB in a KIT and not 2x8GB + 2x8GB in two seperate KITs.
Why should RAM in different KITs be different from each other?
Because there can be different Factories and Factory Lines, that use slightly different silicon. Or if the RAM Modules are manufactured in the year 2017 but another one in 2018, you can’t be sure the timings of the RAM will be stable and exactly the same across all Modules from different Factories and or Manufacturing Dates.
So best to get a KIT that was pre- tested.
Best Mainboard for 3D Modeling and Rendering
The motherboard or Mainboard is the Hub that connects all of your hardware components together.
It won’t impact performance all that much, but you should make sure it has the features and sockets you want. Some important things here to note are:
- The CPU Socket type: Different CPUs use different Sockets. Make sure the Mainboard fits your CPU Socket
- Some Mainboards/Chipsets have support for different amounts of RAM and RAM Slots
- Some Mainboards support more GPUs than others and offer more PCIE-Slots and Lanes to be used by GPUs
- If you wan’t to get an M.2 PCIE Drive make sure the Mainboard you get supports this type of Drive (The Mainboard Manual is your friend)
- There are different form factors of Mainboards. This is especially important if you get a custom PC Case, that might be smaller than usual
This all sounds very complicated and might be too much to handle for a first time builder.
Best Storage for 3D Modeling and Rendering
Now, the speed of the storage is responsible for a few things:
- Saving and loading your scene Files
- Storing and loading your textures, Assets, References
- Swapping to disk if RAM is Full
- Launching your Software
Loading your scenes fast, will require a fast disk.
If you have Autosave on, which saves your scene every few minutes (so you don’t lose any progress in case of a crash, highly recommended) you will also want as short of an interruption as possible.
Then again having a blazingly fast Disk doesn’t do much for you once your scene is already loaded into RAM.
I recommend to have at least a SATA SSD such as the Samsung 860 EVO for your OS and your Scene Files.
Consider a PCIE M.2 SSD such as the Samsung 970 EVO if you want even more Speed and can spare the extra cash.
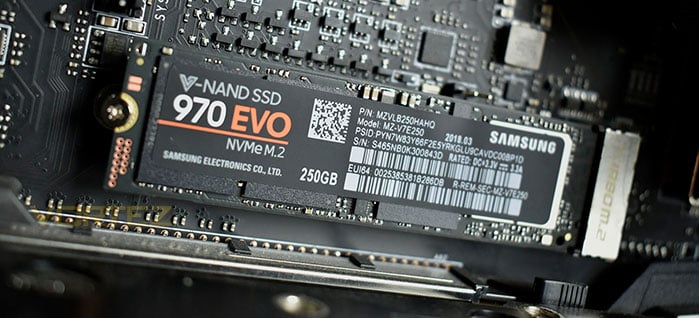
Fortunately, flash based SSDs have become quite cheap recently and the prices are continuing to drop.
Take a loot at the Price decrease of the Samsung 860 EVO 1TB over the last 6 Months:
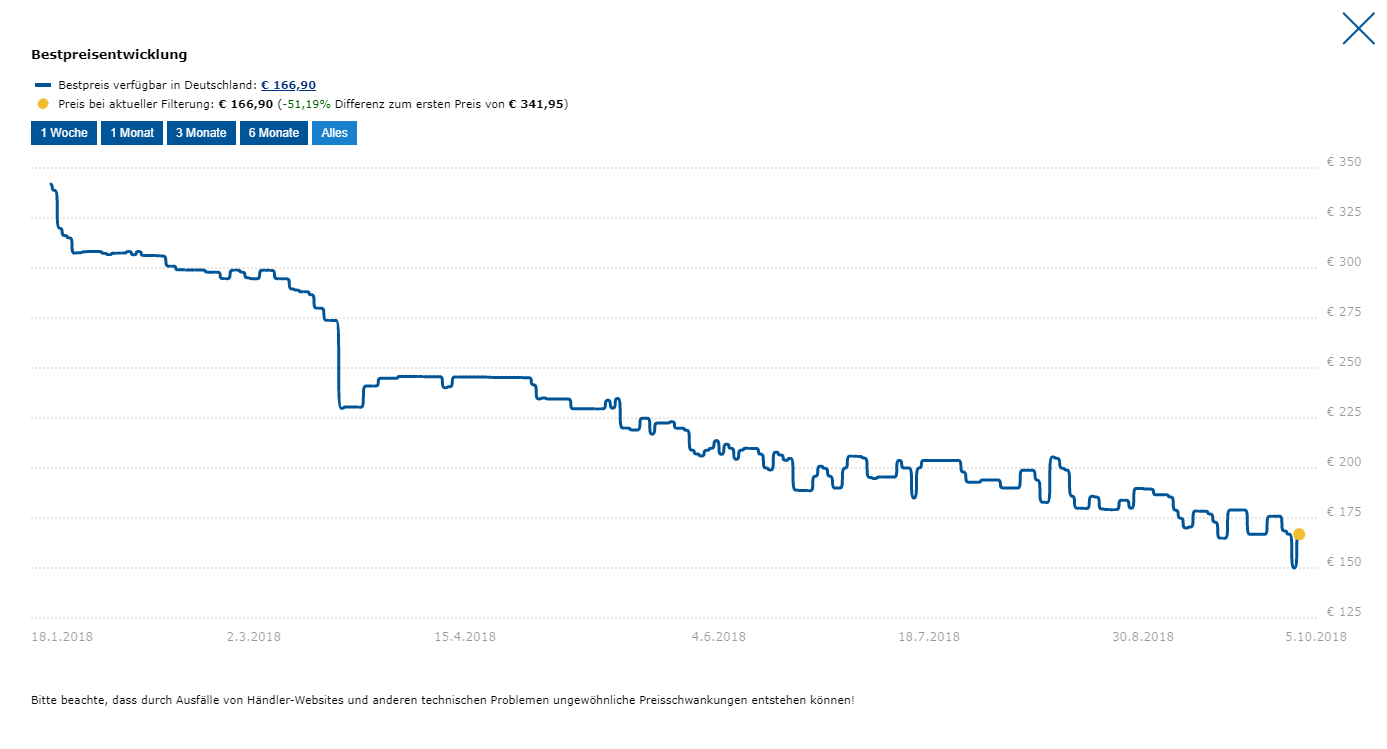
Image-Source: geizhals.de
It usually is a good Idea to get a larger HDD to be able to periodically backup your Data in case your main Discs brake down out of unforeseeable reasons. As they tend to do in the middle of the most important Project.
About PCIE-Lanes
This little section here is somewhat advanced (feel free to skip over it), but I am asked this often, so let me just put this here:
Question: If the i7 8700K, i7 9700K, i9 9900K CPUs only offer 16 PCIE-Lanes, how can you use NVME SSDs (that already need 4 pcie-lanes) or Sata Drives, if your GPU already uses up all of the 16 PCIE-Lanes to the CPU:
Answer: The CPU-GPU PCIE-Lane interconnect is 16 PCIE Lanes wide, the Chipset itself can create 24 additional PCIE Lanes if needed (on the Z370/Z390 Chipset), BUT the Chipset Lanes are connected to the CPU by a DMI Link is only 4 PCIE-Lanes wide (roughly 4GB/s).
So in an unlikely Scenario that you permanently copy huge Data (Like 50GB of Data) from one of your NVME SSDs to your other NVME SSD, this would be bottlenecked, if your NVME SSDs can read and write faster than 2 GB/s.
Talking about sequential read/write this is possible of course (like with the 970 EVO), but extremely rare. In an everyday use like in gaming, rendering and the like you won’t be read and writing sequentially all that much, but randomly and usually much smaller files.
Everything but the RAM and GPU are attached to those 24 Chipset PCIE Lanes that are attached via a 4 PCIE-Lanes wide Connect to the CPU. So LAN, USB and everything you plug into the motherboard otherwise, too.
The PCIE Lanes to the CPU from the Chipset are not used up or reserved as soon as you have a component on the mainboard that could use them.
It is like a tunnel on a highway that is always there and will only let traffic through, if it has to.
So you can attach up to 24 PCIE Lanes worth of components to the Chipset, such as SATA SSDs, HDDs, USB, Ethernet Cables, and they will use the Connect to the CPU only if needed.
If you use all components at maximum speed simultaneously though, then yes you would most certainly bottleneck. In this case you would have to turn towards the HEDT Platform (Like 2066 or TR4) and not mainstream (1151, AM4).
Best Monitor for 3D Modeling and Rendering
It is usually good to go with a Monitor that has a so called IPS Panel and not a TN Panel.
IPS Display Panels have better Color and Contrast display.
If you work on this Workstation a lot you will want to get a Non-Glare (a Matte) Monitor as hard reflections on your display would otherwise distract you a lot.
You will want to get at least a FullHD 1920×1080 Pixel Monitor, so it nicely fits all of your Software Palettes and Viewport.
You might want to consider even Higher-Resolution Monitors with 2560×1440 or even 4K (3840x2160Pixels) Resolution to be able to fit more of your footage, references, and Software Windows on the display.
Especially if you are working on 4K Advertising and Films or Hi-Res Images.
I have had great experience using Asus IPS Monitors such as the Asus PB 278QR, but you might prefer a different brand.
Best Power Supply (PSU) for 3D Modeling and Rendering
An expensive Power Supply won’t increase your performance, but it is wise to get a bit more than enough wattage.
You will usually want around 400 – 500 Watts for a regular Build and add +250Watts for any additional GPU you are planning to get.
Good PSU brands are Corsair, Seasonic and BeQuiet among others.
Build your own Computer!
The Best Computer for 3D Modeling and Rendering is a Workstation that is snappy and makes you spend less time on it.
It shouldn’t make you want to punch your monitor and should preferably costs less than an arm and a leg.
Building your own Workstations and Computers for 3D Modeling, Rendering and many other use-cases is something I myself enjoy tremendously.
If you don’t do it yourself yet, I am sure you will learn to love it.
Building your own Computer teaches you about the inner workings of the various hardware components, lets you gradually upgrade parts if needed and helps you find potential problems later on.
And the best of it all?
It is a lot cheaper than buying pre-configured Workstations and Computers and only takes an hour or two to assemble!
Apart from learning how to assemble a PC, if you want to learn about the inner workings of how a Computer actually works let me just drop this Book recommendation here, as it kind of blew my mind a few years ago when I picked it up.
Most of you have probably read it already, but those of you who haven’t: Prepare to be leveled up! 🙂
Anyway, you might know this already, but I can’t stress it enough. Assembling your own Computer is not difficult.
Especially nowadays, you more or less just plug different parts into each other, tighten some screws and the hardest part seems to be to add some thermal paste to the CPU. That’s pretty much it!
Here is a nice guide with step-by-step instructions that you can follow along:
Now, this was quite some theory. There is much more of course, but for now lets take a look at some actually functioning Builds.
Here are some Pre-Selected Builds in different Price Tiers:
Best Computer for 3D Modeling and Rendering, AMD at roughly ~700$
- CPU: AMD – Ryzen 5 1600 3.2GHz 6-Core Processor
- CPU-Cooler: Already included with CPU
- Motherboard: MSI – B350 PC MATE ATX AM4 Motherboard
- Memory: Corsair – Vengeance LPX 16GB (2 x 8GB) DDR4-2400 Memory
- Storage: Samsung – 860 Evo 500GB 2.5″ Solid State Drive
- GPU: MSI – GeForce GTX 1050 2GB Video Card
- Case: Deepcool – DUKASE WHV2 ATX Mid Tower Case
- Power Supply: Corsair – CX 500W 80+ Bronze Certified Semi-Modular ATX
Some Build notes:
If you are experienced enough to do a BIOS upgrade you should consider the AMD Ryzen 2600 that will work on this board with a BIOS upgrade. If you still want a second Generation Ryzen CPU but don’t want to flash your BIOS, go with a 400 Series Chipset that supports these already.
Consider upgrading to a Nvidia GTX 1060, if you can spare some more cash.
Best Computer for 3D Modeling and Rendering, AMD at roughly ~1500$
- CPU: AMD – Ryzen 7 2700X 3.7GHz 8-Core Processor
- CPU-Cooler: Already Included with CPU
- Motherboard: Asus – Prime X470-Pro ATX AM4 Motherboard
- Memory: Corsair – Vengeance LPX 32GB (2 x 16GB) DDR4-3000 Memory
- Storage: Samsung – 970 Evo 500GB M.2-2280 Solid State Drive
- GPU: Asus – GeForce GTX 1060 6GB 6GB Turbo Video Card
- Case: Fractal Design Define S – ATX Midi Tower
- Power Supply: Corsair – RMx 650W 80+ Gold Certified Fully-Modular ATX
Some Build notes:
This is a basic AMD build that you can build upon. The Case is professional looking, minimalistic and quiet. There is no room for Optical drives, you will need a different Case if you want to have DVD/CD Drives.
The AMD Ryzen 2700X is the fastest of the second Generation Ryzen CPUs with excellent Multi-Core and good Single Core performance. All AMD Ryzen CPUs usually come with included CPU coolers, so no extra Cooler needed here.
I added a Samsung 970 EVO M.2 NVMe Drive in this build that will give you extreme Storage Performance. The Asus Turbo Series GPUs are Blower-Style GPUs, meaning you can stack them on top of each other in Multi-GPU Builds, without loosing too much Cooling performance.
Best Computer for 3D Modeling and Rendering, Intel at roughly ~1500$
- CPU: Intel – Core i7-8700K 3.7GHz 6-Core Processor
- CPU-Cooler: be quiet! – Dark Rock 3 67.8 CFM Fluid Dynamic Bearing CPU Cooler
- Motherboard: Asus – Prime Z370-A ATX LGA1151 Motherboard
- Memory: Corsair – Vengeance LPX 32GB (2 x 16GB) DDR4-3000 Memory
- Storage: Samsung – 970 Evo 500GB M.2-2280 Solid State Drive
- GPU: Asus – GeForce GTX 1060 6GB 6GB Turbo Video Card
- Case: Fractal Design Define S – ATX Midi Tower
- Power Supply: Corsair – RMx 650W 80+ Gold Certified Fully-Modular ATX
Some Build notes: This is a basic build that you can build upon. The Case is professional looking, minimalistic and quiet. There is no room for Optical drives, you will need a different Case if you want to have DVD/CD Drives.
The Intel CPUs need additional CPU Coolers, so I added an excellent CPU Air Cooler from BeQuiet here. Air Coolers are usually quieter than AIO or Water Cooling solutions, as they only have one Fan. If you are planning on some more extreme overclocking, you might want to consider getting a different CPU cooling solution though.
Best Computer for CPU Rendering, AMD at roughly ~3100$
This is an excellent Build that leans towards CPU Rendering Performance and less towards 3D Modeling.
- CPU: AMD – Threadripper 2990WX 32-Core Processor
- CPU-Cooler: Noctua – NH-U12S TR4-SP3 55.0 CFM CPU Cooler
- Motherboard: Asus – PRIME X399-A EATX TR4 Motherboard
- Memory: Corsair – Vengeance LPX 64GB (4 x 16GB) DDR4-2400 Memory
- Storage: Samsung – 860 Evo 500GB 2.5″ Solid State Drive
- GPU: Asus – GeForce GTX 1060 6GB 6GB Turbo Video Card
- Case: Fractal Design Define R6 – Blackout ATX Tower
- Power Supply: Corsair – RMx 750W 80+ Gold Certified Fully-Modular ATX
Some notes on this build: As this build is focused on CPU Rendering, the other parts such as storage and GPU are proportionally low-end compared to the 32-Core CPU. This build has absolutely great CPU Rendering Performance.
64GB of Memory is lots of RAM and will be more than enough for almost all scenes but you can save some cash and downgrade to 32GB if needed.
Best Computer for GPU Rendering, AMD at roughly ~6800$
This is an excellent Build that will bring you the maximum GPU Rendering Performance (on a single Consumer Mainboard) combined with an excellent CPU for good Workstation performance. But it comes at a steep price.
- CPU: AMD – Threadripper 1900X 3.8GHz 8-Core Processor
- CPU-Cooler: Noctua – NH-U12S TR4-SP3 55.0 CFM CPU Cooler
- Motherboard: MSI – X399 GAMING PRO CARBON AC ATX TR4 Motherboard
- Memory: Corsair – Vengeance LPX 64GB (4 x 16GB) DDR4-2400 Memory
- Storage: Samsung – 860 Evo 500GB 2.5″ Solid State Drive
- GPU: 4x Asus – GeForce RTX 2080 Ti 11 GB Turbo Video Card
- Case: Corsair – Carbide Quiet 600Q ATX Full Tower Case
- Power Supply: Corsair – 1600W 80+ Titanium Certified Fully-Modular ATX
Some notes on this Build: The PCPartPicker list only supports 2 GPUs but I am going with 4 GPUs for this build.
Having 4 GPUs makes you need a Motherboard with 4 PCIE Slots that are spaced far enough from each other to allow for 4 dual-Slot GPUs. This is possible with the MSI X399 Gaming Pro Carbon AC Motherboard.
RTX 2080Tis are quite expensive ~1300$. If you can work with less performance but want save some good money, I’d recommend going with 4x RTX 2070 as these are only about 600$ a piece. You will only have 8GBs of VRAM on these, but the GPU rendering performance / price is much better.
The Case is a big one that has room for 8 single-slot (or 4 dual slot) Cards. The Power Supply should provide at least 1250W and I added some headroom here with the excellent 1600W Corsair Titanium Power Supply.
Threadripper CPUs are excellent for multi-GPU setups, as these CPUs have 64 PCIE-Lanes to drive all of those GPUs in 16x and 8x Mode.
All of these Build will of course need a Keyboard, Mouse, Monitor and Operating System to be complete, but I’ll let you figure those out on your own.
Custom PC-Builder
If you want to get the best parts within your budget you will most certainly love the Web-Base PC-Builder Tool that I have created.
After selecting the main purpose, that you will use the computer for and adjusting your budget, it creates the perfect PC with Parts recommendations that fits nicely within your budget.
Be sure to check it out and feel free to give me some feedback on it!

Best Laptop for 3D Modeling and Rendering
Just a quick reminder for anyone who would like to get a Laptop instead of a Desktop Computer or Workstation.
I have written an Article about what is important in a Laptop for Animation that you should definitely check out.
Lots of the specs from 3D Animation will be exactly the same for 3D Modeling, and for CPU Rendering in itself the Article Best CPU for Rendering will help you out.
It has a section on the best CPUs for Rendering in Laptops, so feel free to check that out!