How to create realistic reflections
Not all surfaces have the same reflective characteristics, and if you want your renders to look realistic then you’ll need to ensure that they reflect light properly. In this tutorial from 3D World, Pietro Chiovaro talks through how best to create realistic reflections in Blender.
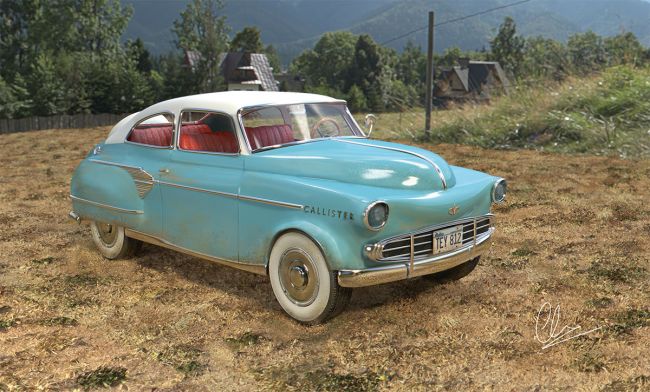
Looking at the render above, you’ll notice that not all the surfaces have the same reflective capacity; the rims of the car, as you can see, are more reflective than the paint or compared to the glass. This derives from the fact that each material has a different setting.
In Blender there are three shaders in particular that help us to add reflectivity to a material, these are Glossy, Anisotropic and Glass. These three shaders when combined with other shaders such as Diffuse or Transparent, allow us to add a certain level of reflection to each material we are creating – whether that’s for a wall, a table, a cup, an egg and so on.
Making the connection
Putting it into practice, if we want to create the paintwork of the car, we have to open the Node Editor panel, and add two shaders: Diffuse and Glossy. After that, we have to connect them – to do this, simply add the Mix Shader and subsequently connect them to the Material Output node.
Setting the node
Now we can begin to set the node, changing the values
of roughness and the color of the Diffuse and Glossy shaders. It’s important to note that in the Glossy shader, the lower the value of Roughness the greater the reflective capacity of the material will be.
Obviously this is a node basis; in fact, we can combine many shaders and connect the texture to give a more realistic effect to the material. In the end, we can highlight the reflective capacities of the materials, adding a Glare node in the Node Editor panel for compositing.
This might be interesting for you – newest 3D models on FlatPyramid.