How to create 3D models for Android game development using Blender

Being able to create your own 3D models is something that can come in handy for a wide range of reasons. Whether you want to create some attractive 3D art, design a product to get 3D printed, or even make animations and special effects.
Of course, 3D models also come in very handy for game developers, so if you’re an Android developer working in Unity, then this is a very useful skill to add to your bow. By learning to create 3D models, you’ll be able to bring your game world’s to life with far more detail and professional polish.
The good news is that there are some very powerful tools available that will let you get started completely for free. The bad news is that creating 3D models is a little more complicated than drawing in 2D.
Probably the best free tool for our purposes is Blender, so that is what we shall be using. You can download this from the website at Blender.org, or you can alternatively download it through Steam.
This guide will help you to get started with the software. There’s far too much to cover in a single post though, so consider this more of a ‘taster’ to put you on the right track. For non-developers meanwhile, think of this as a little ‘behind the scenes’ look at how the characters and settings in your favorite Android games are made!
Getting to Grips With the UI
When you first open Blender, you’ll be greeted with a largely blank screen with a grey cube in the center. This is a 3D model, albeit a very simple one, and technically you refer to a single object like this as a ‘mesh’.
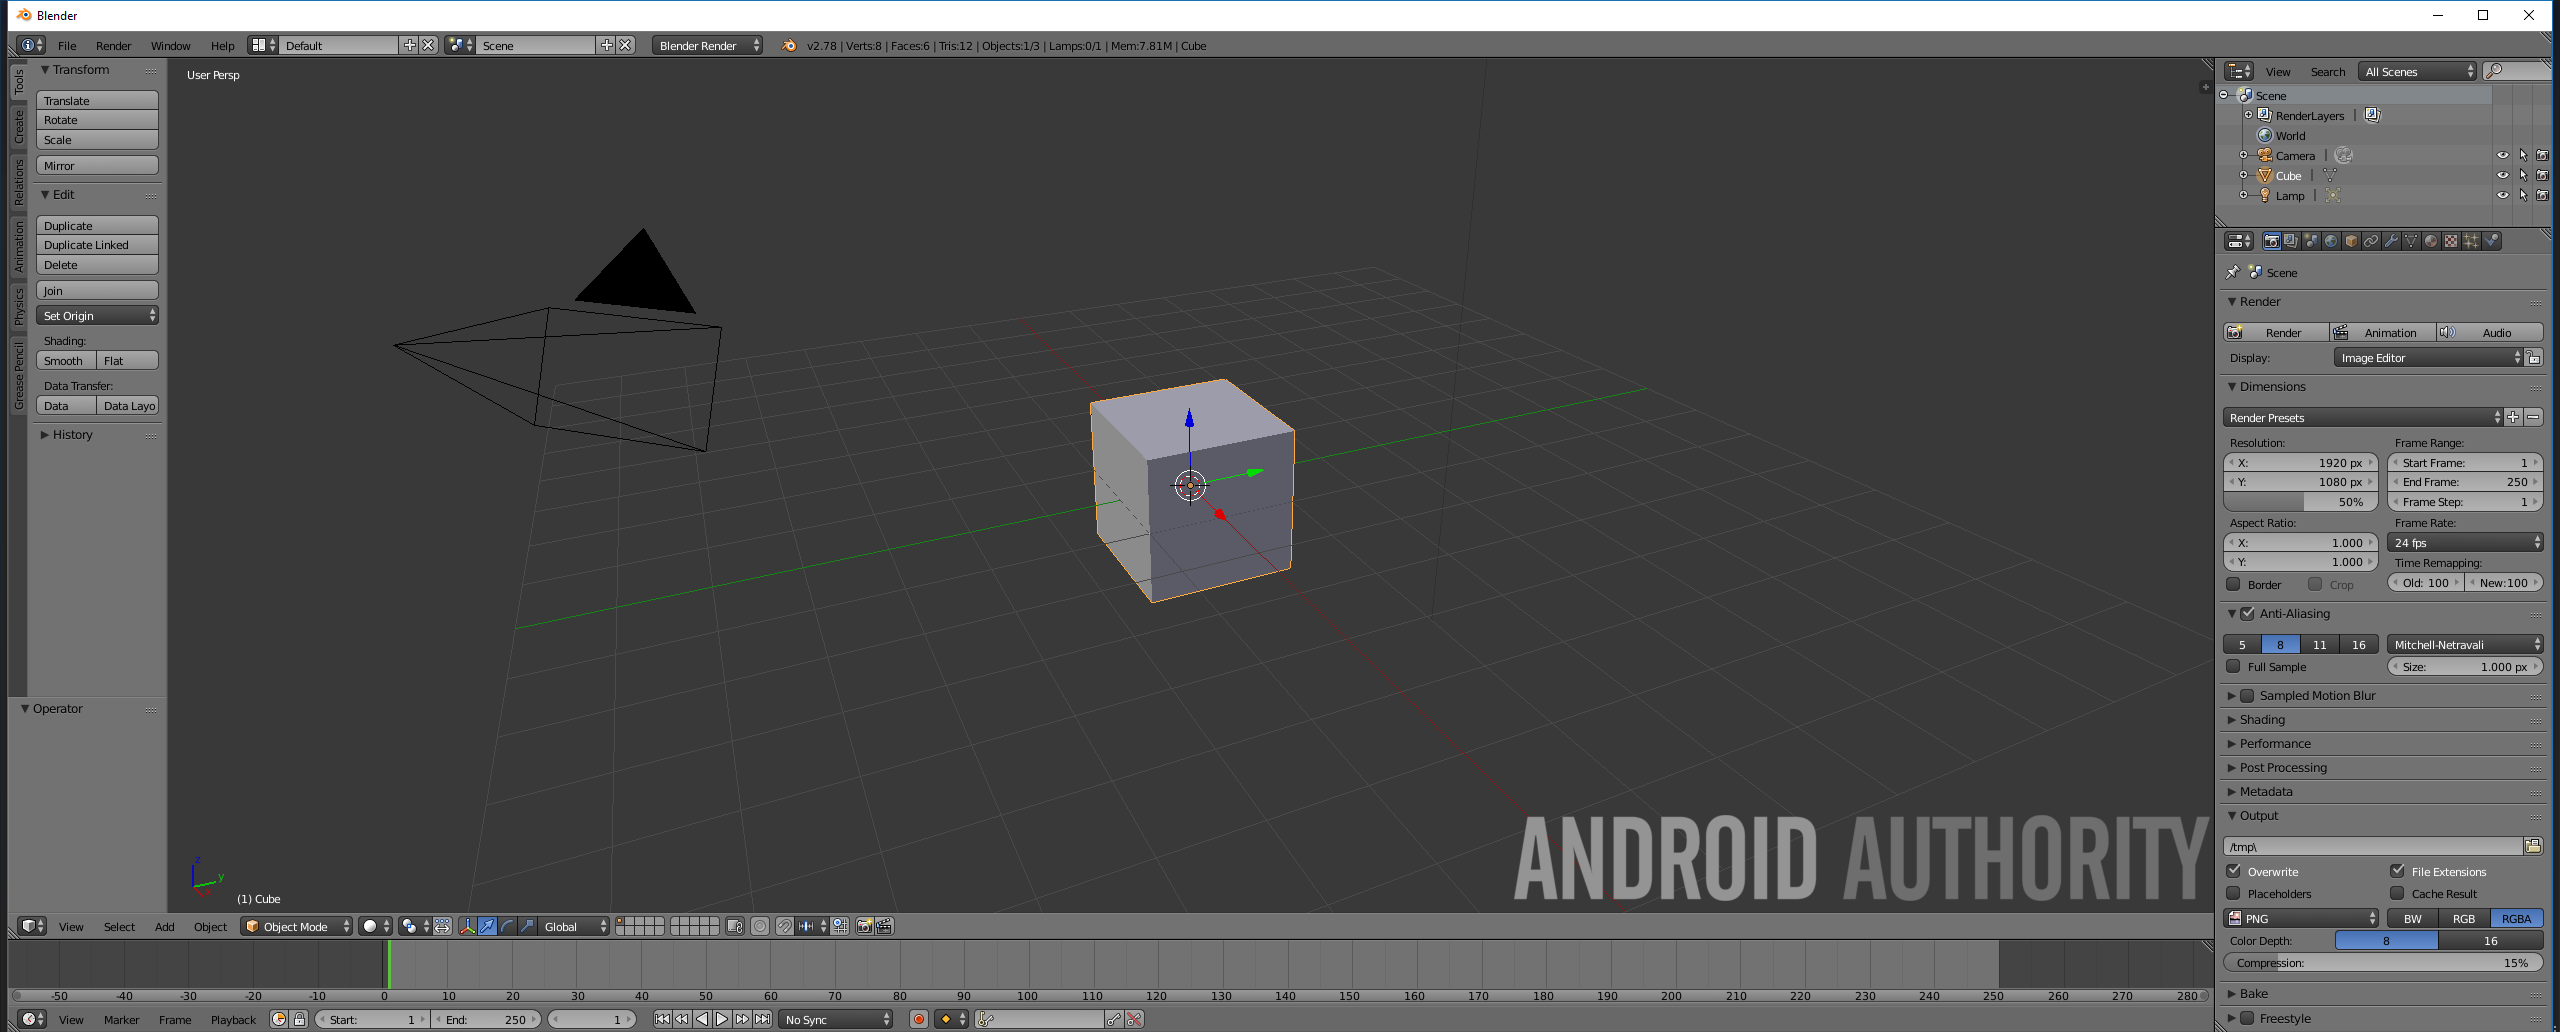
You’ll also notice there are a ton of windows, which might look a little intimidating at first. In the center is the view of whatever you’re creating, down the bottom is a timeline (for making animations), on the left are your creation tools and on the right is another toolbar with even more options and controls for creating textures, adding modifiers etc. Don’t worry about what all this does now, we’ll cover each aspect as and when it is needed.
So you’ve got your cube there in the center and in all likelihood, your first impulse will be to pan the view around. That’s where you’ll learn that nothing here is intuitive, as clicking and dragging won’t work as it would do in many other pieces of software.
Instead, to pan the around the scene, you’ll want to click the mouse wheel and then move the mouse around while holding it down. Likewise, scrolling up and down is also less simple than it could be. To pan left and right, you need to hold CTRL and then scroll up and down. To pan up and down, you hold SHIFT and do the same. Scrolling without any other buttons will zoom in and out. Don’t worry if this is already melting your brain, I’ll include a cheat sheet down bottom for quick reference.
With that out of the way, you might decide you want to move the cube around the screen. Thankfully, that’s a bit simpler and all you’ll have to do is drag using the three arrows to move the item on each of its axes (similar to Unity, if you’re familiar with that).
You’ll find more controls on the left, which include:
- Translate (move)
- Rotate
- Scale (grow and shrink)
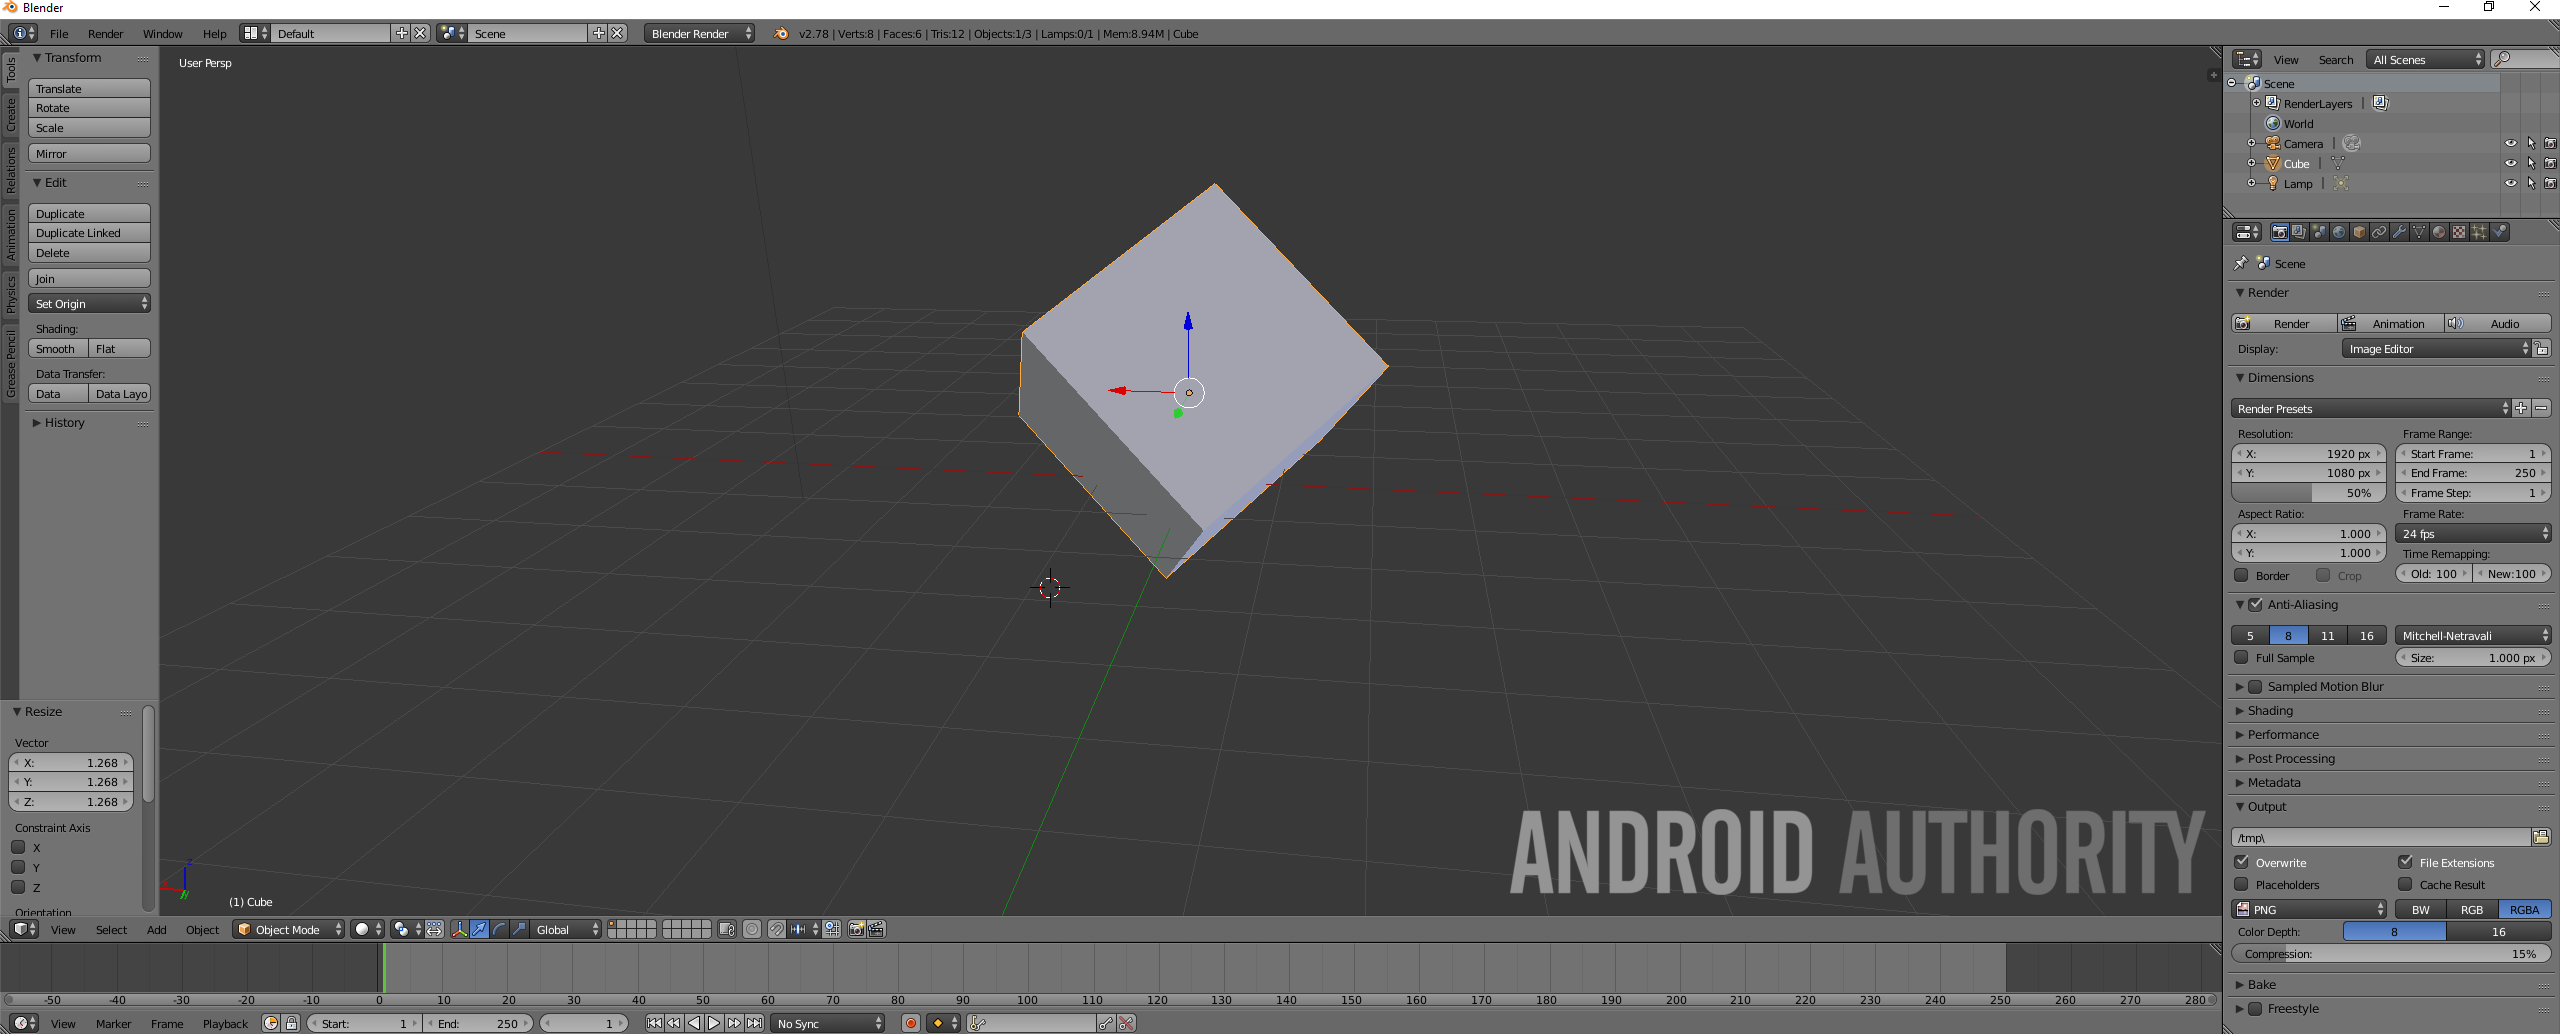
These each transform the selected mesh in the way you’d expect. Try to keep in mind the distinction between what you’re seeing and the 3D model itself. When you rotate the mesh on its horizontal axis, this will look the same as when you rotate the perspective by clicking the scroll wheel. The perspective doesn’t actually matter from a game developer’s perspective though, as we’re going to be exporting the 3D model as it is and then changing the perspective in the game. Changing the view simply allows us to see what we’re doing. Just to complicate matters further, this is different once again from the ‘camera’ which you might notice is hovering in the background. This is what controls the view when you render an image or create an animation – but that’s another post for another time!
Adding More Meshes
There’s only so much you can accomplish by spinning items around though, so it’s time we started actually getting creative. A good place to start would be by adding extra items into the scene.
When you used the transform tools earlier, you might have noticed some tabs along the left, one of which was ‘create’. Click this and you’ll open up some new options, including a selection of meshes that you can insert into your scene. These pretty much speak for themselves (yep, even the one that says ‘monkey’) and if you wanted to create a second cube for instance, you would simply click ‘cube’ and then move that around independently. The cube will appear wherever you move the cursor, which is the target that changes position whenever you left click.
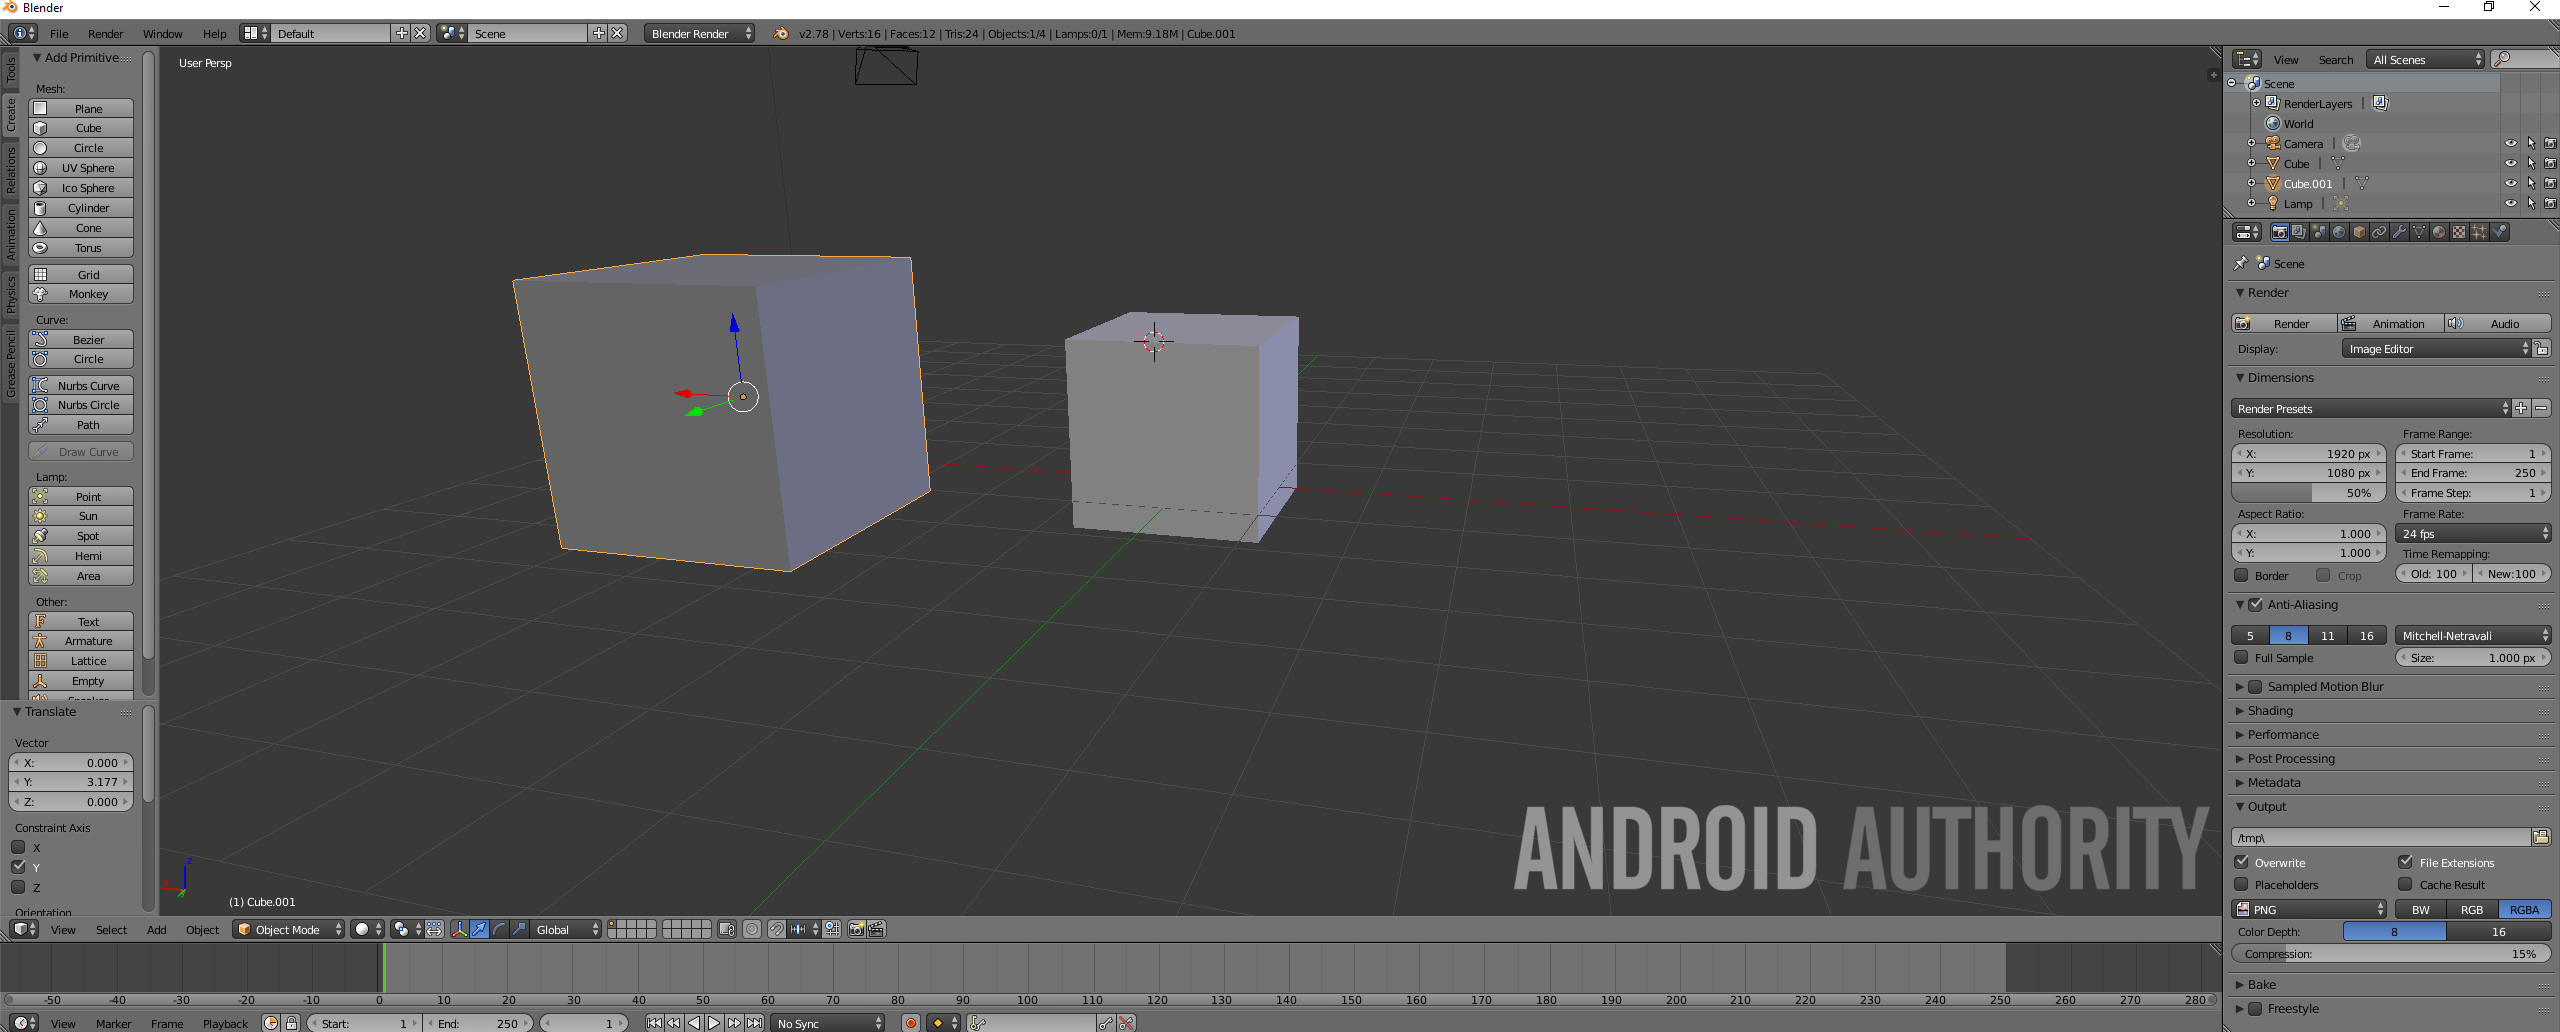
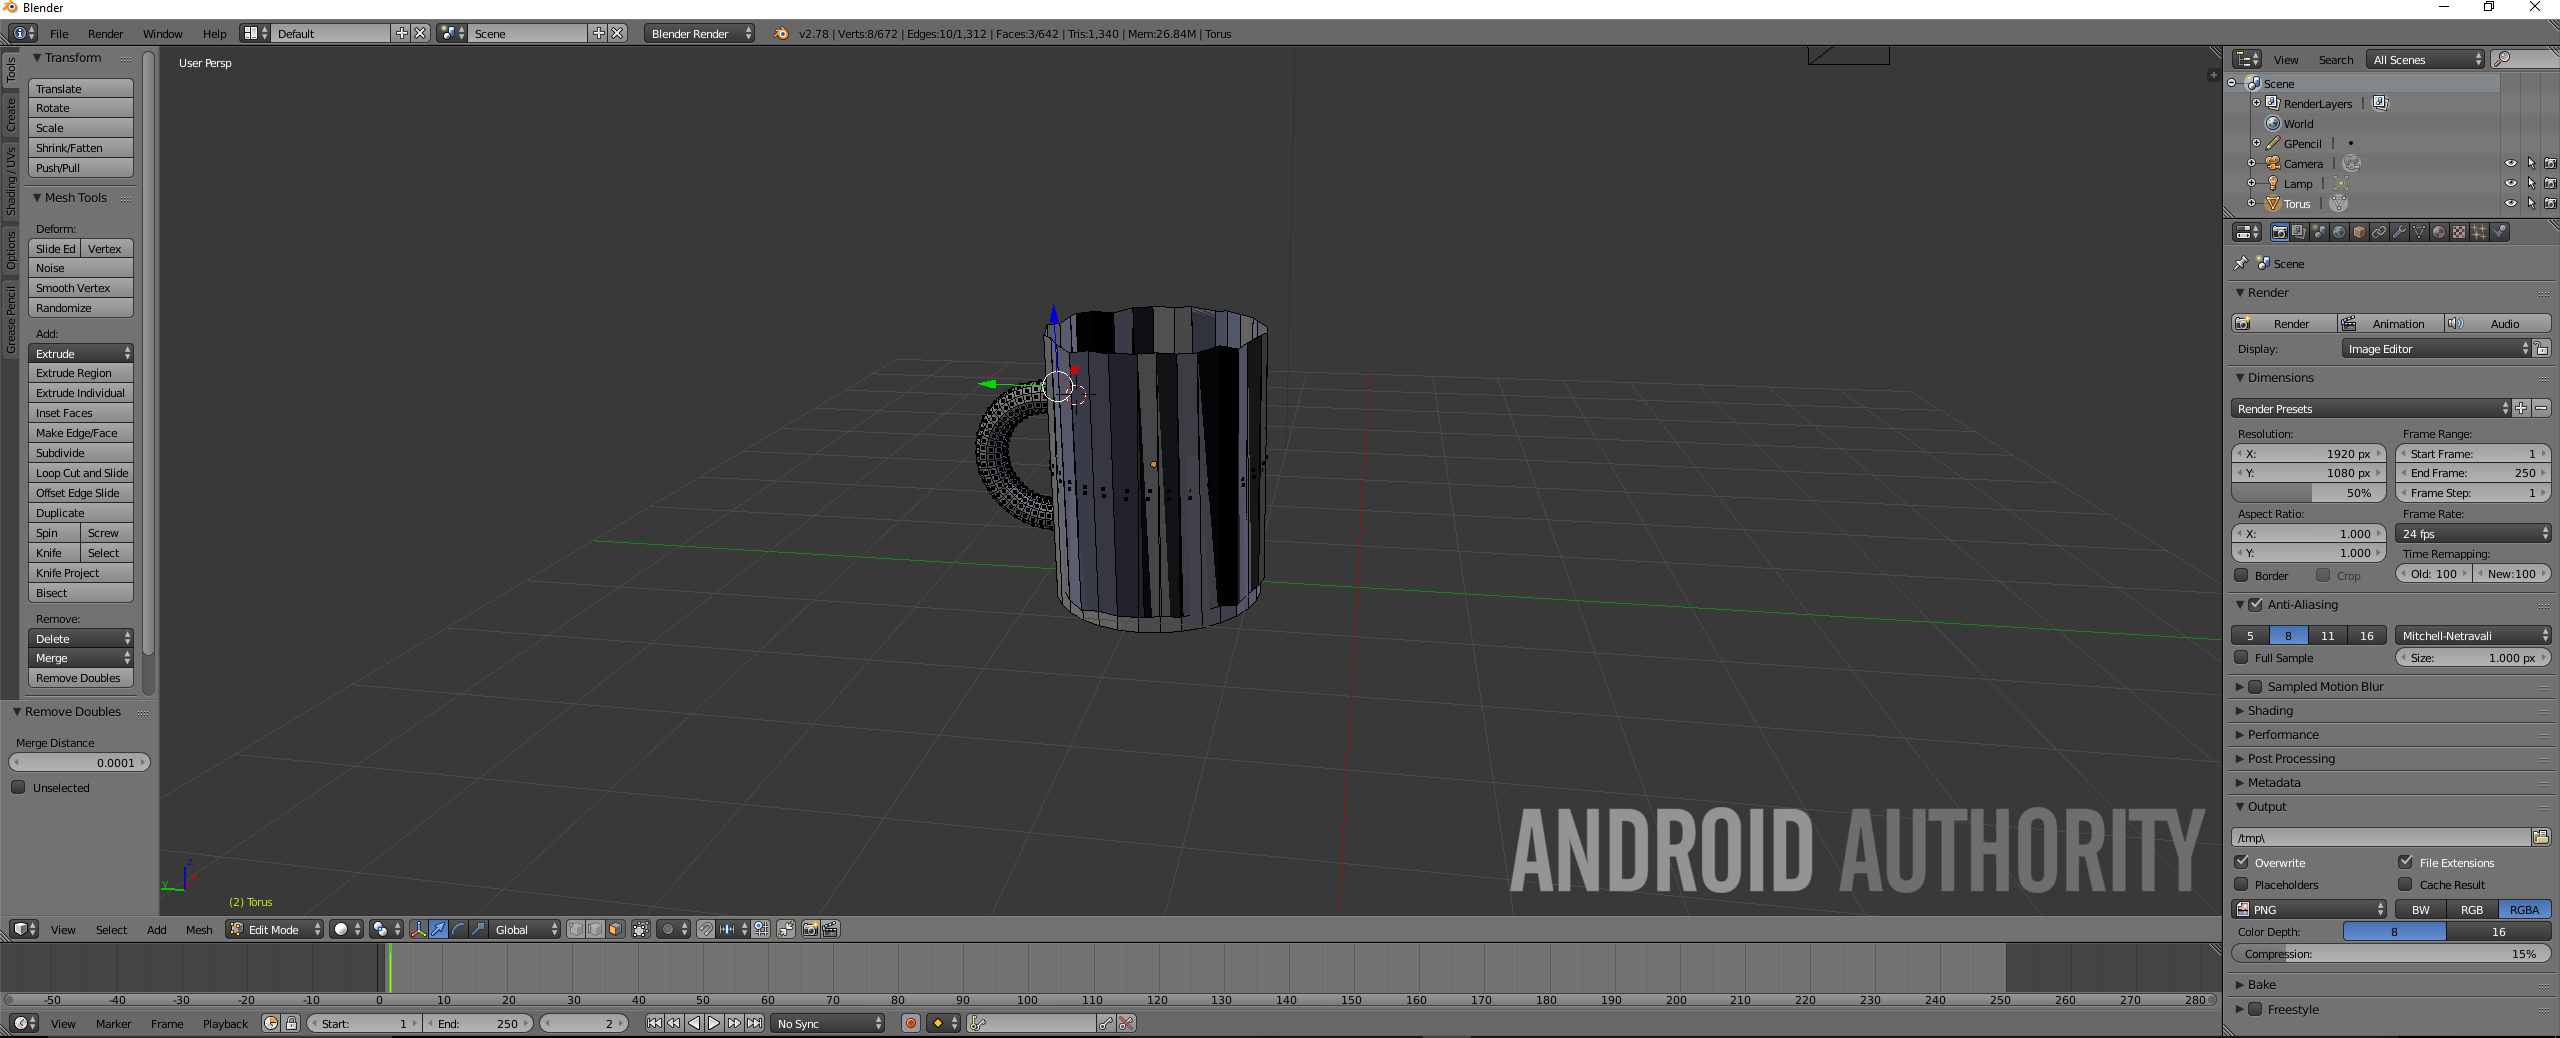
But for this tutorial, we’re not going to be working with cubes. Cubes are boring… Rather, I think we need a cylinder and a torus, as that way, we can make ourselves a mug, which is something nice and simple but also recognizable. (Except it’s going to be an funky wooden mug…)
So, delete both cubes by selecting them, pressing the delete key and then clicking ‘Delete’. Note that in order to select a mesh, you need to use right click, rather than left click. Remember what I said earlier about things not being intuitive? Now add your cylinder and then your torus (which is like a donut). The torus is going to be our handle, so we want to turn it on its side and position it so that it is protruding out of the side of the mug.
Some tips to help you out here: when rotating, you should first select the axis, which you do by hitting ‘X, Y or Z’. You can hit ‘R’ as a shortcut to enter rotate mode, so by just pressing ‘R > Y’, you can begin rotating the object right away. You’ll also notice the option to change the angle by entering numbers in the bottom left; hit R > Y and then ‘90’ and you can quickly flip something 90 degrees. This is very useful as lining things up would take ages if we did it all manually.
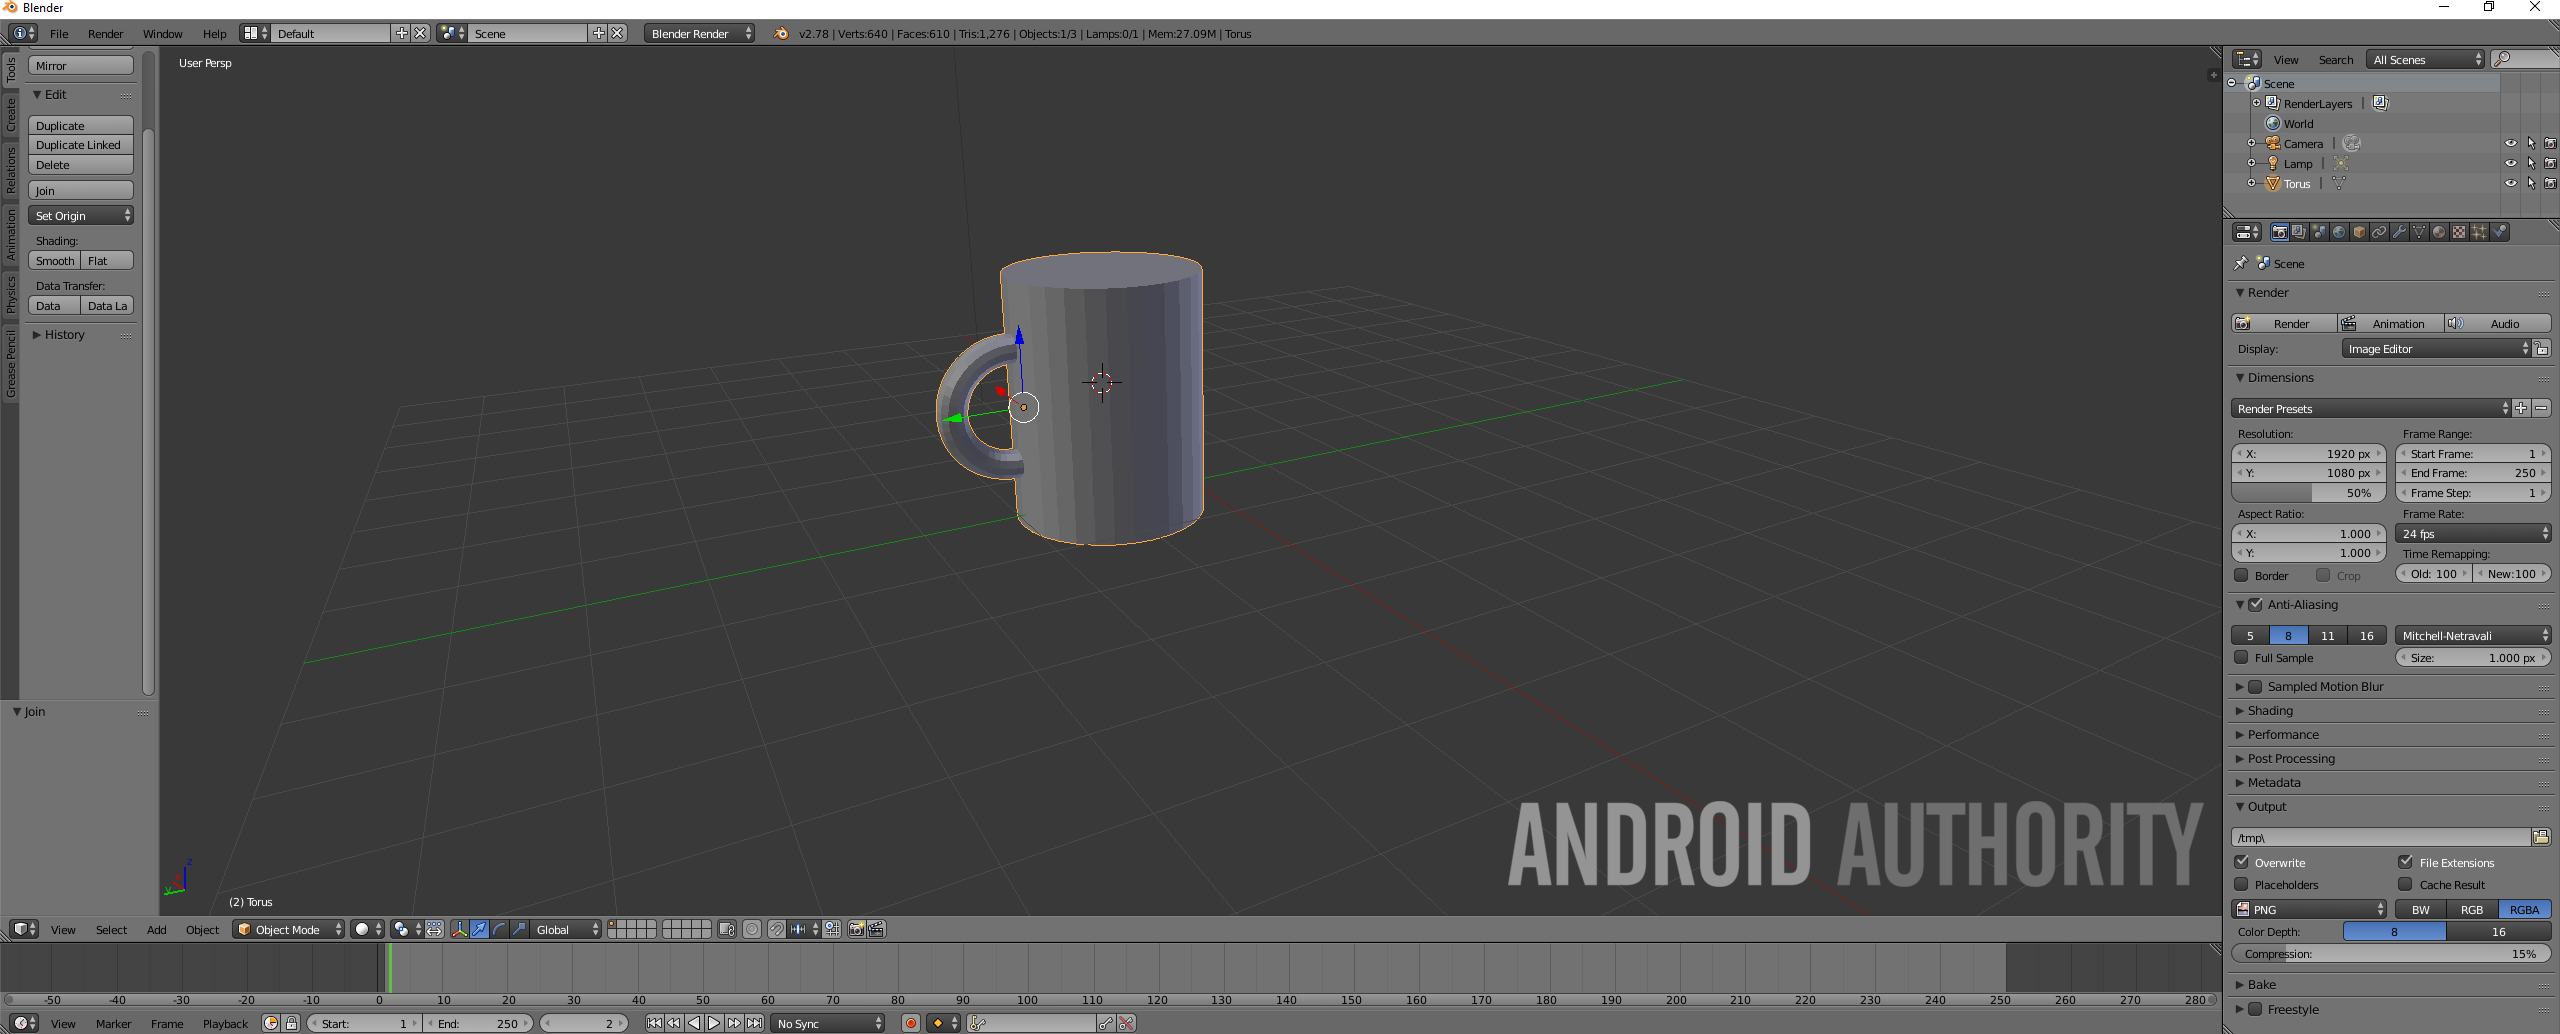
Note that you can likewise press S for a shortcut to start scaling, or G to start moving – again pressing X, Y or Z will fix you to that specific axis. Why not elongate the mug slightly and compress the handle to make it look a bit more like an actual mug and not just two shapes glued together?
Now we want to make these two separate meshes into one single mesh. That way, when we move one, we’ll be able to move both. To do that, you are going to click on both while holding shift and then hit the ‘Tools’ tab again and choose ‘Join’ (under ‘Edit’). From this point onward, those two elements are now one.
Edit Mode
Things really get interesting once you start to edit your shapes. To do that, you need to find the button down the bottom (just above the timeline) that says ‘Edit Mode’. You can also enter this mode by hitting tab at any time. The mode we were in before was called ‘Object Mode’ and tab is what you use to switch between those two states.

A useful thing to remember is that you can’t select meshes in edit mode; whichever mesh was selected at the time will be the mesh that is selected once you hit tab. This means that you’ll be bouncing back and forward between the two modes often as you highlight different sections of a scene to work with! As a game developer, you’ll probably be making single objects for the most part though.
Notice that in this mode you can see the wireframe that makes up your mesh and this will allow us to manipulate it. Along to the right from where it says ‘Edit Mode’, you’ll find that there’s a small icon with three cubes with different parts highlighted in orange. This allows you to decide which aspect of the mesh you want to work with: the vertices, the lines or the planes. A plane is a flat surface created by a perimeter of lines, whereas the vertices are the points where the lines converge.
Once you’ve chosen your mode, you can then select these elements as you would select shapes. That means you can right click on them individually, or hold shift to select multiple faces/lines/vertices. Once you’ve selected the area you want to work with, you can then transform it just as you would an entire mesh by moving it or transforming it.

Alternatively though, you could also opt to use the various ‘Mesh Tools’ in order to do things like extrude the surface – pulling parts of the shape outward for example. Or you could merge multiple selected points/faces to create a single point or bulge. One I like is ‘Randomize’ which is a way you can deform elements to make them look a little more weathered and natural. I’m applying this to the top of my mug to give it a more hand-made look so that it’s more like a wooden ornate mug rather than a smooth china one. Have a little play with some of these tools to see what you might want to use in future.
Designing Our Mug
What we really want to do at this point though, is to make our mug hollow! As Bruce Lee said, before you can taste my tea, first you must empty your cup (I’m paraphrasing…).
To do this, simply select the nicely jagged face on top of the cylinder portion of the mug and use Extrude > By Faces. We can now pull the top upwards to make the mug taller, or compress it into the center, hollowing it out and giving us a slightly thick base (if we stop just before we get to the bottom).
You might notice a problem here though, which is that the handle is now visibly protruding into our mug! After all, all we did to add it in was to drag it into the cylinder and when we joined the two shapes, this did nothing other than to attach them together.
If we were doing this ‘for real’, then we would have cut our torus in half before we started – but it’s not too late. Either we could select each unwanted face individually, or we could save ourselves some time and use the ‘circle select’ tool.
Click ‘C’ to enter circle select, then draw over the inside portion of the rhombus using the left click. As you can see, this allows you to select large areas at once simply by brushing over them. You’ll probably find you accidentally select some of the mug too but don’t worry about that.
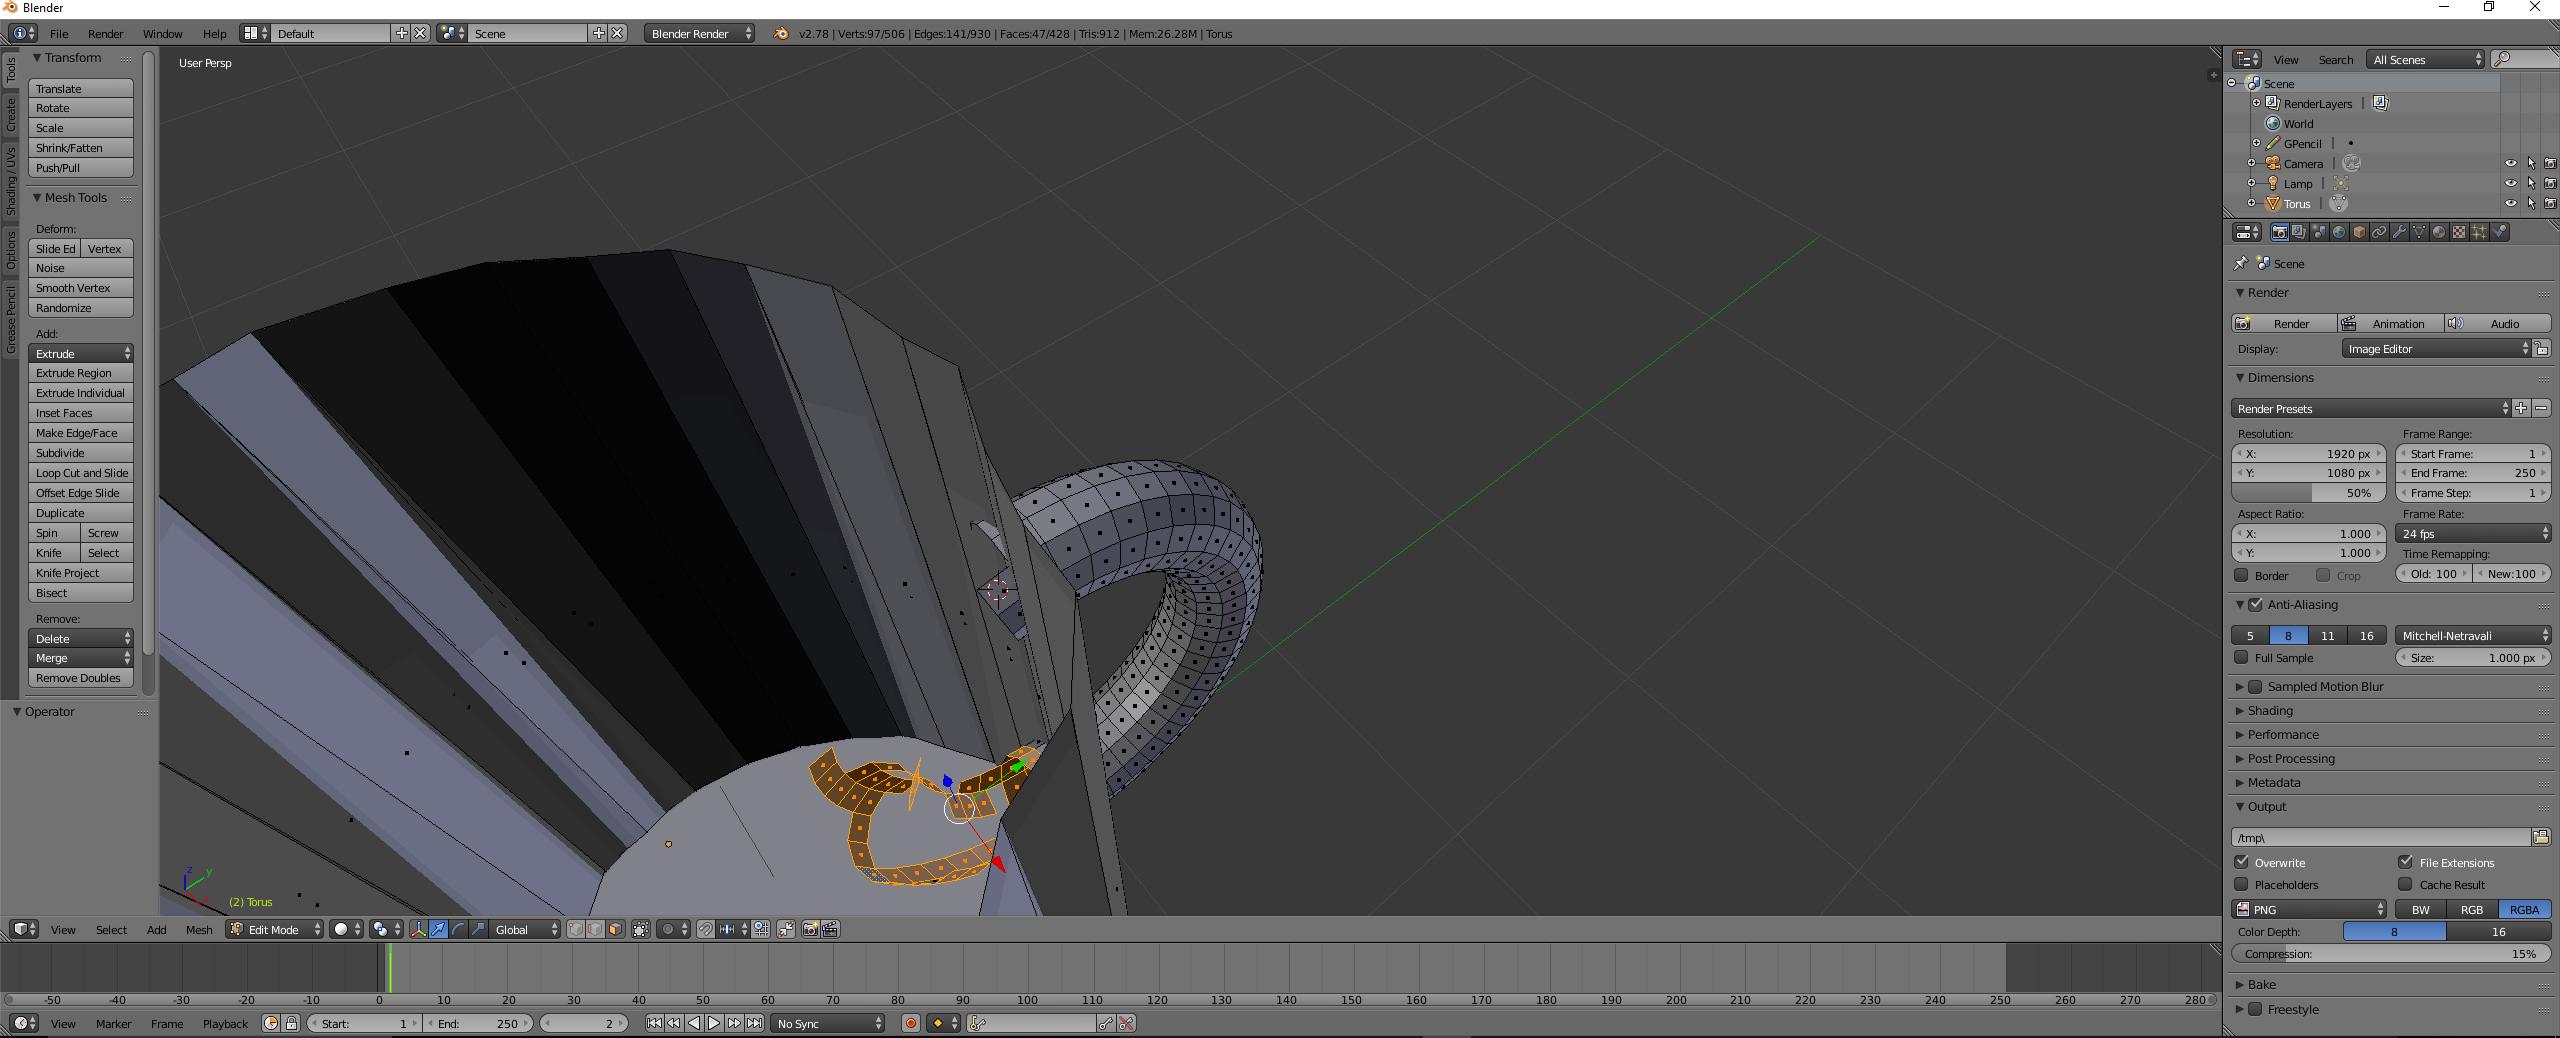
Once you’re done, just right click to exit circle select, hold ‘shift’ and then deselect the faces you don’t want to include with the right click. Make sure that you aren’t leaving gaps on the outside of the handle either (you’ll probably have a few jagged edges inside the mug still). Now hit ‘delete’ and then give the OK and remove the unwanted data. You’ll need to select ‘Faces’ to tell Blender that it’s the faces you want to delete. Note that you can also increase or decrease the size of the circle select tool by using the scroll wheel.
Once you’ve done that, it’s time to give the mug some thickness – currently it looks as though it’s made from paper! To do that, you’re going to select all the faces of the cylinder itself and then extrude inwards. This will also allow you to cover up those few shards from the handle that are still sticking in and thanks to the randomize effect we used earlier, it’s given us a very nicely jagged, wooden looking mug.
Adding to Unity
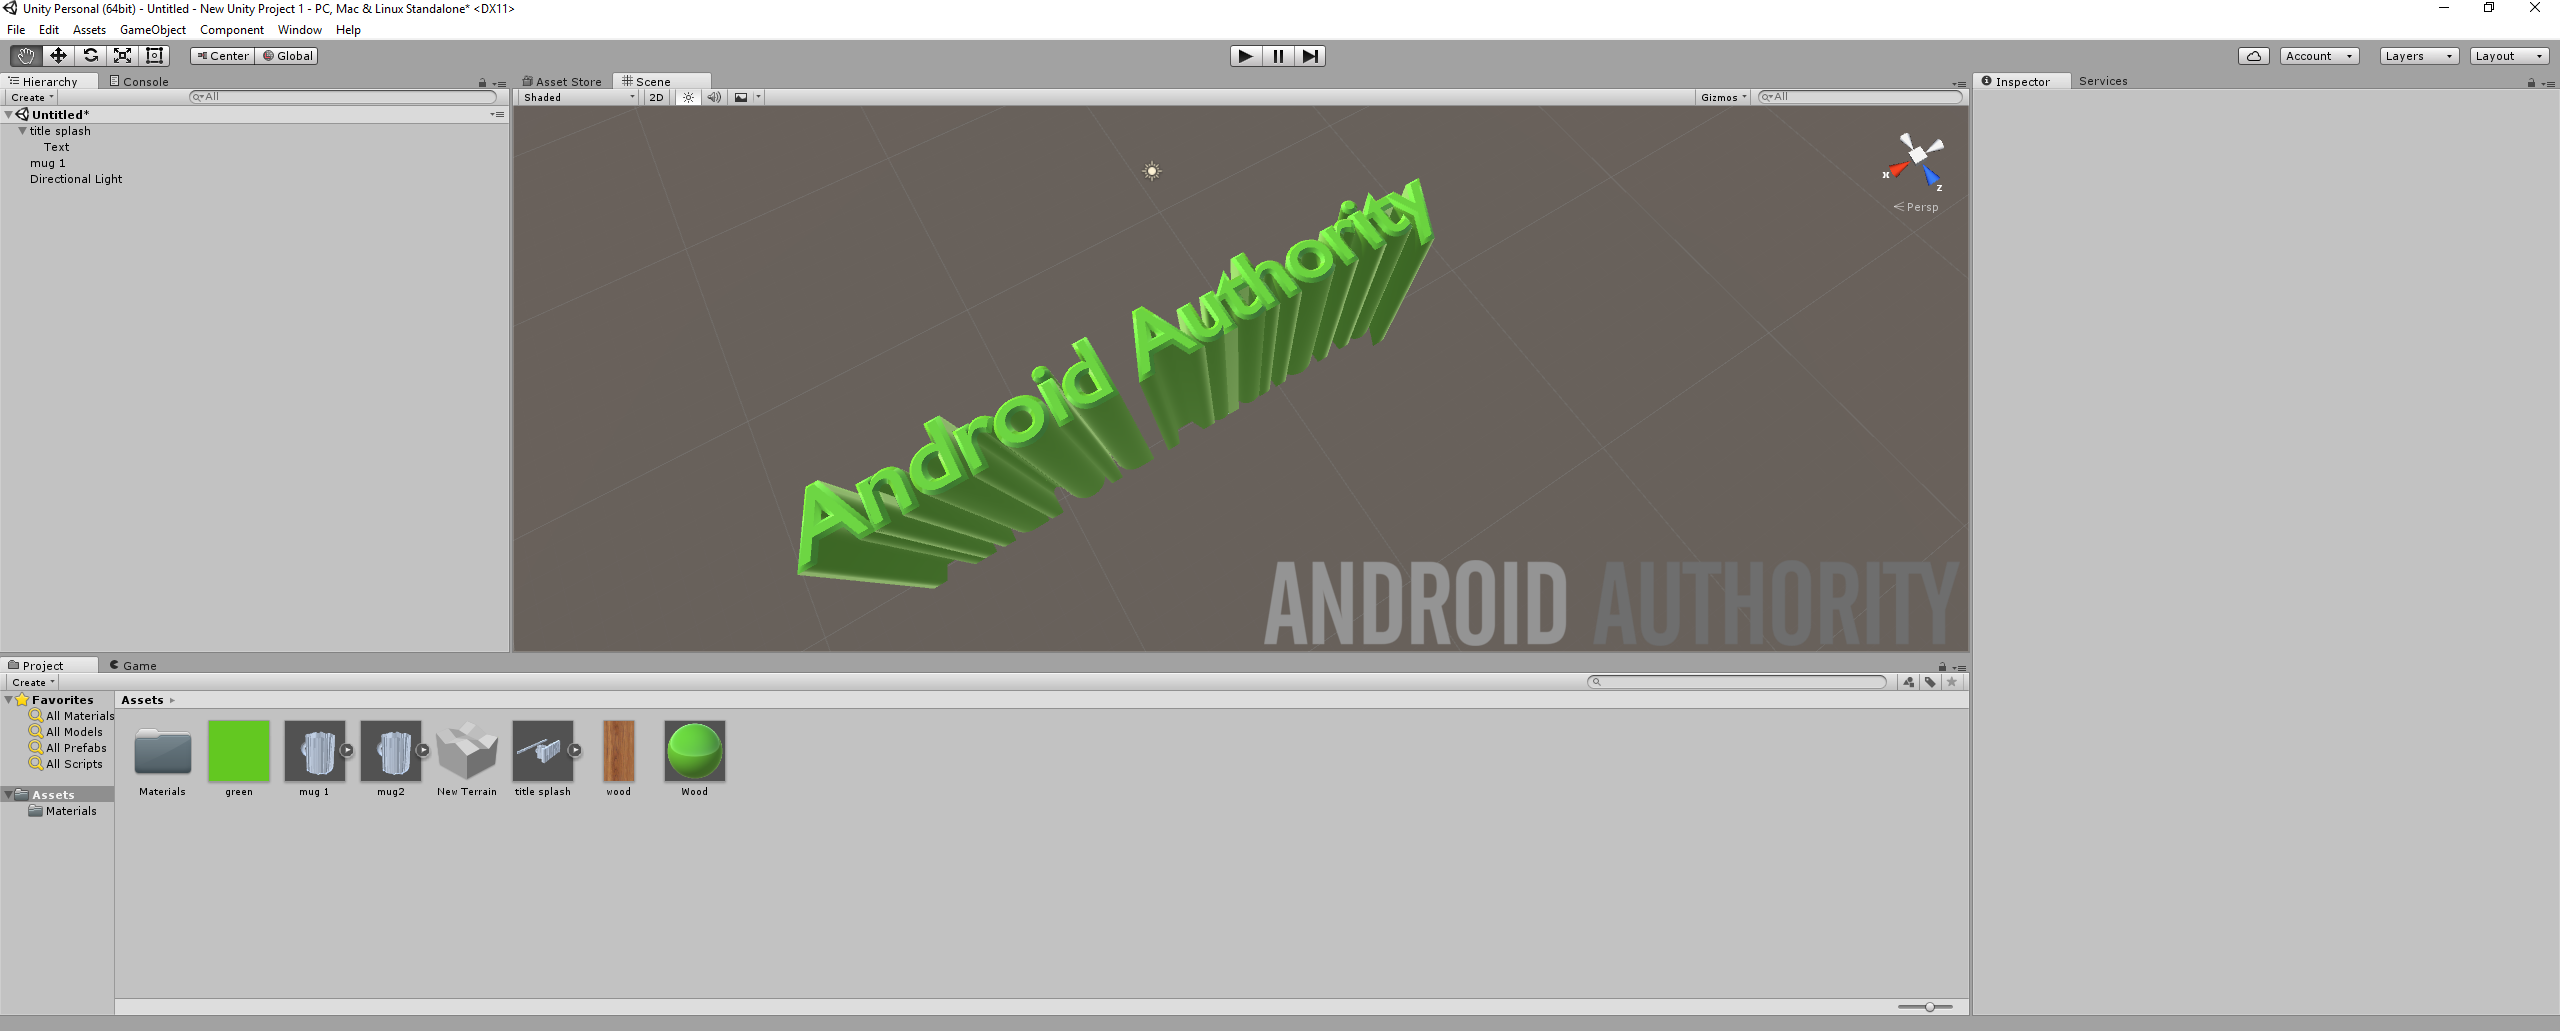
Now all we need to do is to drop our mug into Unity! Click File > Export, then choose ‘FBX’. Simply add the 3D model to your scene as you would do any other asset and you’re ready to go (remember to delete the camera first).
Now you can add textures, RigidBody, a collider… all just the same as you would do for any other object. That way, you can start to fill your worlds with all kinds of detail and really… the sky is the limit! I’ve added a nice wooden texture to my mug and a cylinder collider so that it can sit nicely on this white block…

So Much More to Learn!
This article is supposed to serve as a rough introduction, not a comprehensive guide to Blender. Hopefully you’ve learned enough here to start playing around yourself and developing further but before you go, here are some other bits you might want to look into early on…
Grease Pencil
The grease pencil is a tool that you can use to draw a rough outline or sketch of what you want to create in 2D but in the 3D space (kind of like using Tilt Brush). From there, you can then fill in your design by building the wireframe underneath, before rubbing out the pencil. This is handy for elaborate designs and can be a very useful reference as you work.
Modifiers
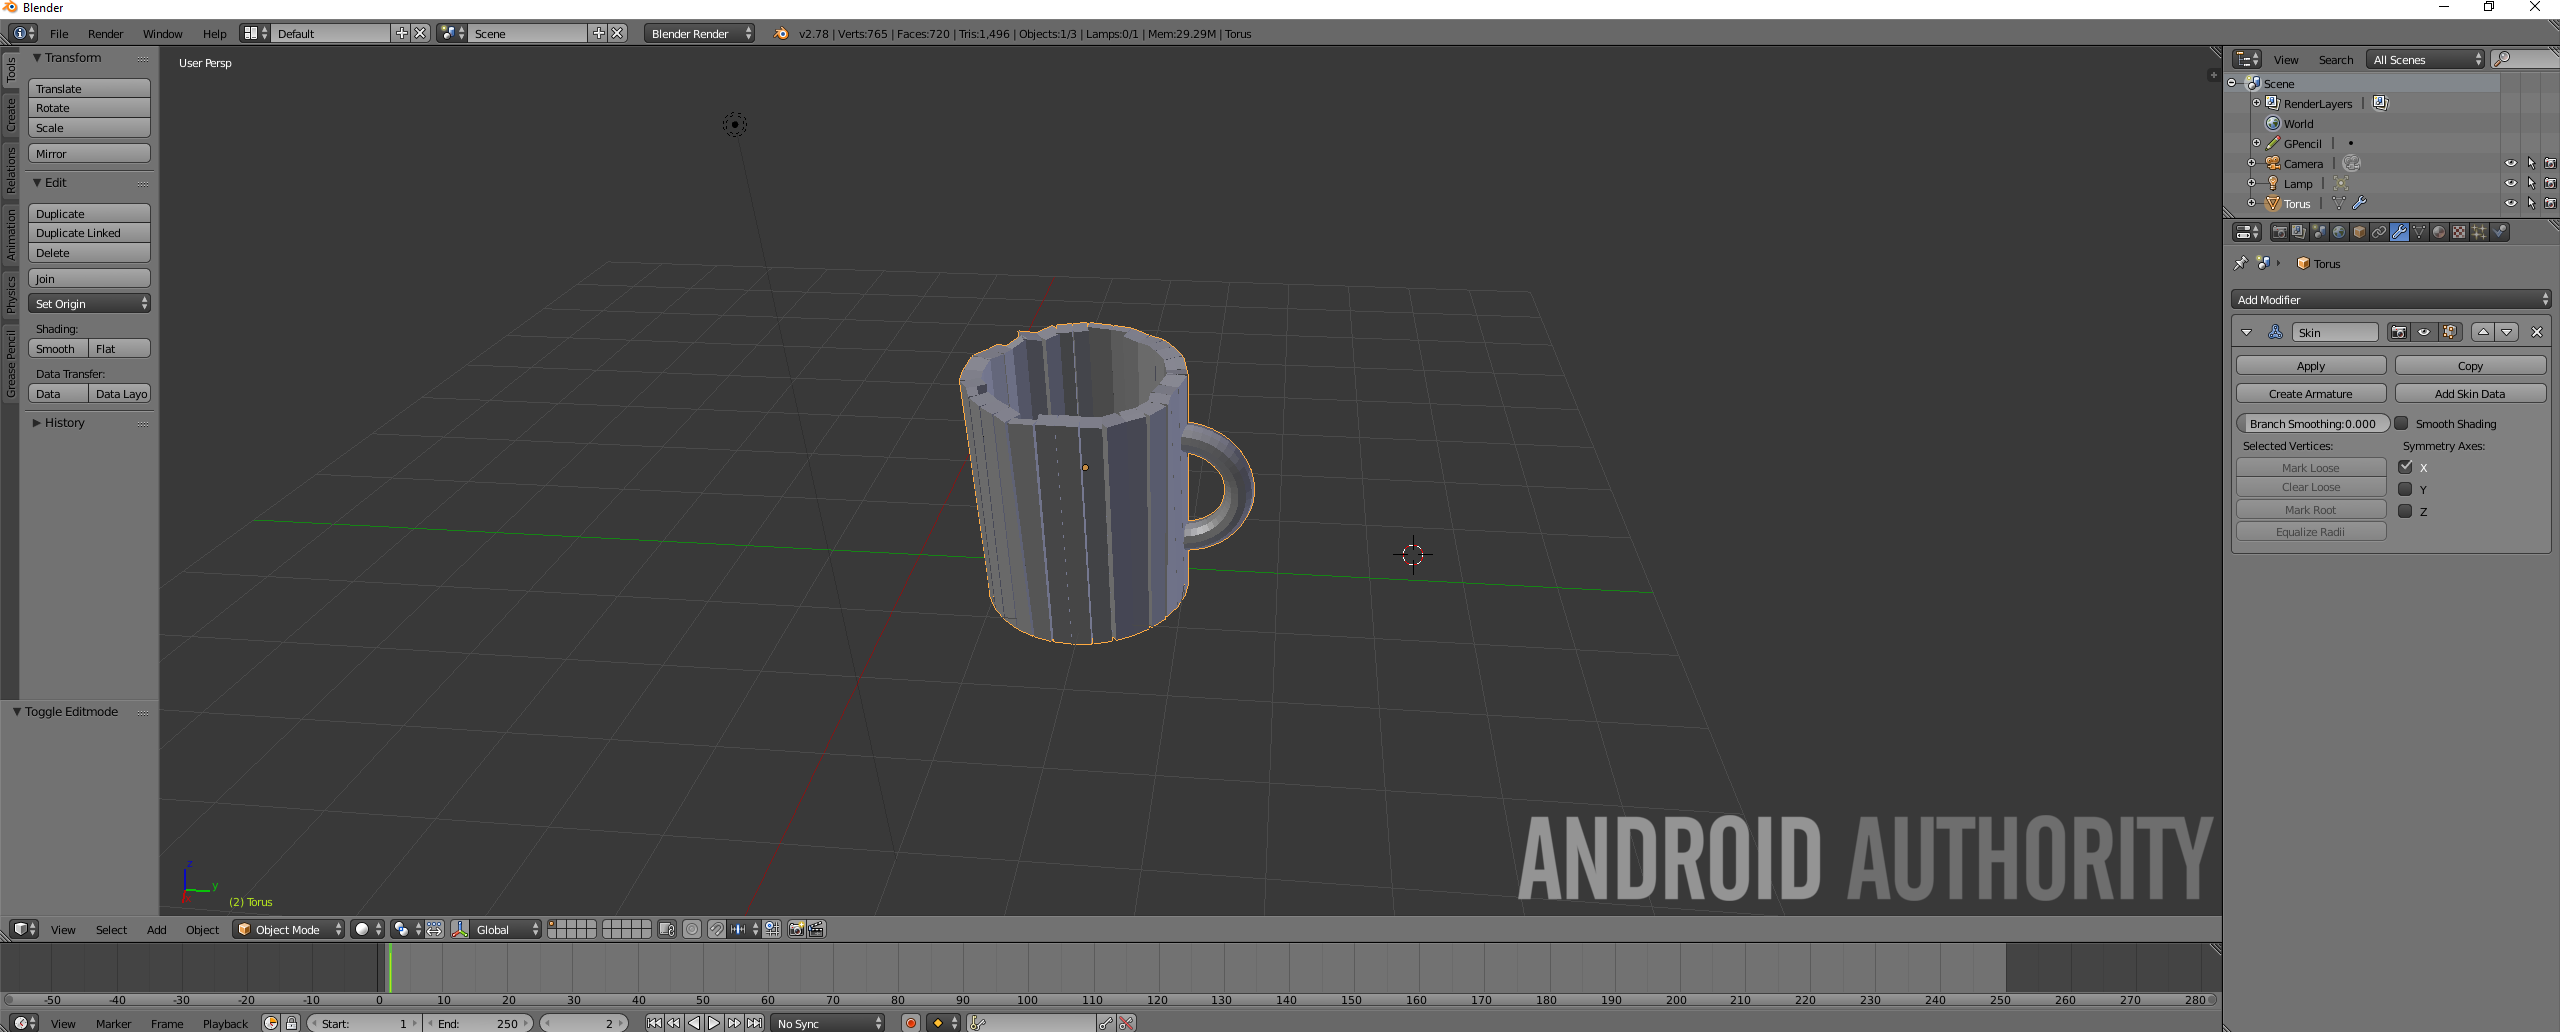
Modifiers allow you to modify your model in various ways. Tools like the ‘skin’ modifier for example can be extremely helpful for turning a very thin and basic wireframe into something 3D. Something you’ll use a lot meanwhile is ‘subdivision surface’, which will smooth out your polygons and make a disco-ball into an actually smooth sphere. We didn’t use this for our mug as it has a more textured, wood-like appearance. Modifiers are found on the right by clicking the small spanner symbol.
The ‘Mirror Modifier’ is also particularly useful, as it allows you to create symmetrical shapes only by drawing a single side. Once you’re done, you then have to apply the modifier with the option down the bottom.
Textures

You can easily add textures to your images for rendering by choosing ‘Texture Paint’ mode down the bottom. Before you do this though, you first need to create your new texture using the checkerboard icon on the right (next to the spanner used for modifiers). You can then create a texture from an image or movie and paint it onto your object’s surfaces. You can also do this in Unity itself though, as I did with the mug. The circle icon meanwhile can be used to change the color of your items.
Text
Adding text is also rather easy. You’ll find this option on the left and then by editing ‘Edit Mode’, you’ll be able to change what it says. On the right, click the ‘F’ symbol and you can change things like the extrusion to make the text 3D, or add a nice bevel effect. You could then use the textures and colors to make your text more interesting in that way too.
Adding Individual Vertices, Lines and Faces
Using the information in this post, you can hopefully create a lot of interesting shapes and objects, simply by editing simple shapes. But if you want to get more creative, then you will need to learn to add new lines, vertices and faces. One way to do this is by using the knife tool, which you can access from the left hand window, or by pressing ‘K’. Then draw a shape with your cut and press return to fix it in place. From there, you can then treat the shape you’ve created as any other face by cutting, extruding or deleting. Note that you should generally cut between edges (lines will glow when you hover the knife tool over them), which ensures you’ll be working primarily with quads and triangle rather than complex polygon.
Even more flexible is the ability to draw vertices/lines free hand. Doing this is nice and simple as you just have to hold CTRL and right click where you want the points! Then select all your points with A, go to the mesh menu and choose ‘Faces > Fill’, or apply the skin modifier.
Joints and Animation
As you get more advanced, you’ll eventually want to start animating characters like bad guys and NPCs. This is when the true power of Blender reveals itself, as you start introducing ‘armatures’ or ‘bones’ to your models to create realistic animation and rag-doll physics. This process is called ‘rigging’ and will be incredibly useful for any 3D model that needs to be able to move in interesting ways. You can add bones by pressing Shift + A to add and then selecting Armature > Bone. Resize the bone and place it where you want it inside your character or object model. Then select the end of your bone and extrude it to pull out a second bone that will be connected to the first bone by a joint.
This is when the true power of Blender reveals itself, as you start introducing ‘armatures’ or ‘bones’ to your models to create realistic animation and rag-doll physics.
You’ll want to name your bones and from there you can enter ‘pose mode’ with CTRL + TAB. Then you can select your individual bones with the transform tools just as you move anything else!
Keep Learning!
As you can see then, we’ve barely scratched the surface of what’s possible with Blender and we haven’t even looked at things like lighting or animation! Hopefully though, this intro has given you the confidence to start playing around and experimenting. My advice is to start out by adding a few simple objects to your environments (mugs, tables, chairs) and then to progress as you get more confident. Each time you need to do something extra, check Google and you should find you now have enough of a basis of knowledge to follow the instructions.
Oh and to help a little, try visiting Blend Swap for a great resource full of free 3D models that you can start experimenting with!
If you don’t have time to create models, you can buy them here – https://www.flatpyramid.com/3d-models/
Source: androidauthority.com/create-3d-models-for-android-games-750148