Behind the Scenes: Happy Egg Product Rendering
Background
My name is Riley Brown and I’m a digital artist living and working in the US (currently Utah). While I work as a freelance digital artist, much of my time is devoted to personal projects, and the building of an online learning platform for digital artists, Akoview. I also work for a furniture and bedding company, Malouf, making photorealistic renders of products and environments.
I’m married and a father to one, with another on the way.
This particular project was a freelance project for the company Happy Egg. This brand approached me to create some product renders of their cartons as an alternative to photography, and a way to allow greater flexibility with their content creation.
Here’s a brief look at my workflow for this project:
Modeling
When it comes to modeling, I have two important philosophies:
- Great reference is key. I prefer the physical product to sit on my desk while I work. If I can’t have that, I’ll get as many photos as I can.
- I’ll see what work others have done before me. That often means emailing the company that manufactures the cartons, to see if they can send me a 3D file. I’ll look online to see what paid models other artists have made. Even when I don’t find what I’m looking for, I’ll often find a good starting point. It’s great learning to make things from scratch, but in production speed and quality are king.
I started with this 3D model as my base. There were two big problems with this model; first, I needed a 12 egg carton. This one holds only 10. Second, the topology was triangulated, and extremely dense. I knew retopology was going to be an important first step.
Bisecting and reshaping the model
I’ll be working in Blender 2.80 (beta) for nearly everything but retopology. I needed to somehow create the 12 egg carton from just 10.
After egg-samining the mesh I determine I can extract one of the central rows, and duplicate it over. First, I need to cut the mesh in half. I could use the knife tool, but this won’t give me a perfect, clean line all the way through. This calls for the “bisect” tool.


From here, I essentially duplicate one of the rows, and move it within the new gap I created (the bisect tool was used again to extract the duplicate row).

I didn’t spend too much time lining things up perfectly. I knew I would be coming back to retopologize anyway! (At this phase I had something like 200,000 verts. Yikes.)
Retopology
For retopology, I used Maya’s “Quad Draw” tool. If you don’t have access to Maya, some retopology alternatives would be TopoGun and RetopoFlow for Blender. There are ways to retopologize by hand in Blender without plugins, but I strongly recommend you learn a proper workflow. I appreciate every moment saved. Time is the one thing I know I can’t buy back!
Quad Draw is the easiest and most intuitive in my opinion. The key here is quads, patience, and a good playlist to zone out to. I highly recommend this one. Good topology is key for optimizing the model for animation and rendering, as well as to establish edge flow for further modeling.
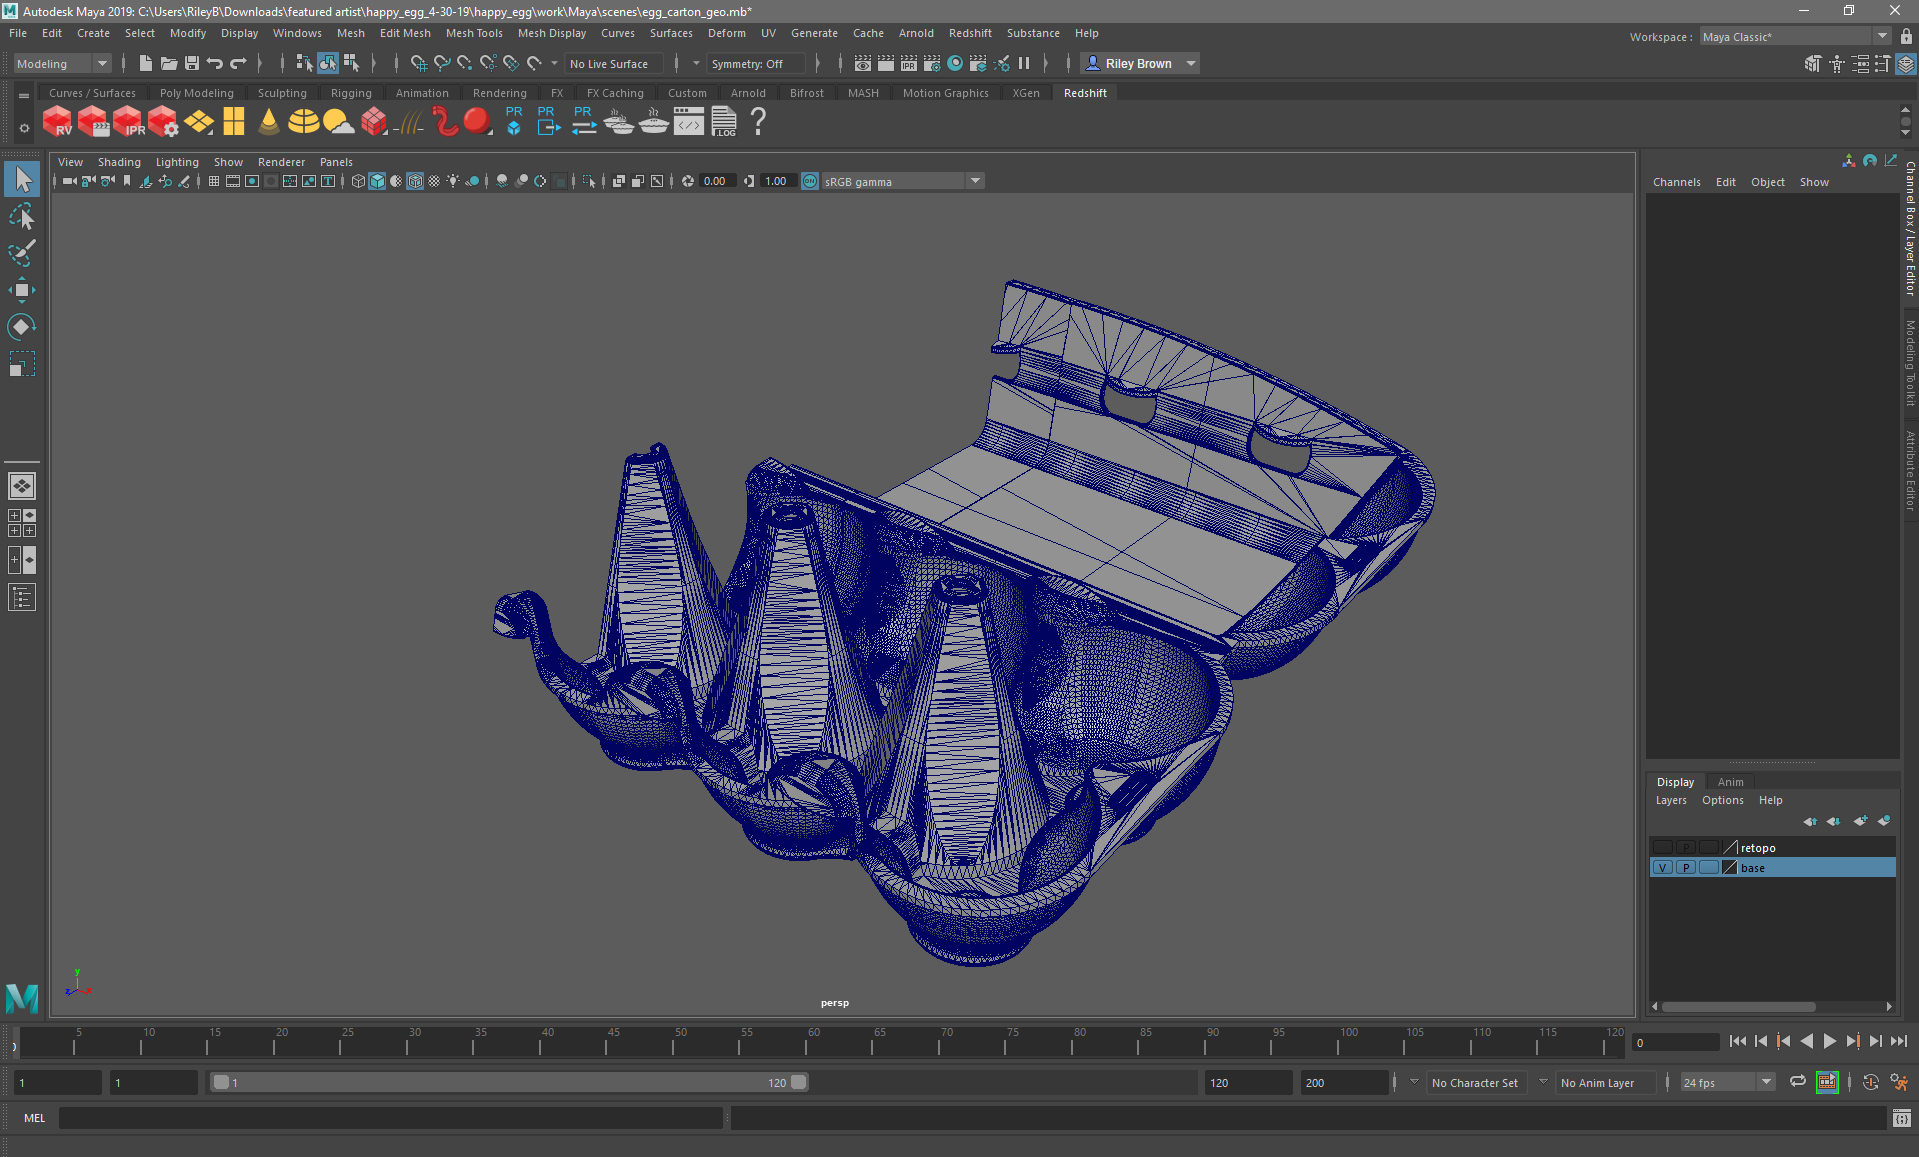
Retopology is going to be difficult enough. There’s no sense in doing my work twice. Cut the model in half where you can! I’ll retopologize half, and mirror it over when completed.


Notice the extra geometry where I know the model will be bending as it opens and closes. You may end up with a triangle here and there. For a project like this I’m not too stressed. Omelettin’ it slide this time.
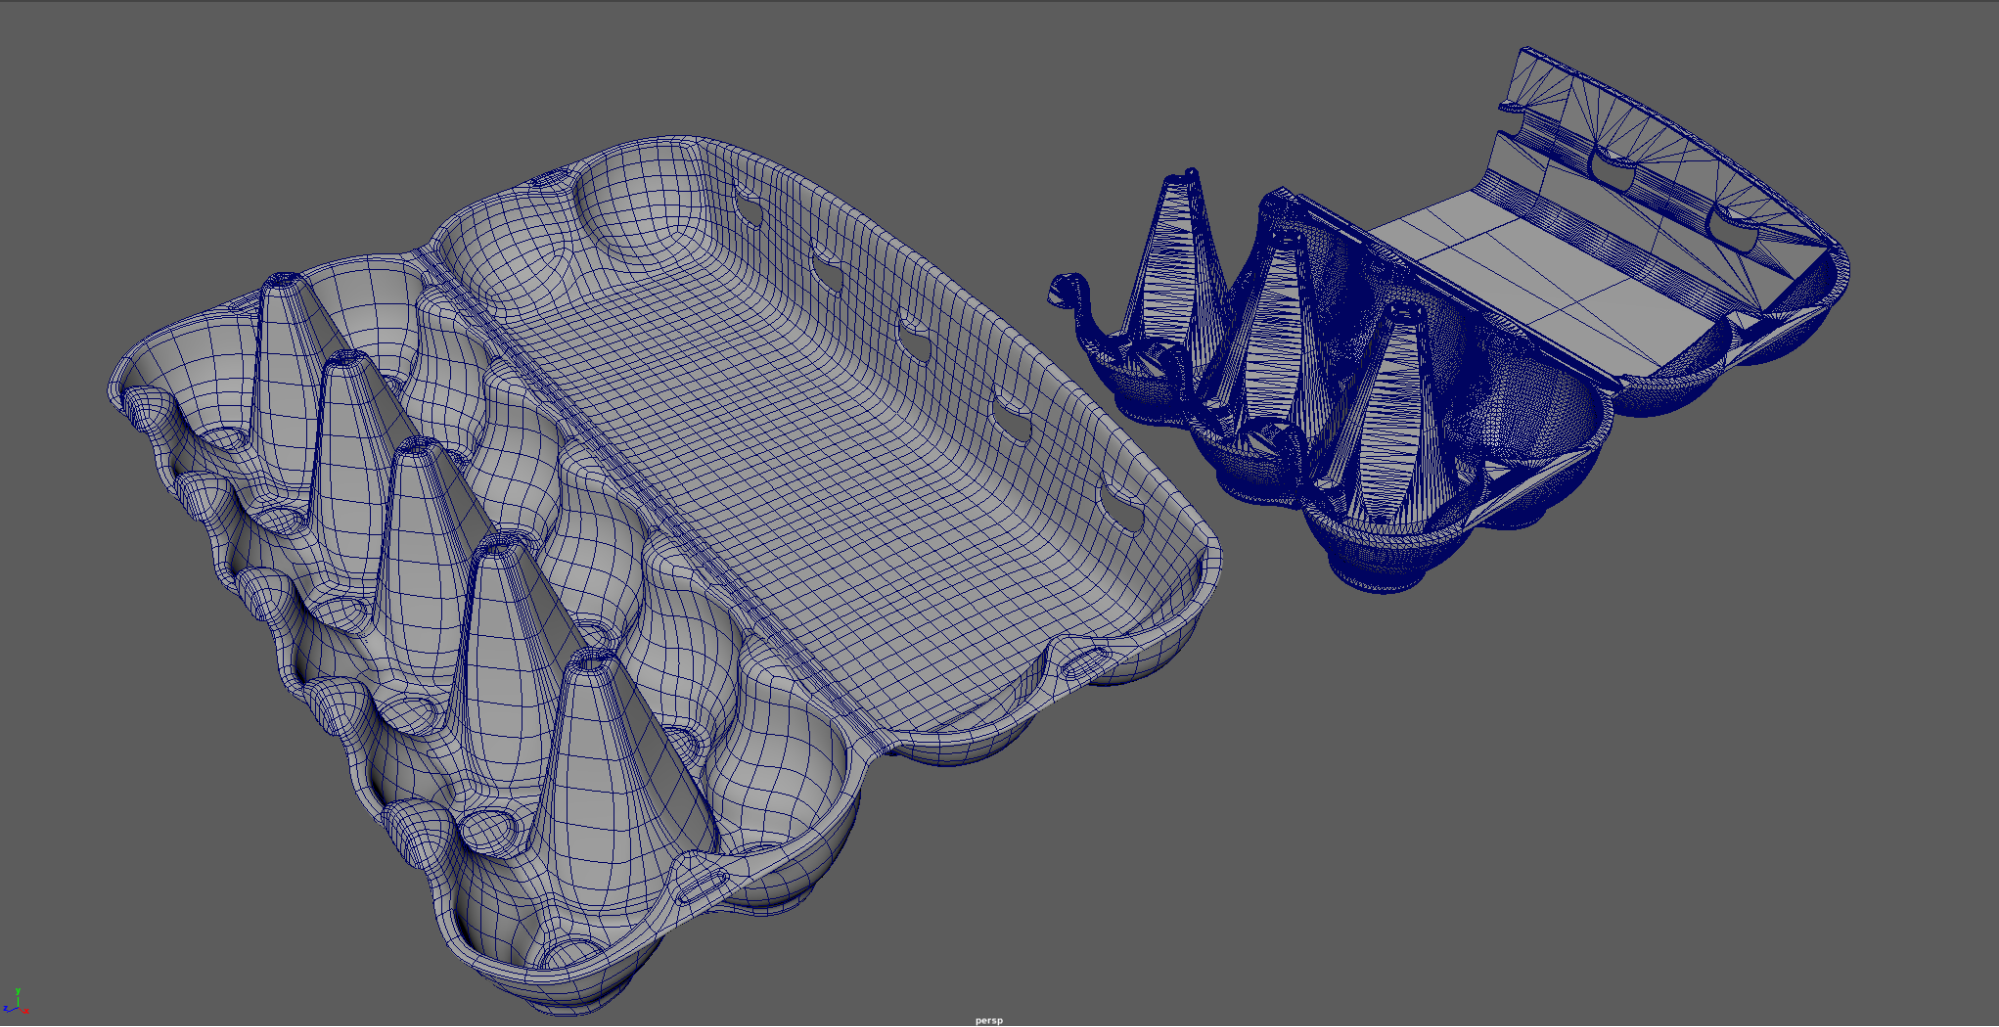
Here we are after our retopology eggs-ercise! Time to send it back to Blender for texturing, rigging, and final rendering. The resulting mesh is much less dense (now only 8,000 verts) and quicker to interact with and render. I should mention, the eggs are simple UV spheres elongated slightly by grabbing the top vert and using the proportional editing tool (Soft select).
Texturing
I chose to do my texturing with Blender 2.80 (beta). It offers enough flexibility and, most importantly, quick iterations to show the client. The carton is made up of two procedural noise textures. Blender does not currently offer much variety in their procedural noise options, so I used a handful of my own, with the aid of some procedural grunge image textures. I also strongly recommend Substance Designer if you are into procedural texturing, and need a powerful, flexible tool. Again, there’s nothing more expensive than time!


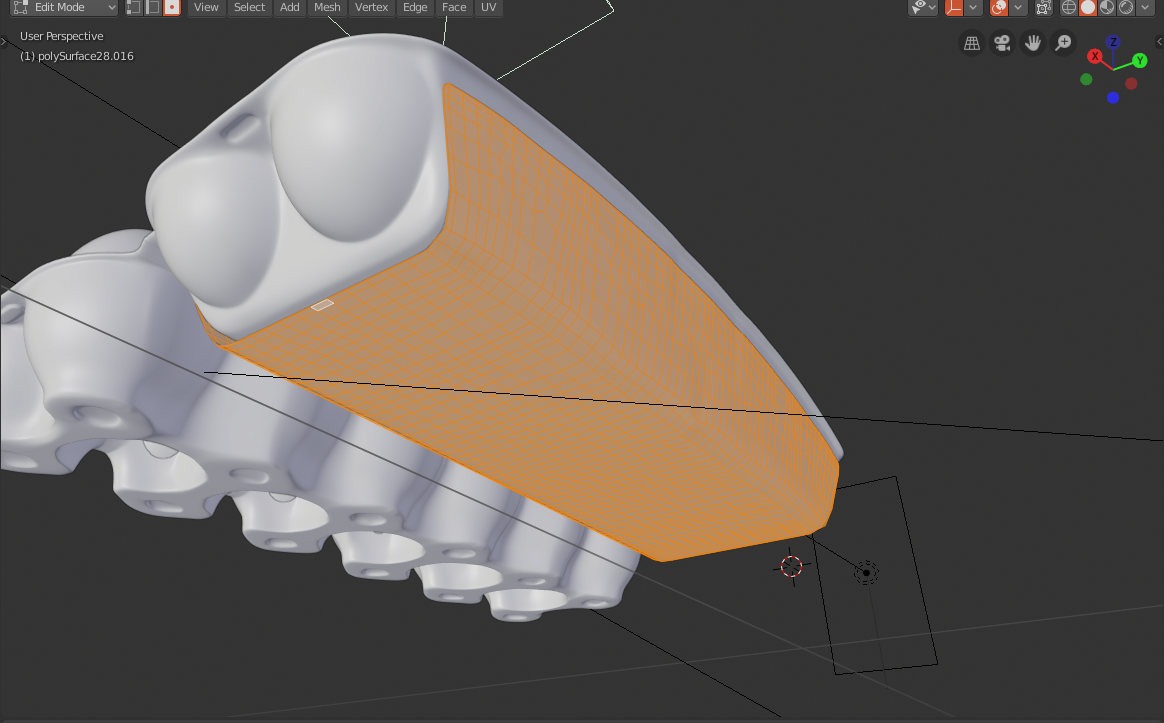
Creating the Label
The label was created by simply selecting existing geometry on the package, duplicating it, and using “separate by selection.” If you are creating a surface that will stick to a mesh (like a sticker label) it’s always a good idea to work with existing geometry where possible. I could have created a whole new plane, and carefully deformed it to fit with shrink wrap, and other methods, but nothing is as useful as using what I already have. This way the label was pre-rigged and pre-shaped to my carton. With a few minor shaping tweaks it was ready to go.
Rendering
I rendered all shots within Cycles. Cycles is not currently the most optimized render engine on the market (I hate to bring on the bad news). However, with my texturing and rigging already done in Blender, it was the most convenient option. I hope to see further attention given to Cycles’ performance. It’s a powerful option, but just requires a lot of time for setup, rendering, and occasional trouble shooting. For hardware I use 2 GTX 1080ti’s, as well as an Intel 18-core i9 CPU. A life spent rendering is not a life well spent.
Final notes
Thanks for checking out my workflow on this project. Next, you can visit my personal training website Akoview. Join the launch group to get discounted access to the first course. (It comes out when it comes out, so I don’t have a date for it yet.)
I’ll be providing detailed free and paid tutorials within the realm of digital art. Blender is a big part of my workflow, so you’ll be sure to find some Blender content. However, I plan to teach a variety of tools to help you explore and expand your digital art horizons. After all, you don’t know what’s best until you’ve given yourself options. If you’re interested, visit the site. I hope this was all that it was cracked up to be. (Okay I’m done with bad egg puns.)
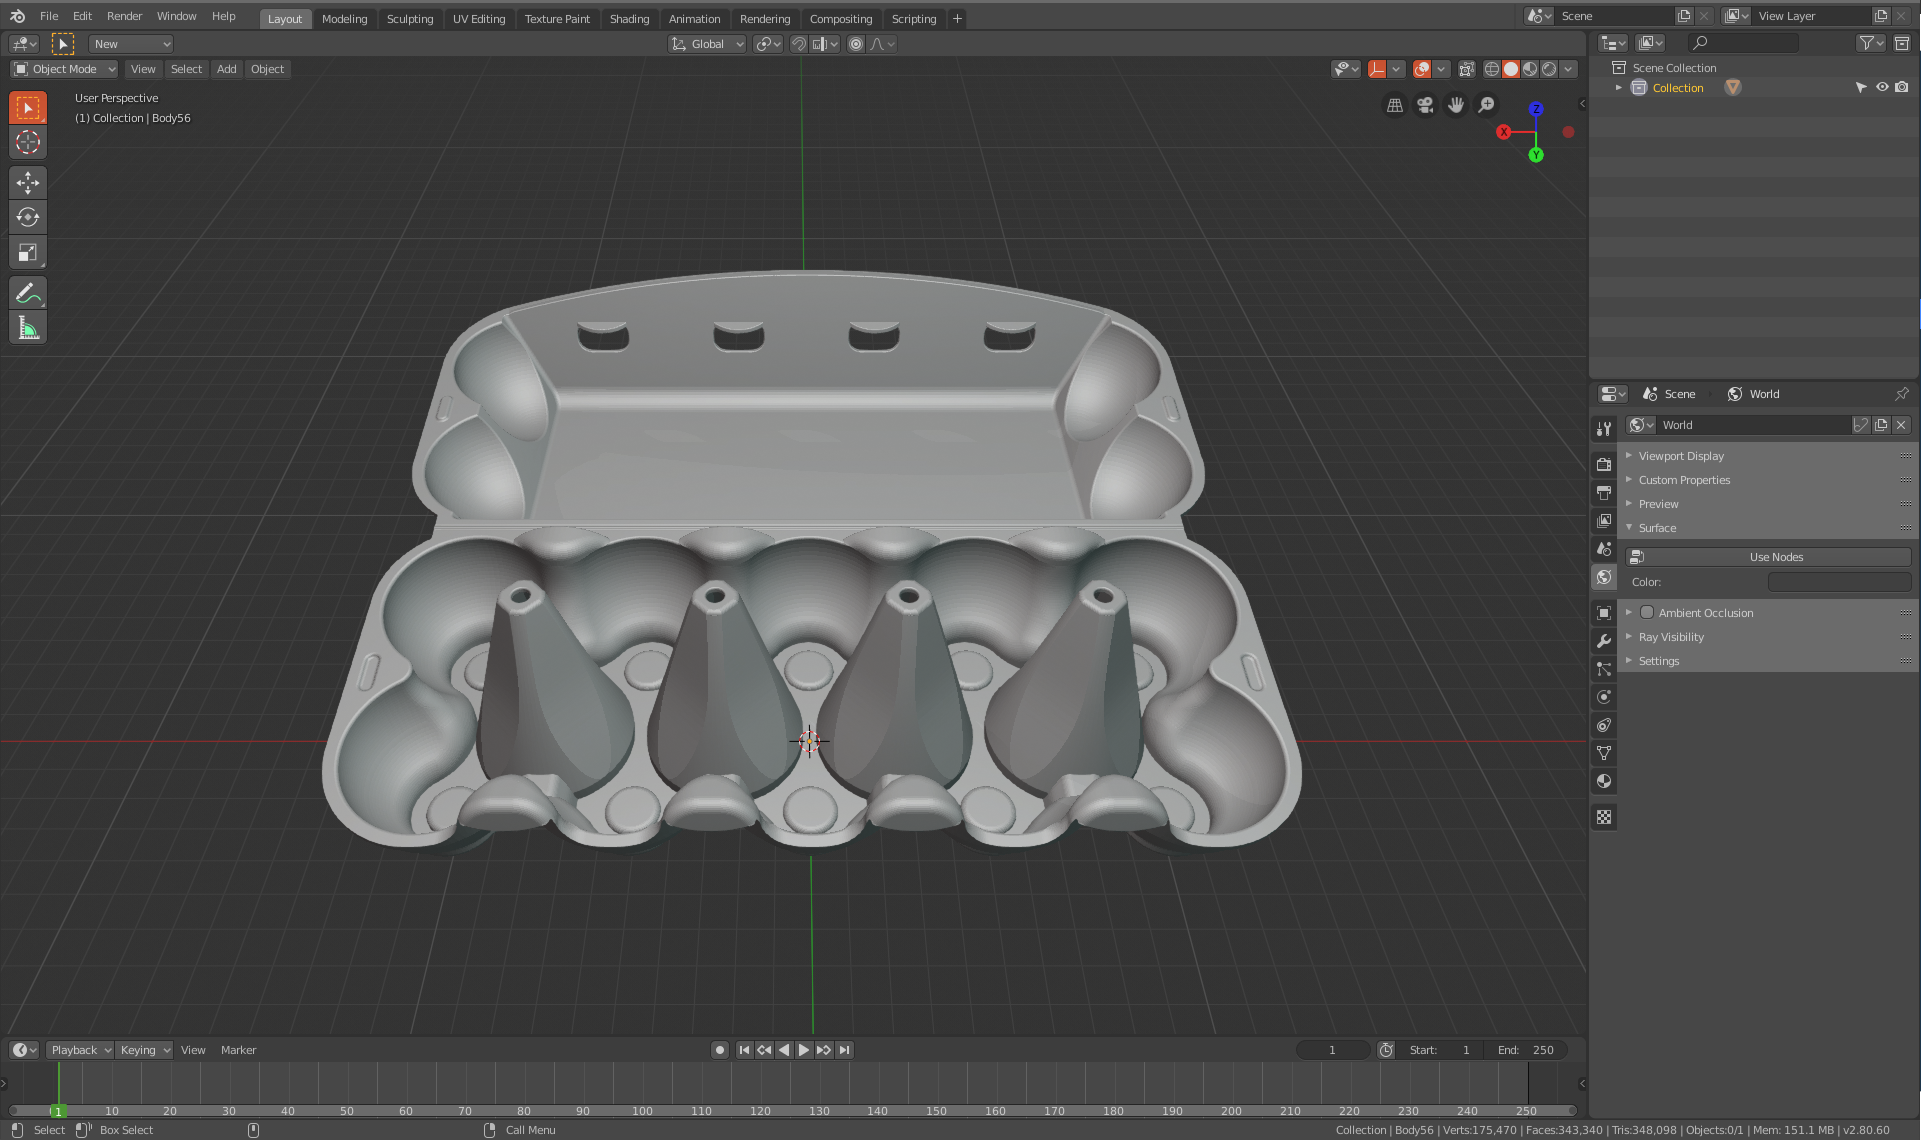
Final Project Renders


