Behind the Scenes: Loft NY
My name is Paco Barruguer and I’m from Burriana, a little city in the Spanish east coast, about 40 minutes from Valencia
I work in a ceramic tile company, in the marketing department making catalogues, brochures, advertisements, doing photo retouching and occasionally little 3D scenes about new products, and stands for fairs or showrooms.
I have been learning Blender for 2 years, but I love it. Since I discovered it I use it daily, although unfortunately more as a hobby than for work. I hope someday I will be able to dedicate myself 100% to 3D.
Inspiration
In the area where I live there are a lot of companies that use renders to show their ceramic tile finishes in catalogues. For that reason I decided to focus my work on architectural visualization, to be able to specialize and as I said before, maybe one day I will be able to make a living with the 3D.
Every day I visit the web looking for scenes that impact me to try to recreate them in 3D, always giving it a perso nal touch with the decoration, colours, structure, etc.
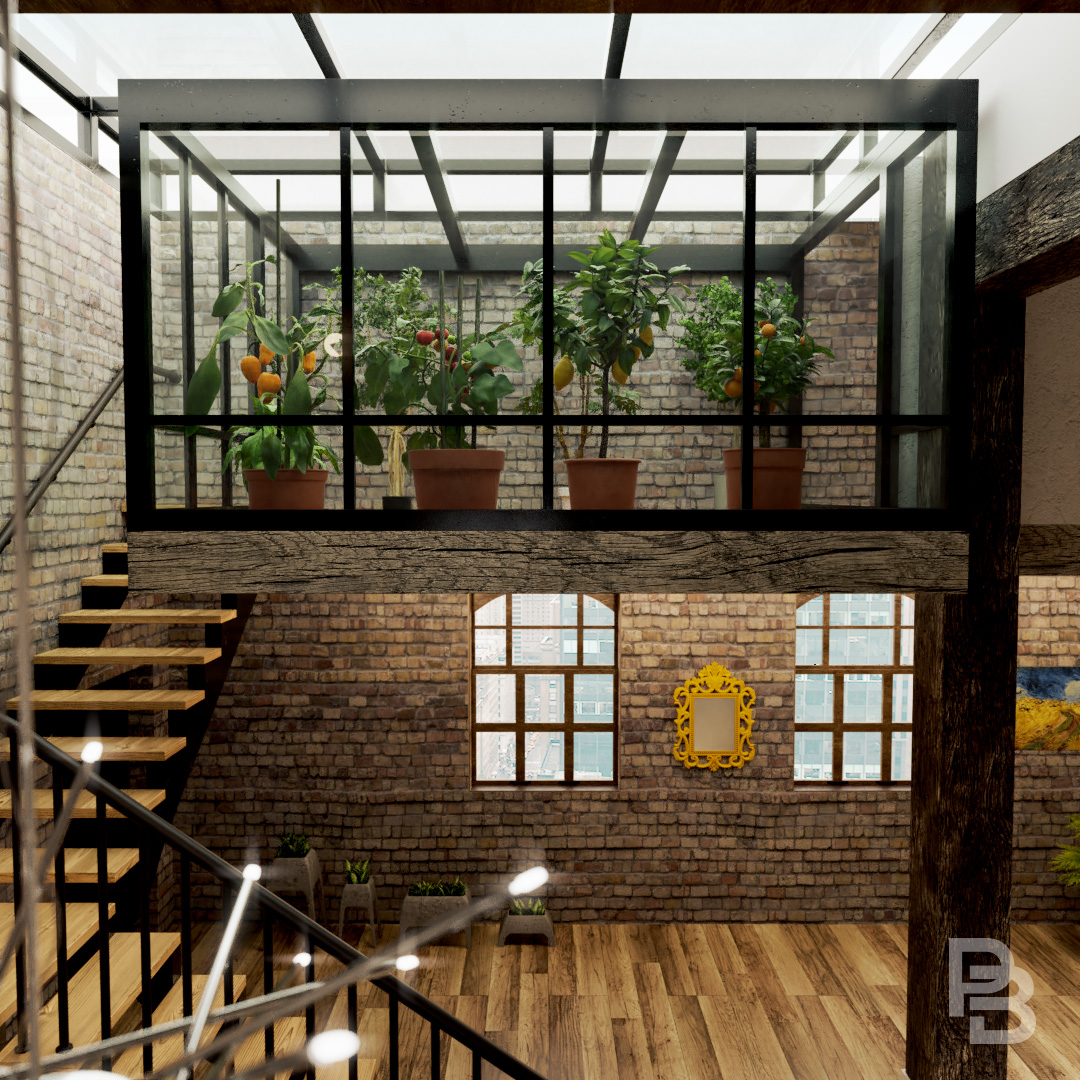
For this scene I focused on one loft in New York. These types of diaphanous scenes with industrial finishes always catch my attention.
That I made it an isometric view is thanks to another scene that I made some time ago. It was a modeling challenge proposed in the blendtuts community, where I learned to use Blender. I thought that this type of view with a realistic finish would be striking and at the same time very visual to see the structure of the room at a glance.


Process
The scene is made 100% in Blender + Cycles with postproduction in Photoshop. Some of the objects are from a library and others were made by me.
Modeling
Firstly the modeling. It is true that in static images and in architectural visualization, not very much care is taken to create good geometry for objects, but I learned to model doing hard surface and I have that acquired vice of modeling all objects with quads. Having well optimized objects slightly improves the scene and helps everything work better.
Texturing
I think that the most important process to obtain a good result in a scene like this is the texturing.
It is very important to work with quality textures and invest time in placing them properly. For example, the grain of the wood has to go in the right direction, otherwise the result is unnatural and not very credible.
I have a particular way of texturizing my models. Normally I don’t use the UV’s. It’s true that I use it in plants, street lines, pictures, lettering and these types of objects, but in all other objects, such as walls, windows, furniture (normally), metallic objects, etc., I use the image texture node in box mode, which is very important with the scale applied, and I apply the texture space manually.
In the object data tab, I deselect the “Auto texture space” and set the scale on all axes as equal. Normally I use the greatest value of the three.

With this setting the texture isn’t deformed and it will look very good. Next I control the size of it with the mapping node scale.

For the walls and the ceiling that are not seen, I need all the objects within the space to act as if the walls and ceiling were there, just without the camera seeing them.
The easiest way to do this is by deselecting the camera ray visibility in the cycles settings in the object tab.

Lighting and Environment
I try to simulate what real lighting would look like using careful illumination. I put the lights where I think they would be and I use the blackbody node to give them a real color temperature. It is also important to use a quality HDRI image for outdoor lighting.
Post Production
Another important point is post production. All good images need post production. At first I thought I had to be able to get good images directly from the rendering, but the truth is that the result improves a lot if good post-production is done, either in the scene composition in Blender or in other software. In my case I work with Photoshop because it is the photo retouching program that I dominate in and it is also very good.
I make a little composition with nodes in Blender to obtain the passes that I will use later, such as AO, Glare and Environment.

Hardware
Finally I will talk to you about my hardware. I have an i7-7700K at 4.2GHz with the Nvidia GeForce GTX 1080 Ti card and 16 Gb of RAM.
I chose this configuration because I like to see the viewer in render mode when I am modifying materials. I’m very meticulous about that and it drives me crazy that the viewer in render mode takes a lot of time to show the result of my nodes.
This computer allows me to work very comfortably and without slowing down. I prefer that if I go slowly the fault will be mine, not the PC’s.
Interior 3D models to download.