Behind the Scenes: Pirates Escape
Pirates Escape Project
The motivation came from the Skyship Challenge promoted by CGBOOST and I stuck to my first simple idea: I would compose a ship, a floating island, a dragon and tell a story with those three elements. “And after plundering the island there they go in an attempt to escape. Storms or dragons do not seem to intimidate them.” I had to tell myself to do not change my mind until I got that working. If I changed my mind I would run the risk of not finishing it in time, so the struggle had just begun!
I’m not familiar with ships at all, so first I found as many references as possible to start getting familiar with that and understanding what a sailing ship is. I did some research on artworks for inspiration from other artists also.
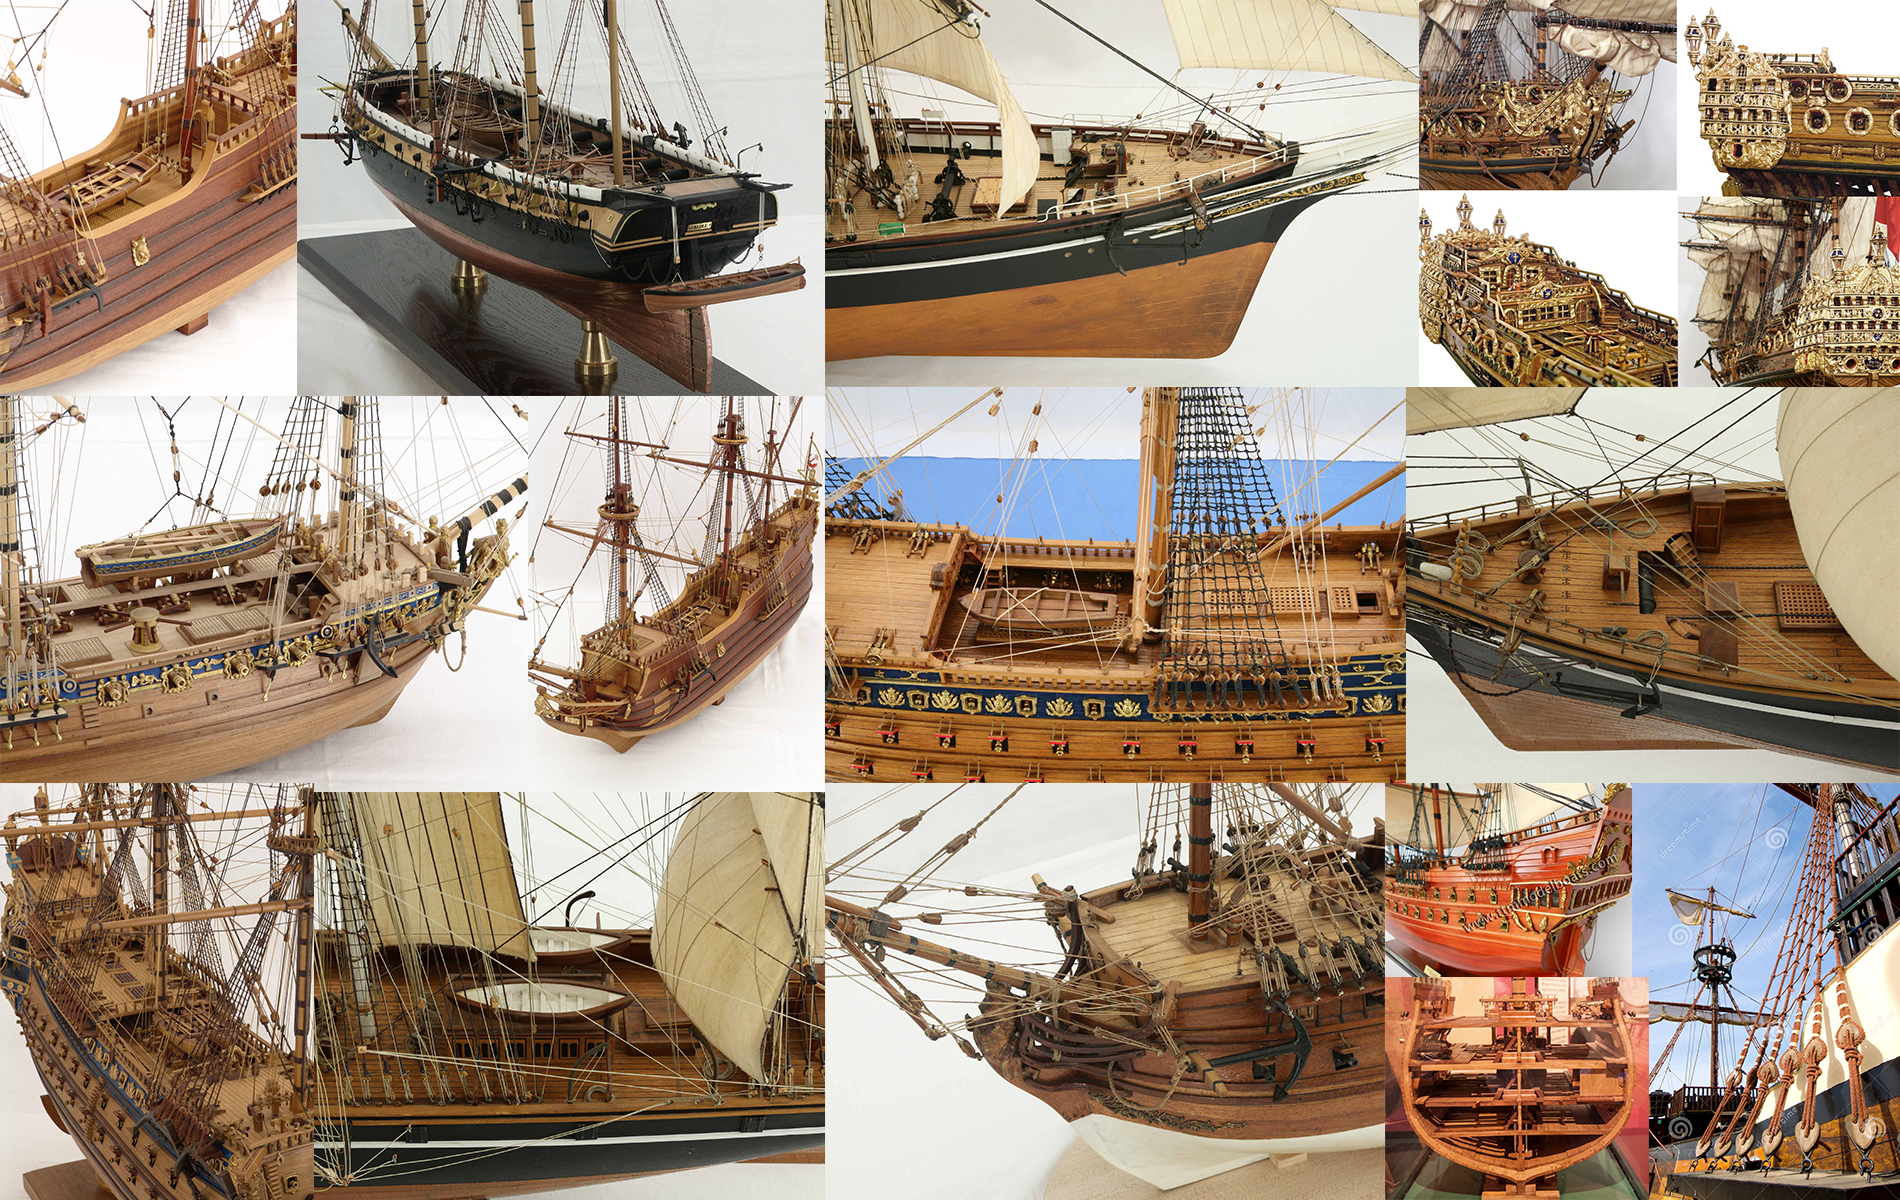
Some miniatures and real ships references.
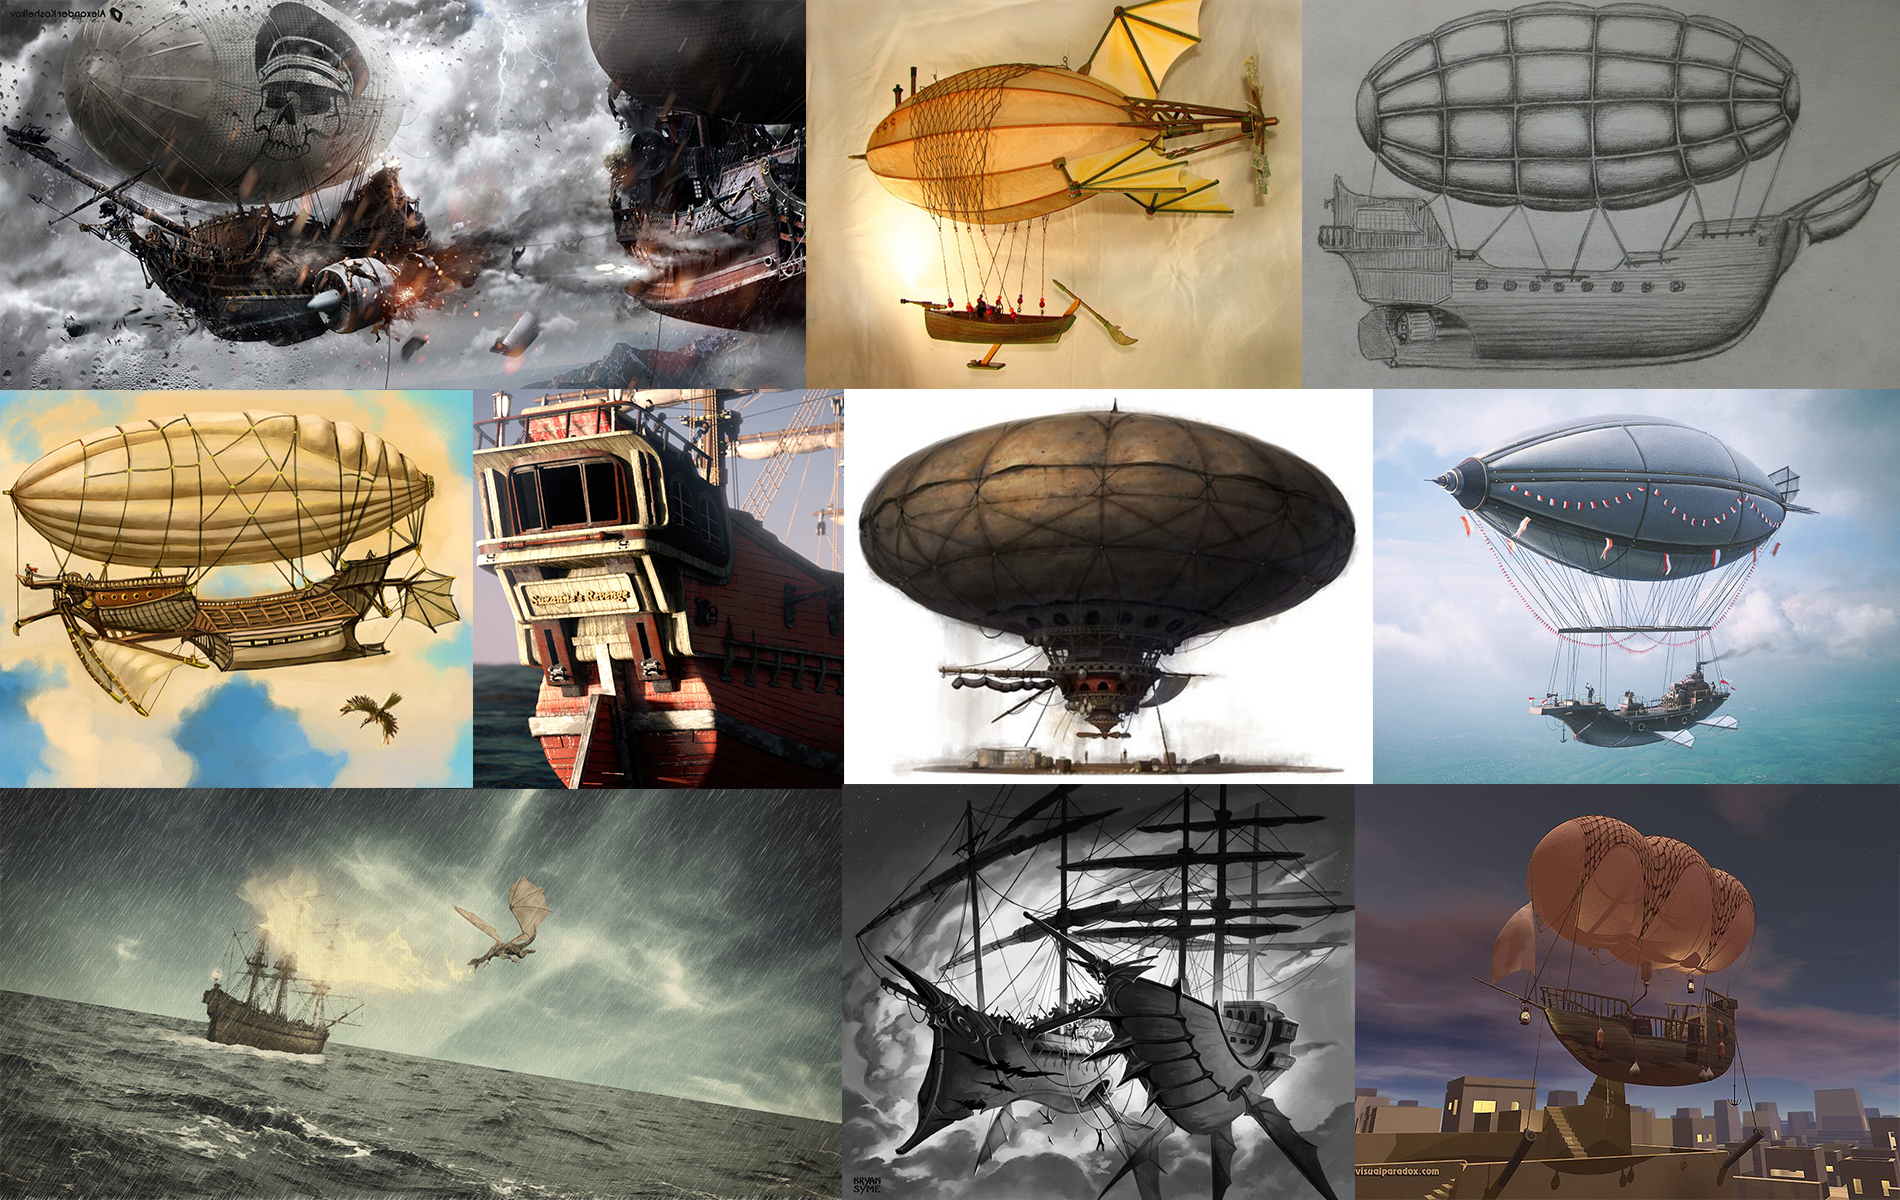
Some artworks for inspiration.
From the inspiration that I got from other artists I decided to implement some concepts in my ship but I never knew exactly how it would look in the end. Because of that I approached the modeling in a way that I allowed myself to regret some decisions and come back quickly to try something else. That means I tried a more non destructive approach to the modelling, not too concerned about the topology itself but aware of potential shading artifacts that this workflow could introduce and that I would have to work around these issues eventually.

A basic half model, mirror, bevels to add rounded corners and several booleans to subtract shape.
While gradually building the ship, I started the composition of the frame. I had clear in my mind that something epic, powerful, and dramatic could be done with these three elements. The quest for the perfect frame was where I deposited most of my energies because I knew how important it would be to the story telling.
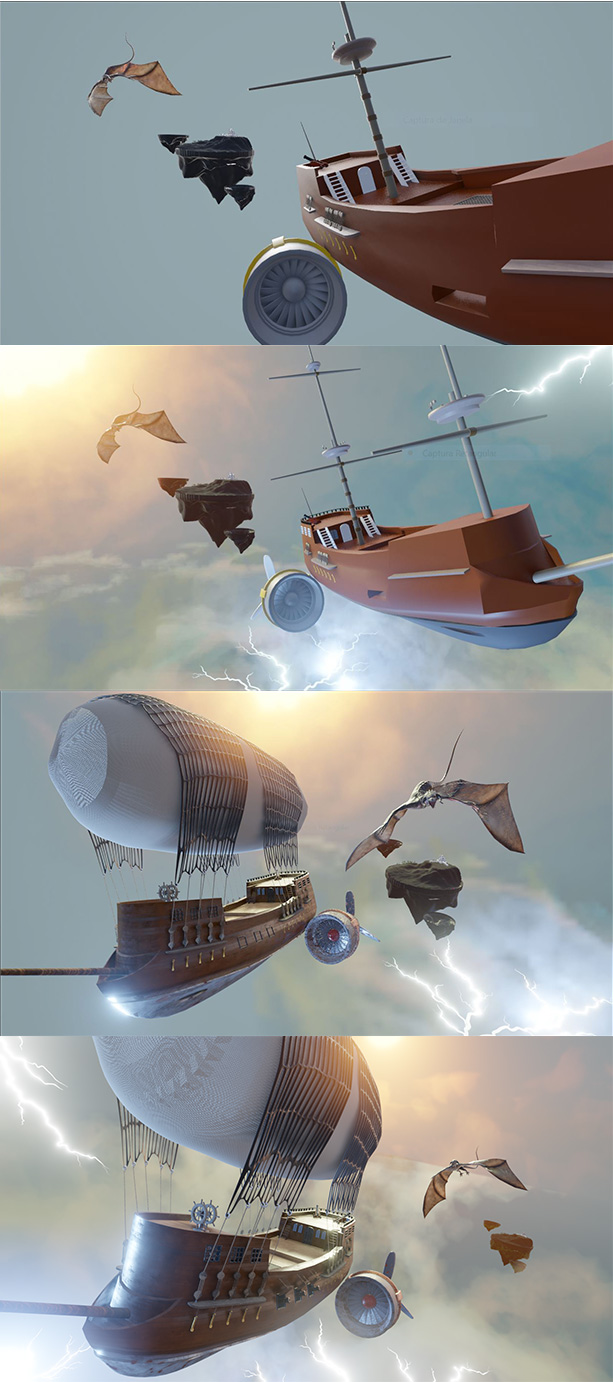
The progress of the composition frame.
Once I’ve identified the frame that had the energy I was looking for I locked it in and quickly jumped into other elements that would support my story and started polishing them and creating more elements.
Sky and Volumetrics
My World material is using the Is Camera Ray from the Light Path Node to split the influence of a Gradient Texture mimicking the sunset for the background and the built-in sunsex.exr texture to help illuminate the objects also.
And EEVEE, How could I not love you? Because of you, I’ve used volumetrics for creating procedural clouds just by using simple boxes as objects with a material and some Noise Texturing attached to the Volume Scatter node. If I had to do this using Cycles I probably… Oh, I don’t need to think about that anymore.

Real-time volumetric cloud done easily on EEVEE. How cool is that?
Image Planes for Adding Quick Effects: Thunder, Explosions, Fire, and Sparks.
Well, when you have a time frame and a lot of work ahead you can’t think too much and have to choose the quickest and most effective technique. My project didn’t require that I simulate any of those effects and spend time on that, so I browsed images I could use to accomplish these effects and imported them using the Image as Planes add-on to save some time in configuring its original aspect ratio.

What is even nicer is that for lightning effects we don’t even need an alpha channel and it will work nicely using JPEGs. You just need to switch the Blend Mode do Additive in the Settings tab and an Emission shader to bump up the light effect.
BlenderKit Add-on for Materials as a Starting Point Shading Process
Since we do not have an official asset manager for Blender yet, this add-on increased my productivity a lot because I was able to choose directly from a fresh online library without the need to leave Blender’s screen. A great experience indeed! Once I had found a suitable material, I could open the Shader Node Editor and tweak the material to fit my needs. I changed colors, normal intensity, and so on. I love working like that in Blender because it keeps the flow of the creative process going.
Side note: I’ve heard that Greg Zaal is thinking of building something on those terms and if he joins Blender’s developers to build something official and consistent in that respect it would be glorious for the community.

BlenderKit addon sped up my creative process in this project.
Final thoughts + Composition tip
I have a theory that the less effort your brain takes to process the image, the more chance the image has of being successful. I believe you have less than one second to get the attention of your audience when they first look at it, and once you’ve got it, their brain will involuntary process the image. That is the point when, if people have to make some kind of voluntary effort to understand what is going on, you have already lost them. They will skip to the next image. We have never been so immediatist in this globalized digital world, right?
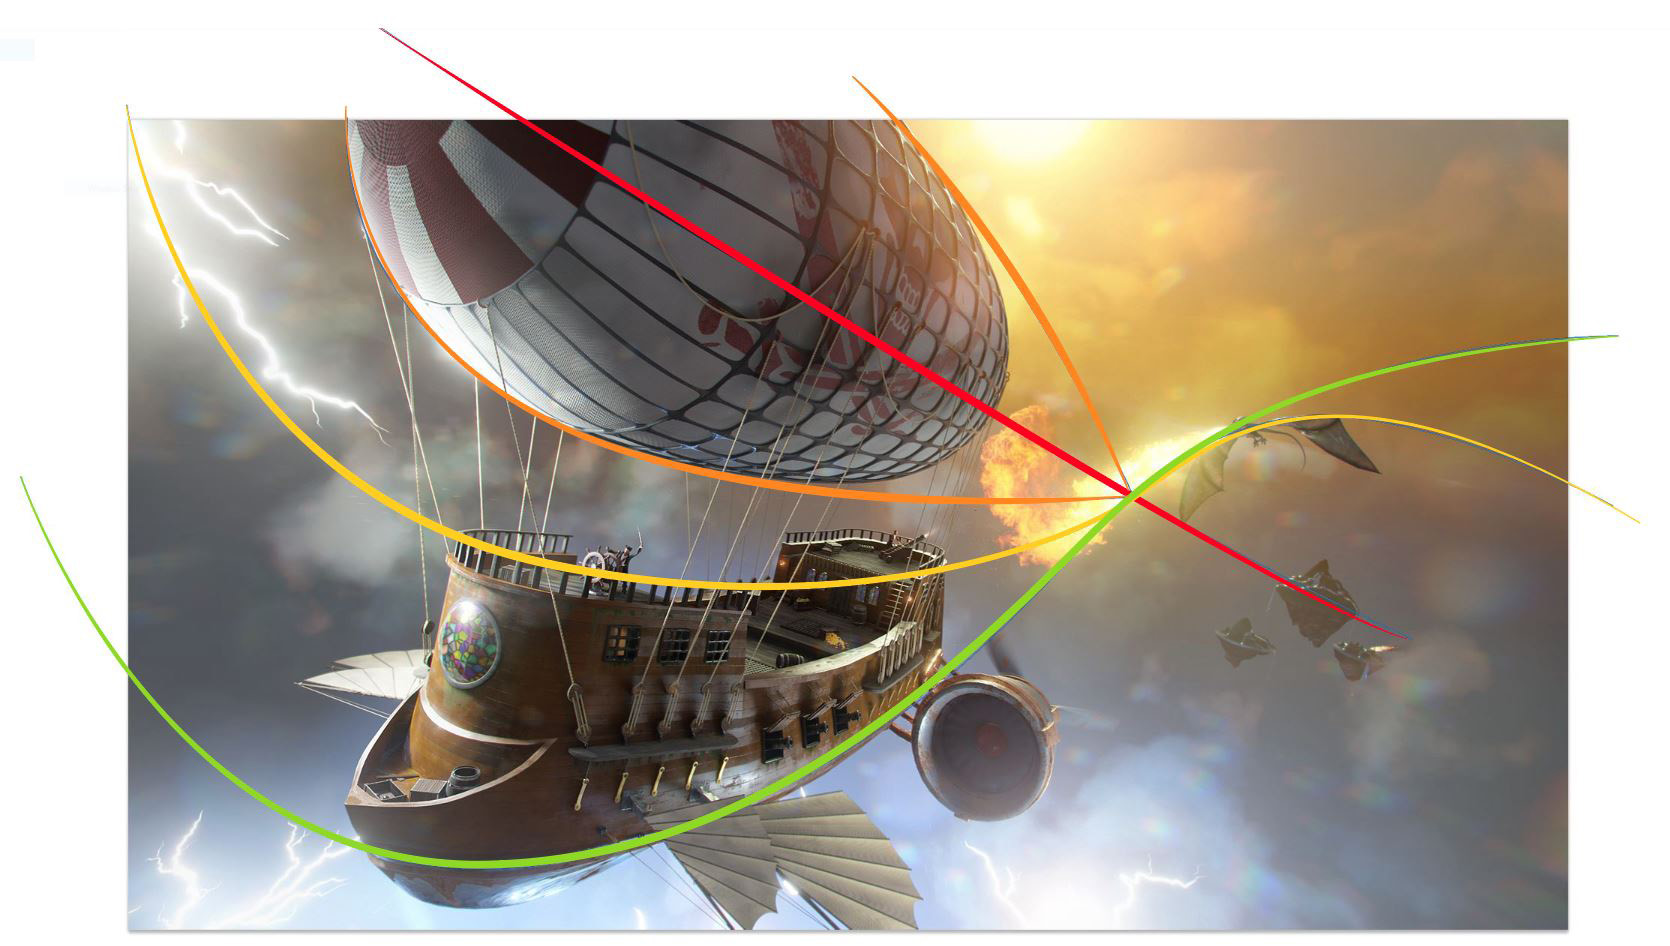
How my composition is guiding your eyes and helping the storytelling.
As the composition was the key aspect for me, I figured out a way to tweak the camera for better compositions. After roughly positioning the camera by pressing CTRL + ALT + 0 you can set and use the 3D cursor as the pivot of your rotations to keep the desired part of your scene in place:

Setting and using the 3D cursor as the pivot for better camera compositing.
That is basically it, guys. I almost forgot to mention it, but if you hadn’t noticed the dragon is Scales from Sintel (2010). The model was available on Blendswap and helped me to tell this story. Thanks, Abby and Bart for the opportunity and see you next time.