Behind the Scenes: White Bathroom
Background
I started using Blender at the end of 2013 and soon after I got hooked on arch-viz. It was probably thanks to the Architecture Academy (that I ironically could not afford) course that was advertised on Blender Guru’s YouTube channel. I was constantly browsing for tutorials back then. At that time it felt almost impossible to create something so realistic and yet, I decided to give it a try after getting a half decent computer in summer 2014. My first attempts were—as expected—nothing short of terrible, but with each failure, I learned something new. As for now, I’m doing freelance jobs that range from product to architectural visualizations. You can check out my ArtStation to see more.
Inspiration
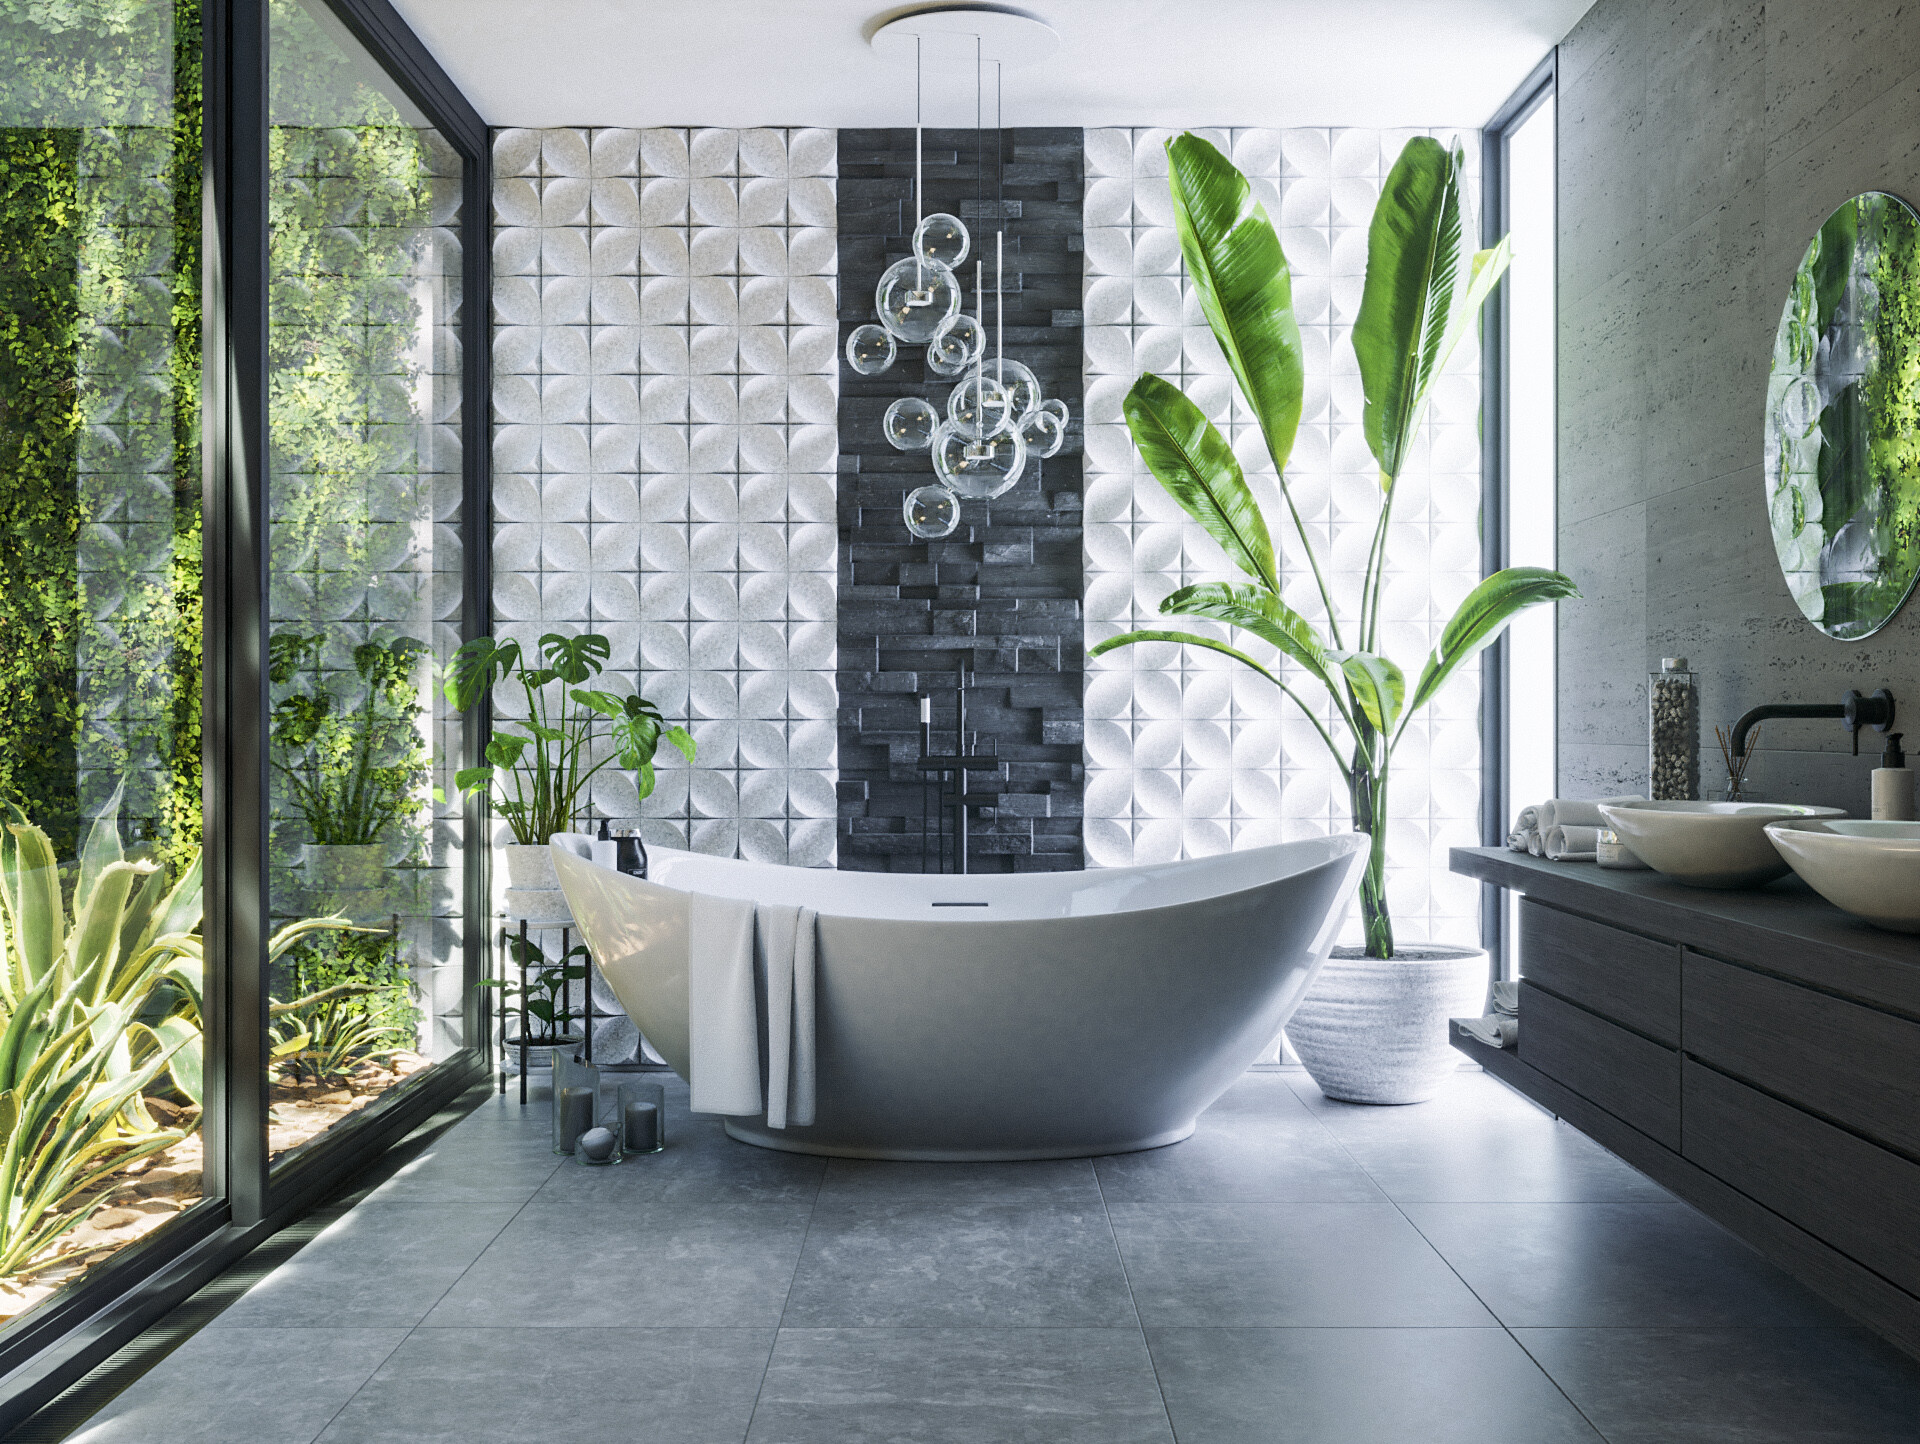
When I was looking for a new job, I noticed that my portfolio lacked bathrooms, which could give me some extra points when presenting my works. I knew I wanted to do a more or less symmetrical composition with a bathtub in the centre and found a nice idea for a window that, despite its size, would give a sense of privacy. Here you can see the work that inspired what’s behind my window (credit to SETLA Studio).
Strangely, this image is basically all my inspiration for this project. The rest of the ideas just randomly popped into my head when I was putting plants and towels around the room.
Tools and Hardware
- Blender 2.8, Cycles, Lightroom, Marvelous Designer, Substance Designer, Poliigon, Megascans
- Intel Core i5 8400, 8GB RAM, GTX 1070
Modelling
This was probably the easiest part. The room is a rectangle divided by a window with a small extruded part on the right. I added it because there was not enough light coming from the top so I decided to light the scene additionally using an area lamp—which is a terrible and incorrect way of doing it—and it worked pretty well. I only gave the lamp a sky-ish color using the blackbody node.

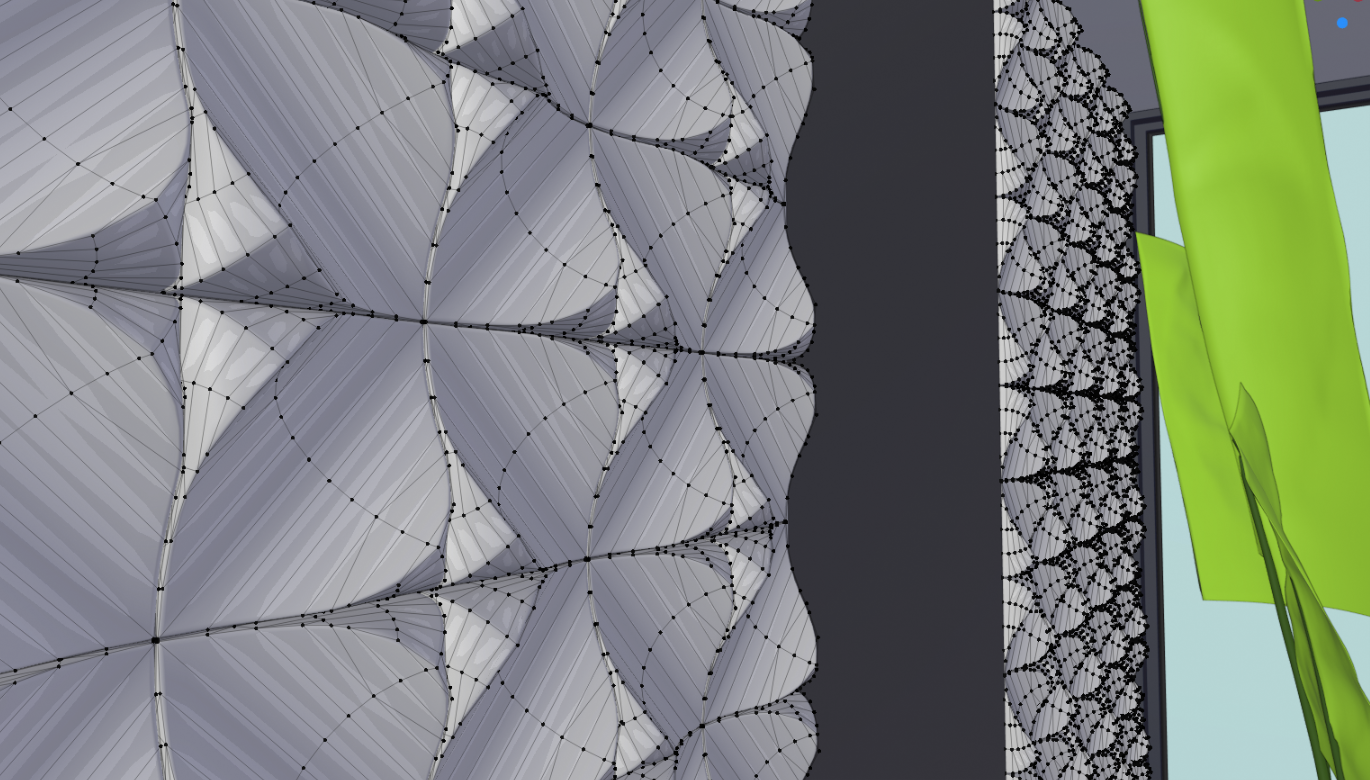
For the back tiles, I used a 3D model I found on the internet and gave it a concrete texture. The topology was quite terrible, though, so I had to retopologize it in order to be able to apply bevel and subdivision modifiers.
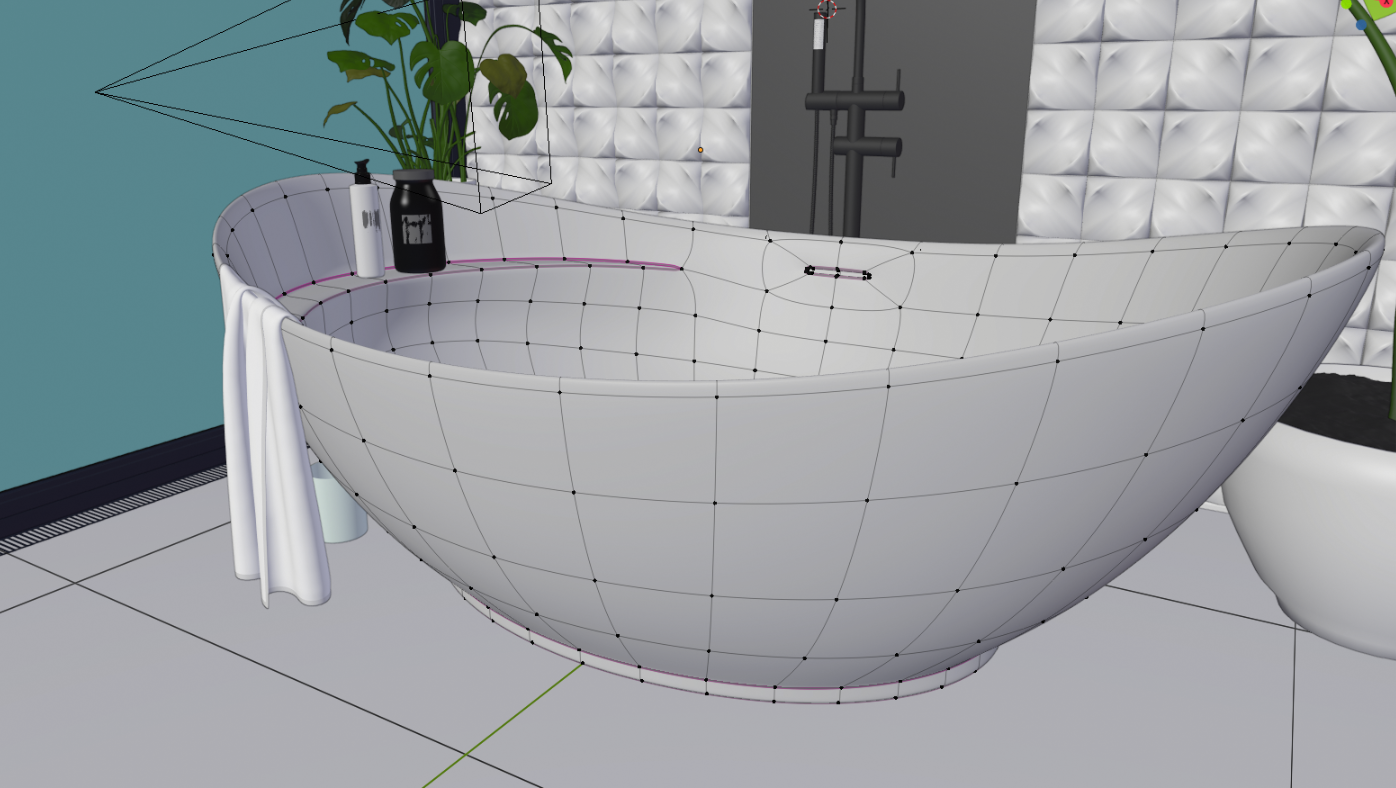
After the room was done, it was time to add the focal element, which in my case is the bathtub. I found a really nice model online but I am too stingy to spend money on something that can be modelled in 10 minutes and look just the same. It’s essentially a UV sphere with its top cut off. I pulled left and right ends of it up slightly and flattened it on the perpendicular axis to give it a more oval shape. There was also a little shelf in it that can be used to put some lotions and soaps on. I made it by extruding a part of the tub and then merging bottom vertices with their original position. I also wanted to make sure that subsurf wouldn’t ruin the edge of my shelf, so I adjusted the crease.
But there has to be something on the ceiling as well. So just like with the tub, I found a great model online, but it also had a price tag that is unacceptable with things so simple. I added some UV spheres, gave them a few millimetres of thickness, three cylinders to hang those balls on and boom, we have a chandelier for exactly $0.00 plus 10 minutes of work.
On the right, I put a little cabinet that is nothing other than some cubes with extra steps. I downloaded the sinks and faucets (the one for the bathtub as well) from 3DSky because unlike the tub, they were free, so why would I waste time modelling them? Same goes for all the skincare accessories—the only challenge was to make decent Cycles shaders for them.
When I was working on this project, I also wanted to try Marvelous Designer so I used it for my towels. Initially, I was going to use the ol’ reliable cloth sim, but for some reason, it stopped working properly and turned towels into crumpled newspapers whenever I turned self-collision on. Thus, Marvelous Designer was the only choice here.

Finally, the plants. None of them were made by me—I don’t like doing them, it takes a lot of time and the result will be poor if you are not using things like GrowFX or Speedtree. Thus, I used some models I downloaded for free from various sources. I know for sure that the big banana plant is from Jakub Cech. The small plant below monstera (or swiss cheese plant because of its leaves with holes) and the one behind the window are free samples from Maxtree. I’m a bit of a model hoarder so sometimes it’s a bit hard to keep track of all the sources. Of course, none of them was made for Blender, so just like with other models here, I made shaders myself using the textures they came with.
Shaders
Every time I’m working on a project, I do shading and modelling at the same time for each model in order to have properly set up materials once I’m done with modelling and to have a better understanding of how something looks when properly shaded.
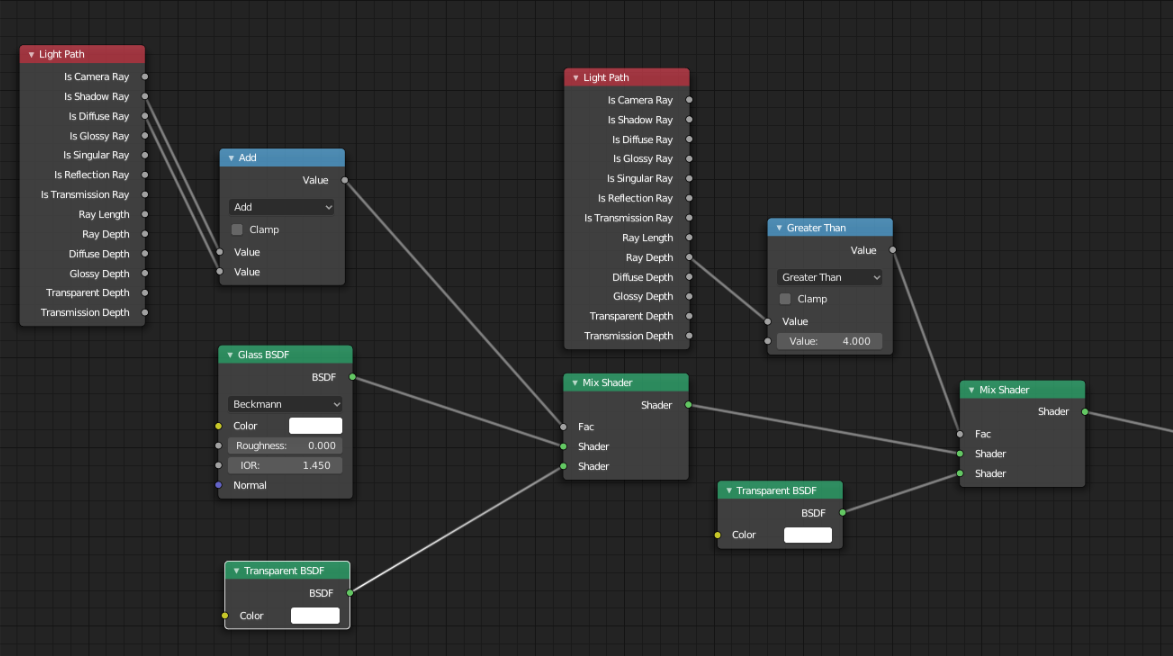
I mostly used materials from Poliigon with the exception of the exterior ivy and the banana leaves (that are not mine anyway), as these were from Megascans. Bathtub and sinks are simple principled BSDF with very low roughness, and to simulate glass I used a glass shader with a light path node that mixes it with transparent shader in order to make them invisible for shadows and diffuse light (no pain with caustics). Also, in order to avoid clipping glass to black when there’s more refraction without increasing light bounces, I used a little trick of swapping the shader to transparent whenever a ray bounces more than 4 times.
Originally, the entire back wall was supposed to consist of those white dune tiles exclusively, but I noticed that they were making my chandelier glass invisible due to a lack of contrast. I decided to add some black stone in the centre. Not only did it help with the visibility of my glass balls, but it also added some nice contrast to the middle of the image which helps to draw attention to it. This part is a subdivided plane with a texture from Poliigon and microdisplacement.
The setup of my plants depended on the texture availability. When there are only color and normal maps, I set roughness to something between 0.35 and 0.6 and add translucency by shifting the hue of diffuse texture and giving it half the brightness to respect the energy conservation law. If there is a translucency map, I only halve its value.
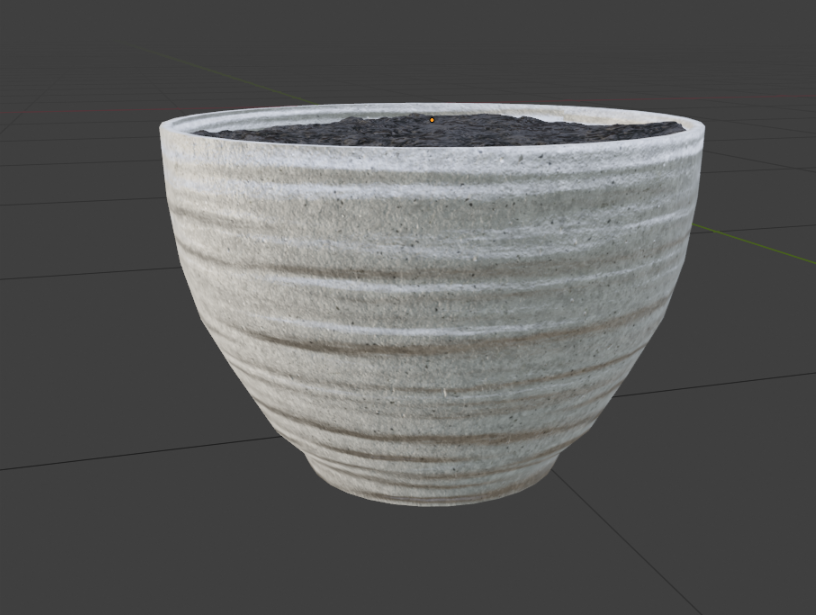
For the banana plant pot, I made a custom material in Substance Designer. I also used microdisplacement here because I wanted to give it a more organic look. The soil here is a texture from Texturehaven.
After rendering some previews, I noticed that the window on the left was throwing my exposure off and I couldn’t see what was behind it. To fix it, I used an image plane with transparency. The image was a tree that covered the area (I used an HDRI for lighting) and that fixed the problem.
Rendering
For the main image, I set sampling to 4000 to ensure there was almost no noticeable noise. For other settings, I didn’t touch anything because it looked good enough already. I only set transparency to 10 bounces and transmission to 12 because I wanted the glass to pass more light through without getting dark.
I exported my images in EXR format and post processed them, using Corona Image Editor. There, I extracted details from highlights and tweaked the contrast a bit. I also think Corona Editor has much better glare and bloom compared to Blender’s compositor, and I added those as well. Finally, the png went to Lightroom where I played with some presets, increased clarity, adjusted exposure where needed, and, most importantly, added some film grain which is probably one of the most important ingredients when you want an image to look like a photo.
Final Render