Hair Production for Game Characters at CGMA
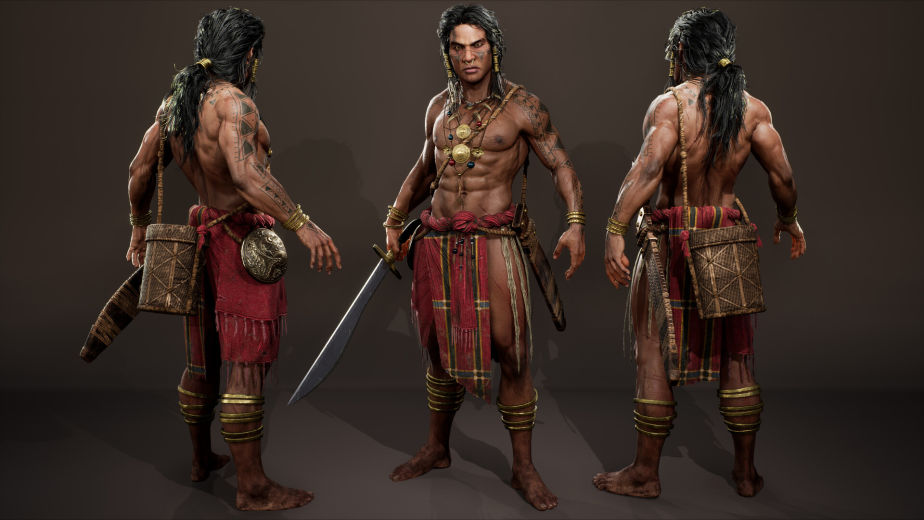
Dominique Gagné took the CGMA class Hair Creation for Games and did a breakdown of the character created during it with the help of ZBrush, Maya, XGen, and Marvelous Designer.
Introduction
Hi, my name is Dominique Gagné, I am from Montréal, and I am a 3D character artist at Behaviour Interactive. I have been working on the game Deathgarden for 1 year and a half. Since we are a small team, I am in charge of the whole process of character creation: modeling high-res/low-res, UVs, texturing, and bringing it inside the engine. Before Behaviour, I graduated from Bois-de-Boulogne college in 2016 and worked in the VFX industry for 2 years, at Digital Dimension. My favorite part of the character creation process is hair. I think this part gives a character a lot of personality and it’s a long and hard process, so when it’s well done, there is a lot of proud to get.
tarting the Class
The company I work for was nice enough to pay me the Hair Creation for Games masterclass with Johan Lithvall at CGMA in February 2019. Since concepting a character is not my main strength, I decided to find a good concept where hair would be appealing and challenging. This is why I used Bryan Sola’s concept. His character had a nice pose, I knew he could tell a story and it was perfect for the hair modeling class.

Speaking of the hair asset, I wanted to create, first of all, long hair, so I could work on the chunk placement, and such a haircut that would give nice specular reflections. It was really challenging and time-consuming, but in the end, the result was nice and I was really proud of it. After my course, I took a little break, then decided to finish the project a couple of months later.
My reference sheet had a lot of examples of face, hair anatomy, loot bags, weapons, and Filipino art crafts. With the final result, my goal was to create a nice portfolio piece where I could improve my presentation skills including the lighting and posing of the character.

Modeling Body & Accessories
In production, I like to use a basemesh to speed up my workflow. This is why I used Human Zbuilder v2 to get the main human proportions. The amount of variation you can give to your character is very nice due to all the layers of the tool. Then, I like to adjust the position of the arms and chest, work on the proportions. To do that, I use the translate tool in ZBrush. For the proportions, I start to sculpt in low resolution, then I increase the subDiv Level gradually when I am satisfied. When I like the sculpt, I add skin pore using the alphas of TexturingXYZ. I use the standard brush with different alpha depending on the body area. I will then add some details with the DamStandard to create skin folds and skin stretch details. To add scars, I will use the ClayBuildup to roughly create the shape, then the DamStandard to create the stretch of the skin.
To model the accessories, I like to either start in Maya or in ZBrush. For example, the blade and its holster were created at first in Maya, then imported in ZBrush. I polygroup where I want the crease, then use ‘’Crease by PG’’. I subDiv my mesh a couple of times, then add details to create the high res. The loot bag was completely modeled in Maya. I placed all the pieces of it manually. It was really time-consuming but the result was nice!
Creating Hair
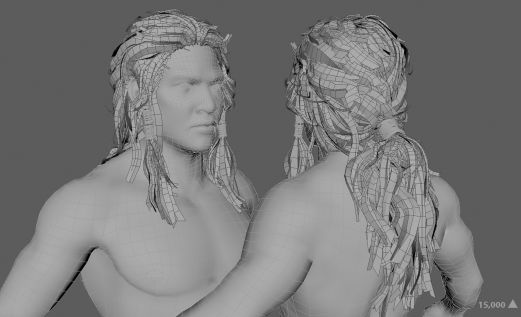
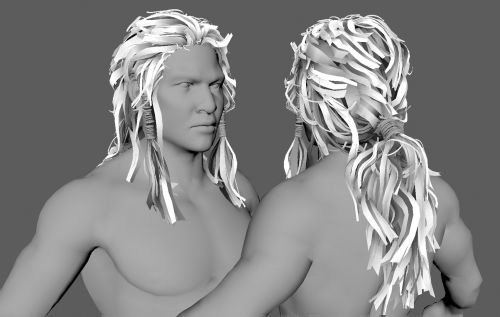
The workflow was divided into two parts: texture and chunks creation, then placement of the hair. First, I created a texture sheet with XGen, xNormal, and Photoshop. The main thing to make quality textures that I learned is to create negative space inside the hair chunks. This way, you can create space to let the hair pass through.
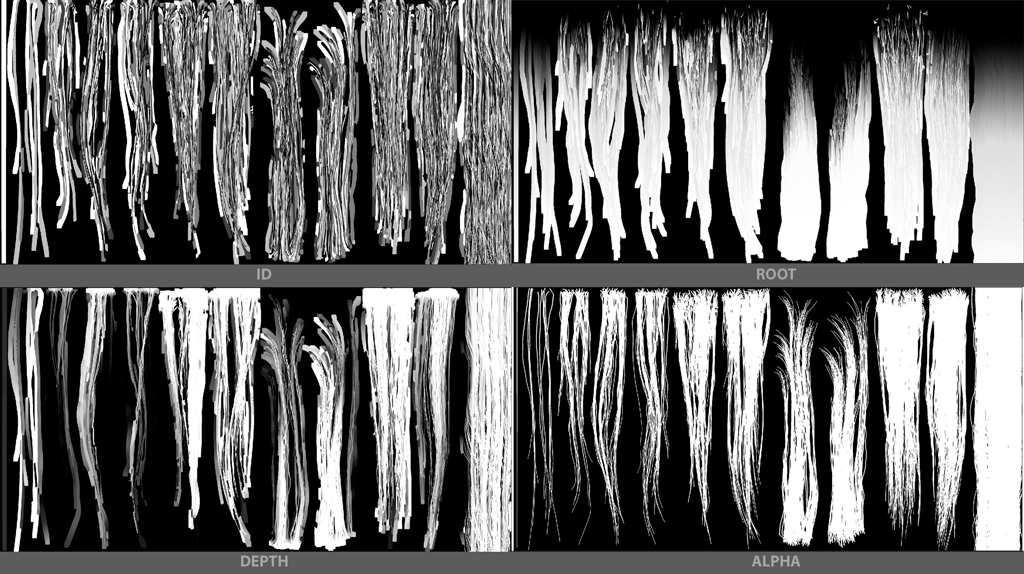
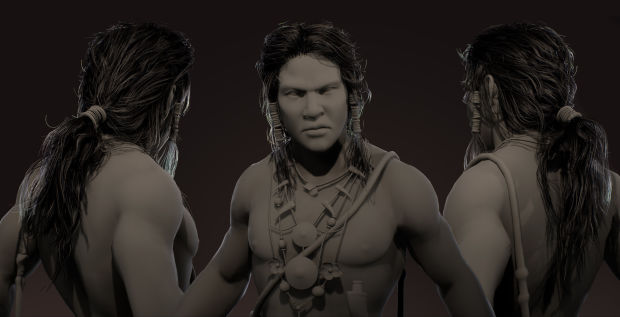
When the textures are done, I create hair chunks. I take 3 planes with different textures I just created and make them interpenetrate together using the negative space I just made. Then, it’s just a matter of placing manually every chunk. To place them, I use different deformers in Maya: Bend, Twist, Flare and Lattice. The placement of all the hair chunks is a very long process, but if the result is nice, it pays out fully.
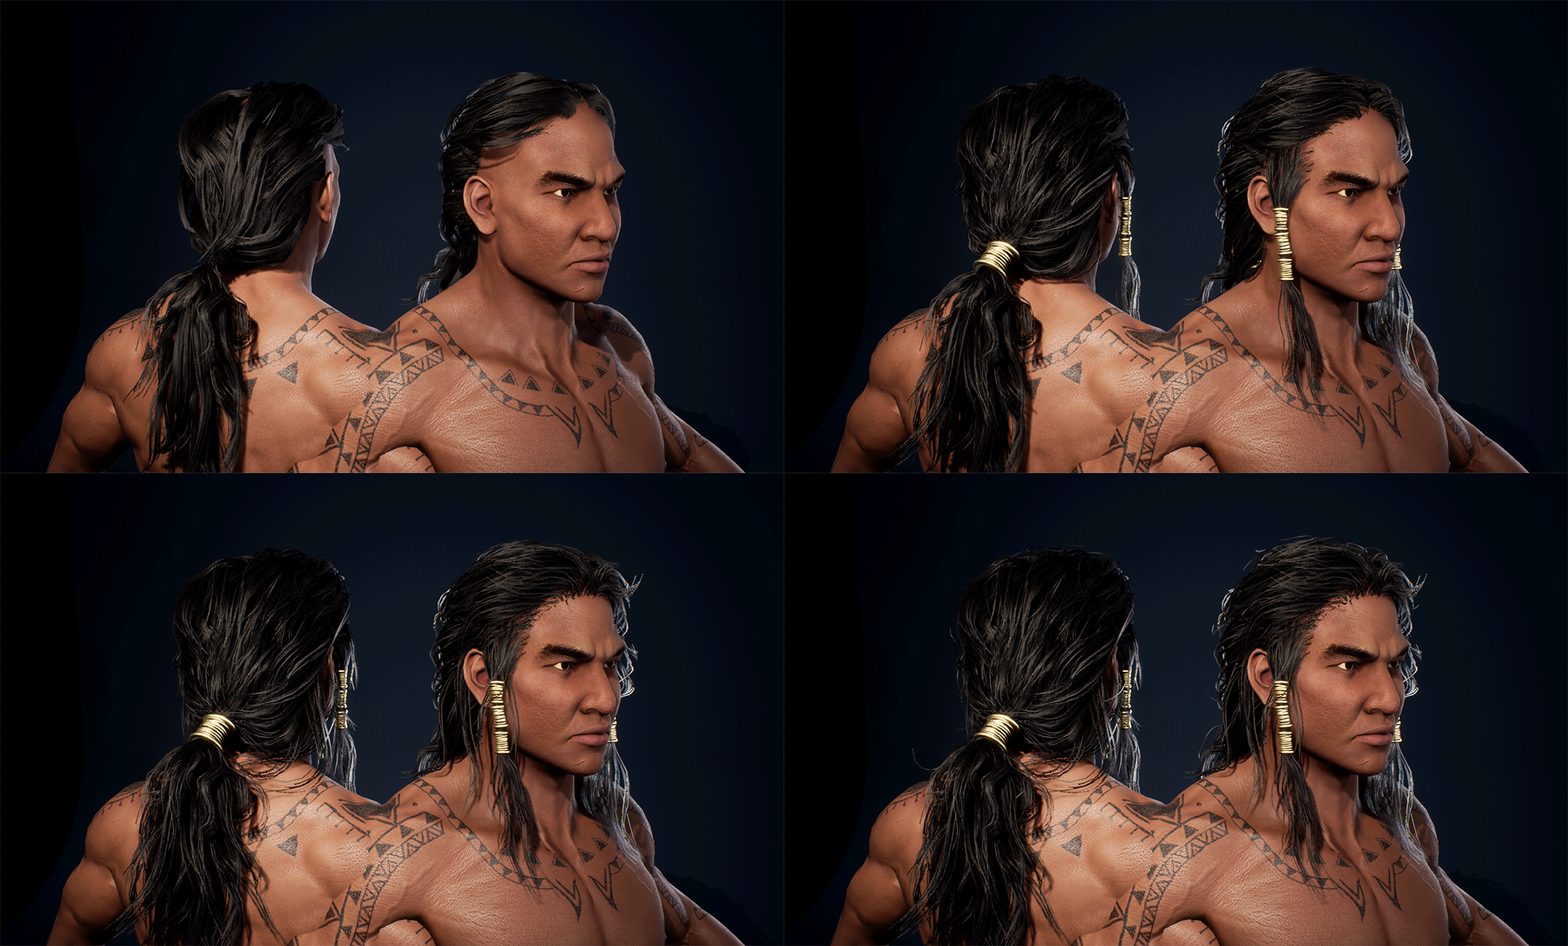
To place the hair, I learned to divide it into 4 steps: a base layer, 2nd layer, 3rd layer, and flyaways. The base layer will be only to cover the head. Also, I like to start the placement of it really far from the hairline. This way, later, I can add single hairs to the hairline to make it more realistic. The 2nd layer is the most important: I create most of the hair flow. I try to create negative space in the hair, areas where it can catch shadows, and variation in the specularity. I will use less dense hair texture during this step. The 3rd layer is also important. Here, I will break the lighting of the hair and the silhouette even more. I will cover the hairline and give weight to the hair. The last step is to add flyaways – subtle details that will give realism to the hair.
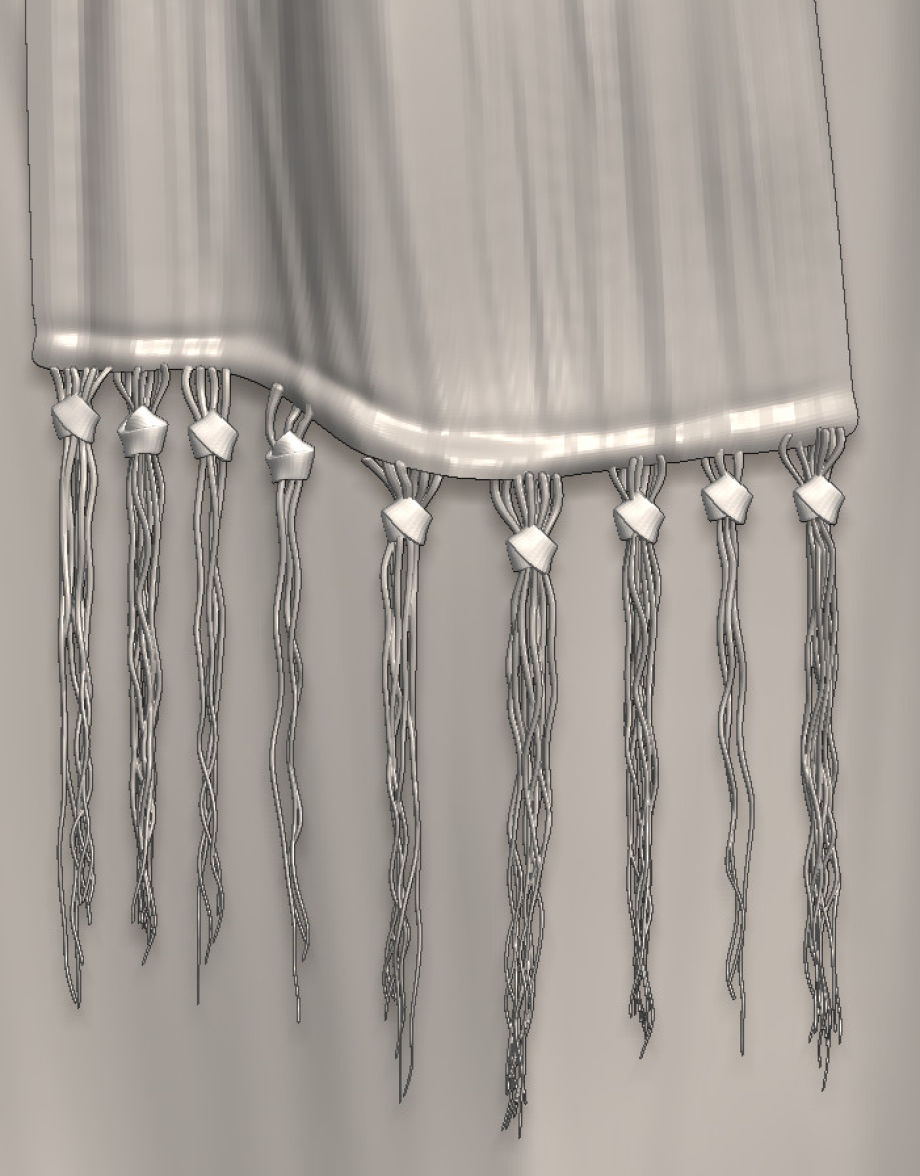
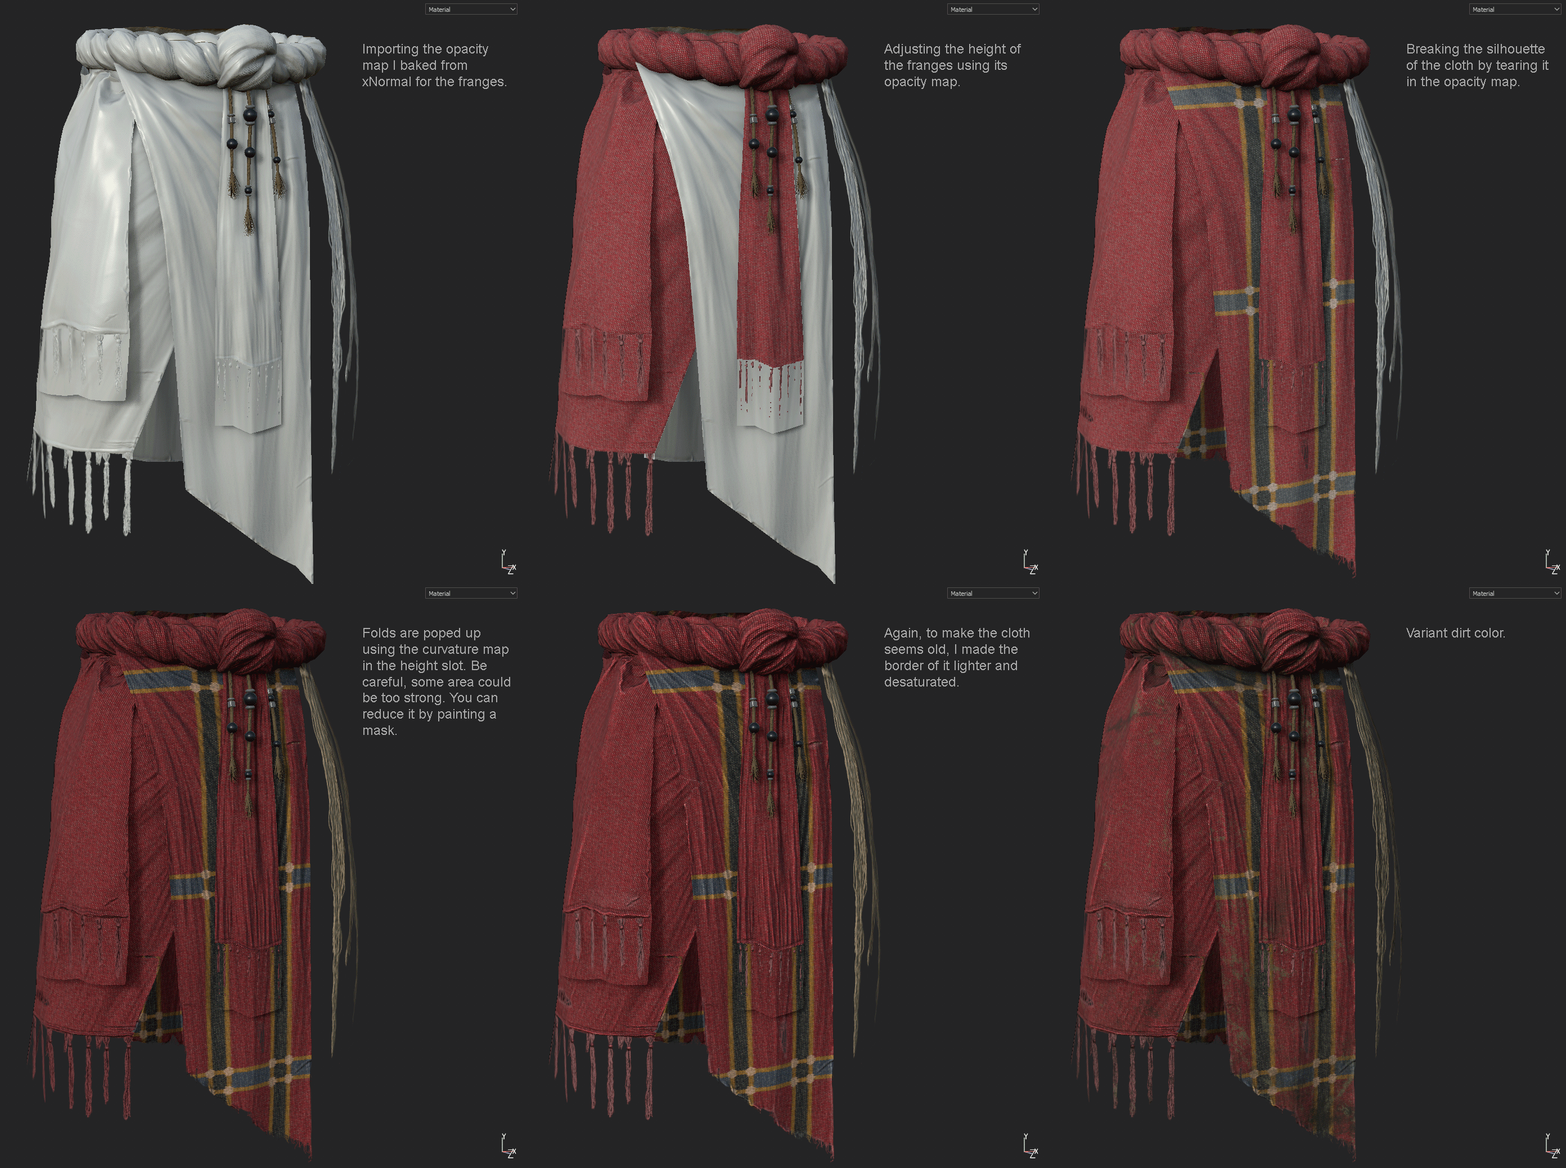
or the details at the end of the cloth, I use XGen in Maya to generate hair which I converted into tubes. I manually placed the knot that I created in Maya for each strand. It was a long process, but the result was great. Then, I used the high poly to generate a normal map, an opacity map, and an ID map in xNormal.
Finally, the necklace was pure modeling in Maya and ZBrush. In Maya, to create the laces, I used curves that I drew on top of the character, then I converted them into tubes with the ‘’Curve to Tube Mesh’’ (you can find it in Maya Bonus tools).
UVs
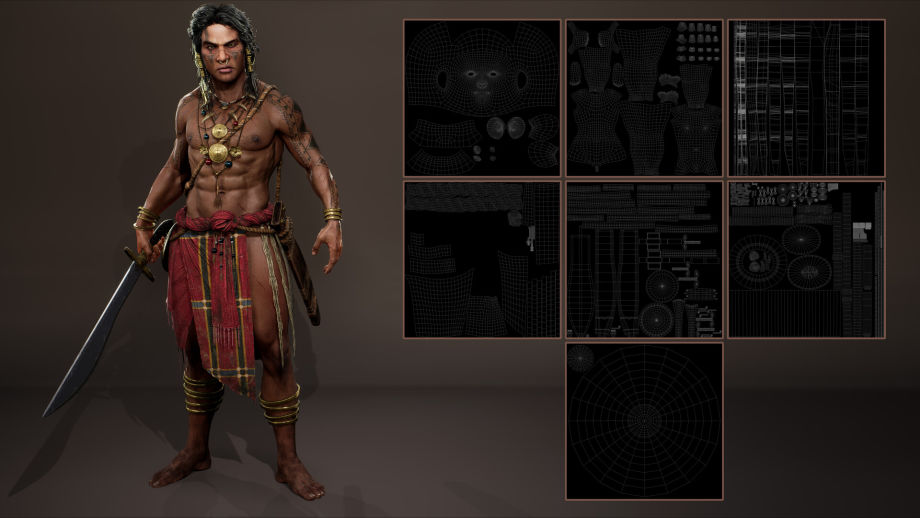
I am one of those people who like to unwrap the UVs. My process is to unwrap everything, not paying attention to the pixel ratio. Then, I group the meshes by materials the best I can. As a result, I have a UV set of metal, cloth, and accessories. Then, I layout my UVs. The most important thing here is to have the same texel density. If not, some parts will have less resolution than the others. It’s important to name the meshes correctly for the matter of baking. I want my low res to be named exactly the same way as my high res, except the suffix (‘’_low’’ and ‘’_high’’). This way, I can easily bake my high res on my low res in Substance Painter using the option ‘’Match by mesh name’’.
Texturing Skin & Cloth in Substance Painter

Presentation
The presentation was something I wanted to improve in this project. My workflow was mainly the following:
- a 3-point light for the character
- rim lights to make the character pop
- a light behind the hands of the characters to make the SSS appear
- lights around the metal pieces to create reflection lights
I have a total of 28 lights. It’s a lot, but since it was for a presentation purpose, I didn’t really mind.
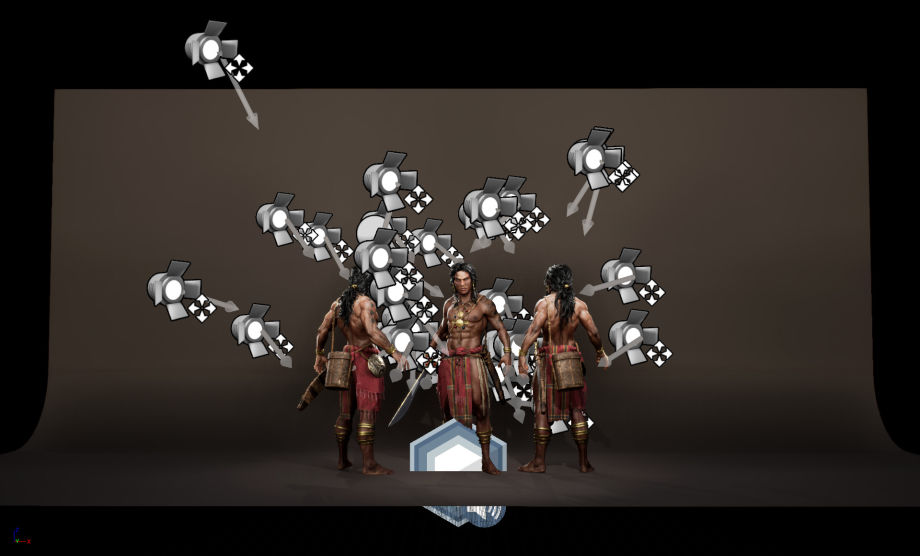
Then, I added a SphereReflectionCapture with the cubemap ‘Panorama’ from Substance Painter. The PostProcessVolume has some settings activated such as Bloom, Exposure, Chromatic Aberration, and Ambient Occlusion.

Dominique Gagné, 3D Character Artist at Behaviour Interactive
Interview conducted by Arti Sergeev
